# Manage Tours & Forms
URL: https://whitepenguin.sonicar.tech/docs/admissions/manage-tours-forms/
> Learn how to create custom tours and admission request forms, then preview them before publishing.
## Overview [#overview]
The **Tours & Forms** tab is the starting point for all admissions activity in WhitePenguin. From here, the admin manages two tools that bring new families into the school:
* **Tour** — a bookable calendar invite for parents to visit the school. Parents choose a time slot, fill in their details, and the booking automatically flows into the **Events** and **Leads & Requests** tabs.
* **Form** — a customizable form for parents to express interest, join a waiting list, or submit admission details. Submissions automatically appear as new leads in the **Leads & Requests** tab.
Both tools share a single workflow that ends with sending an admission offer and activating the child profile once payment is confirmed.
## How to Access Tours & Forms [#how-to-access-tours--forms]
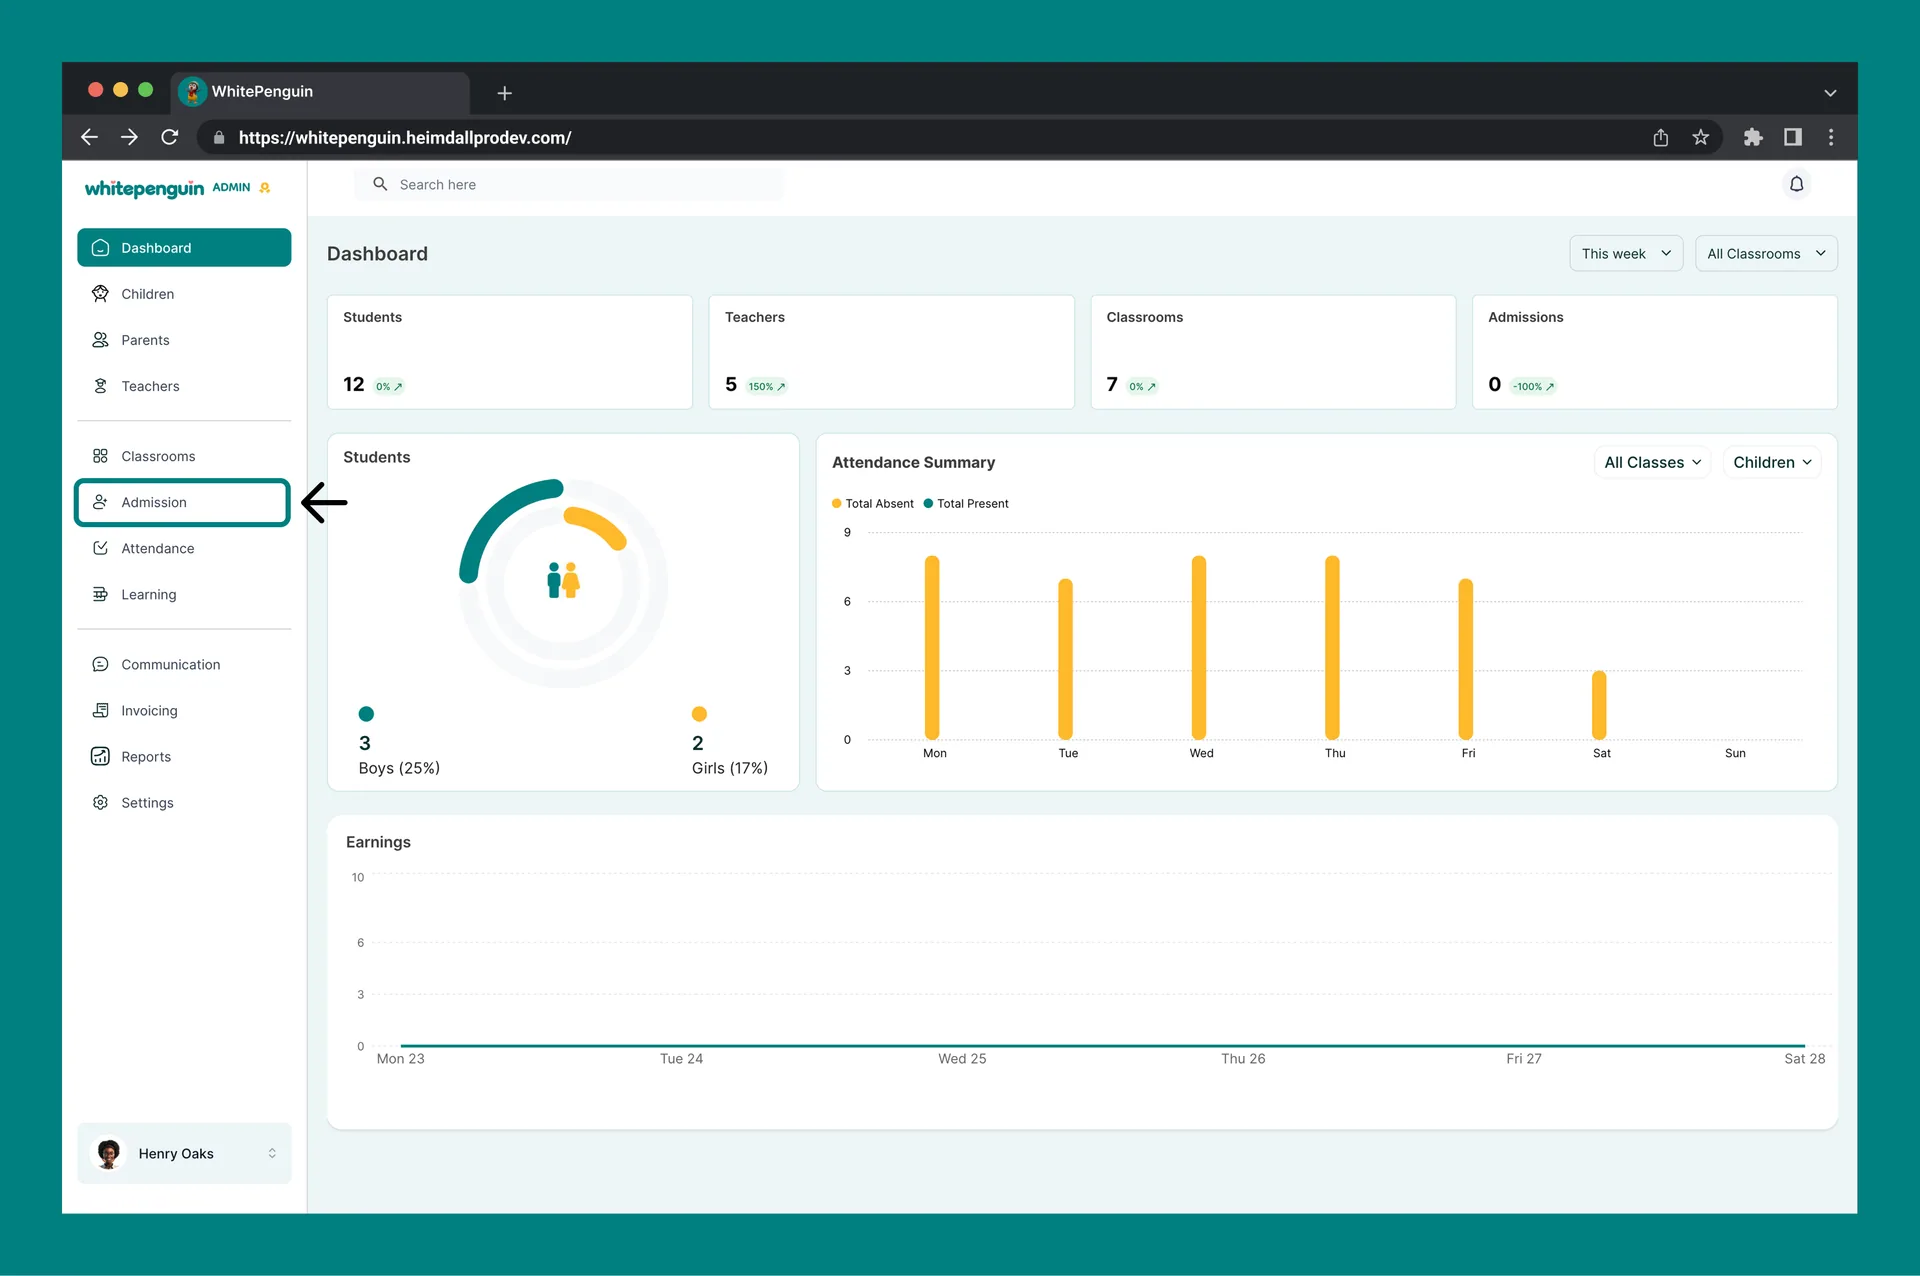
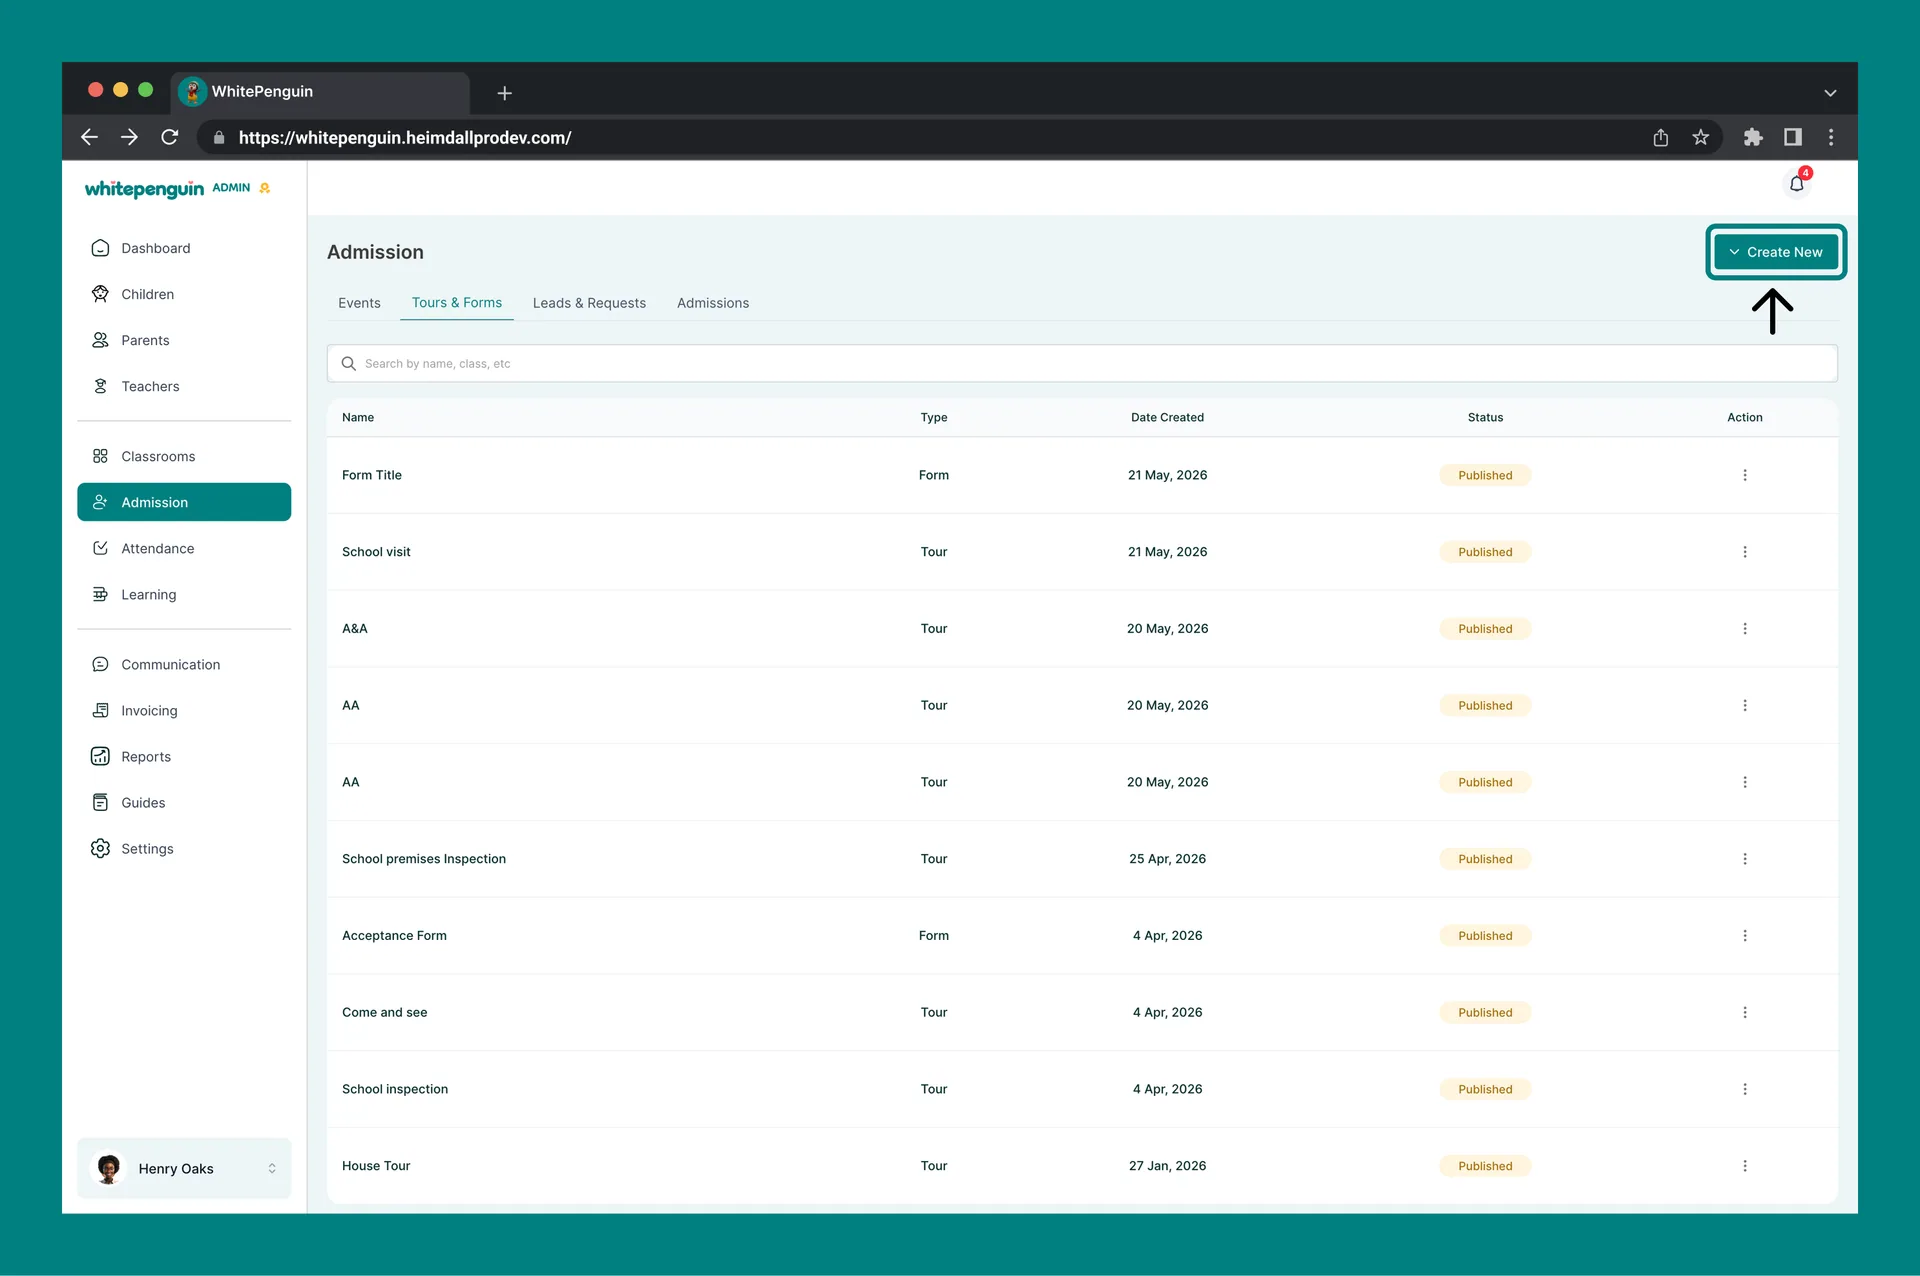
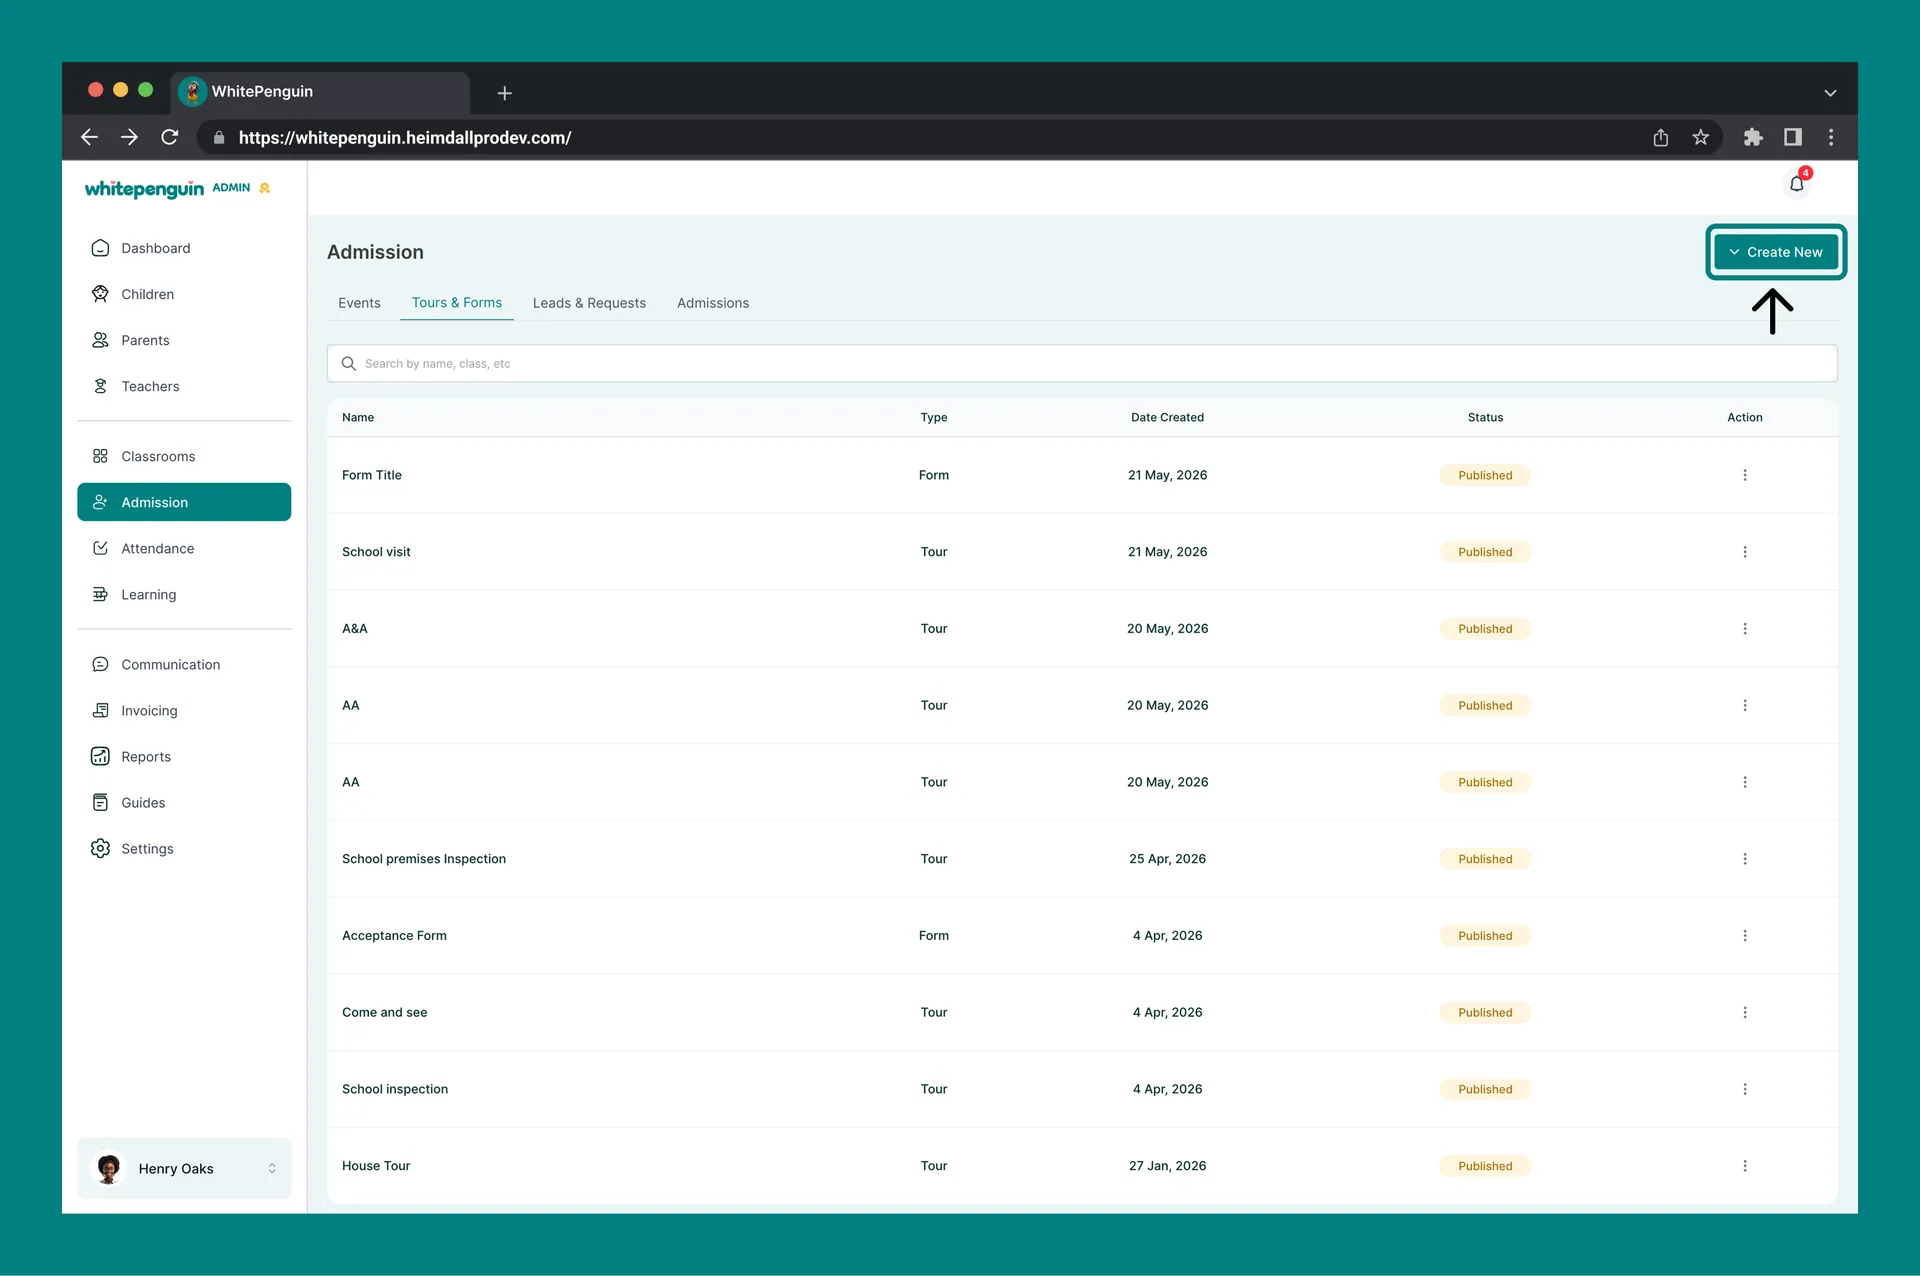
1. Click **Admission** in the **left sidebar**.
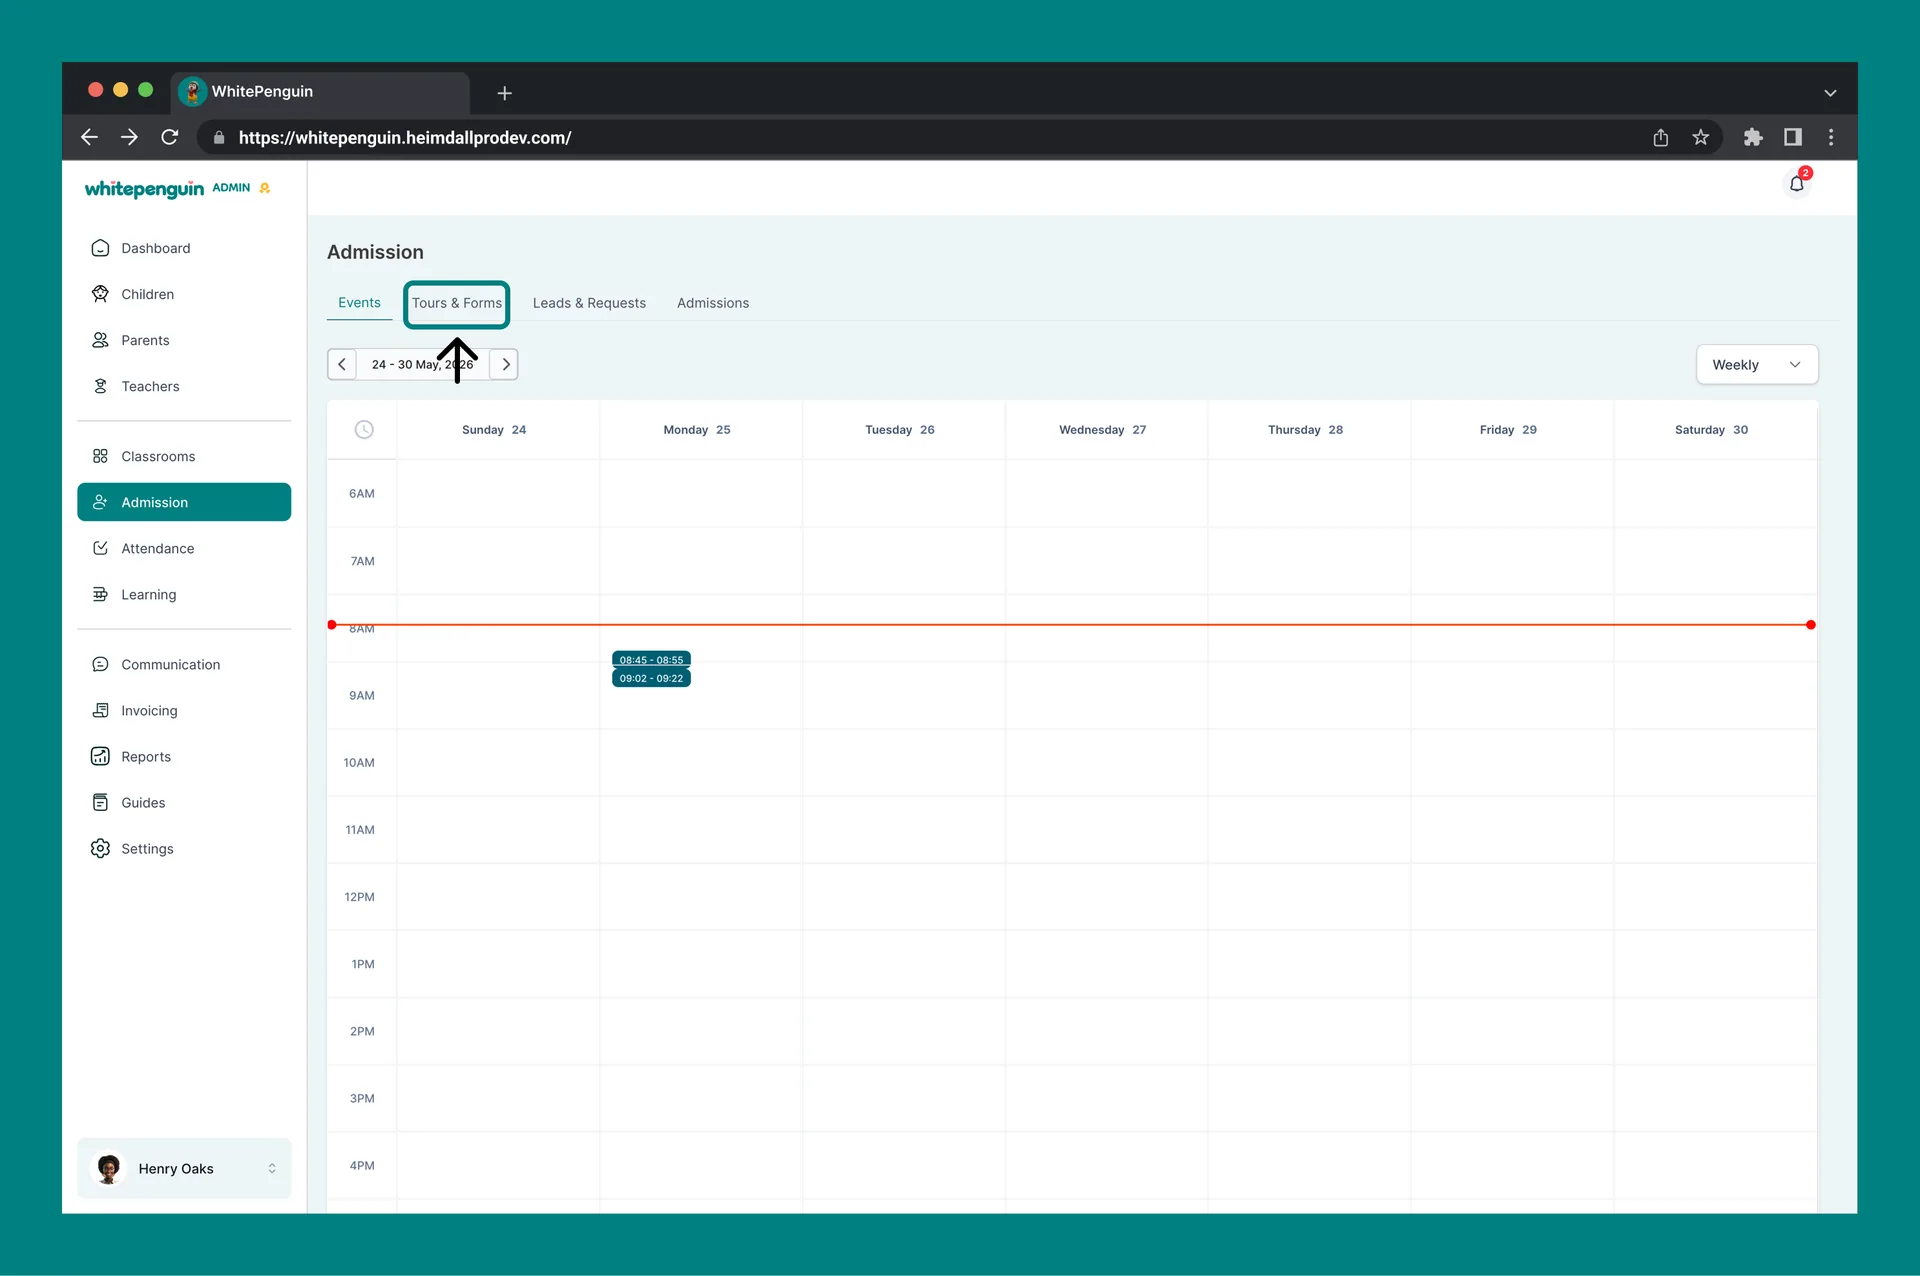
2. Select the **Tours & Forms** tab at the top of the Admission page.
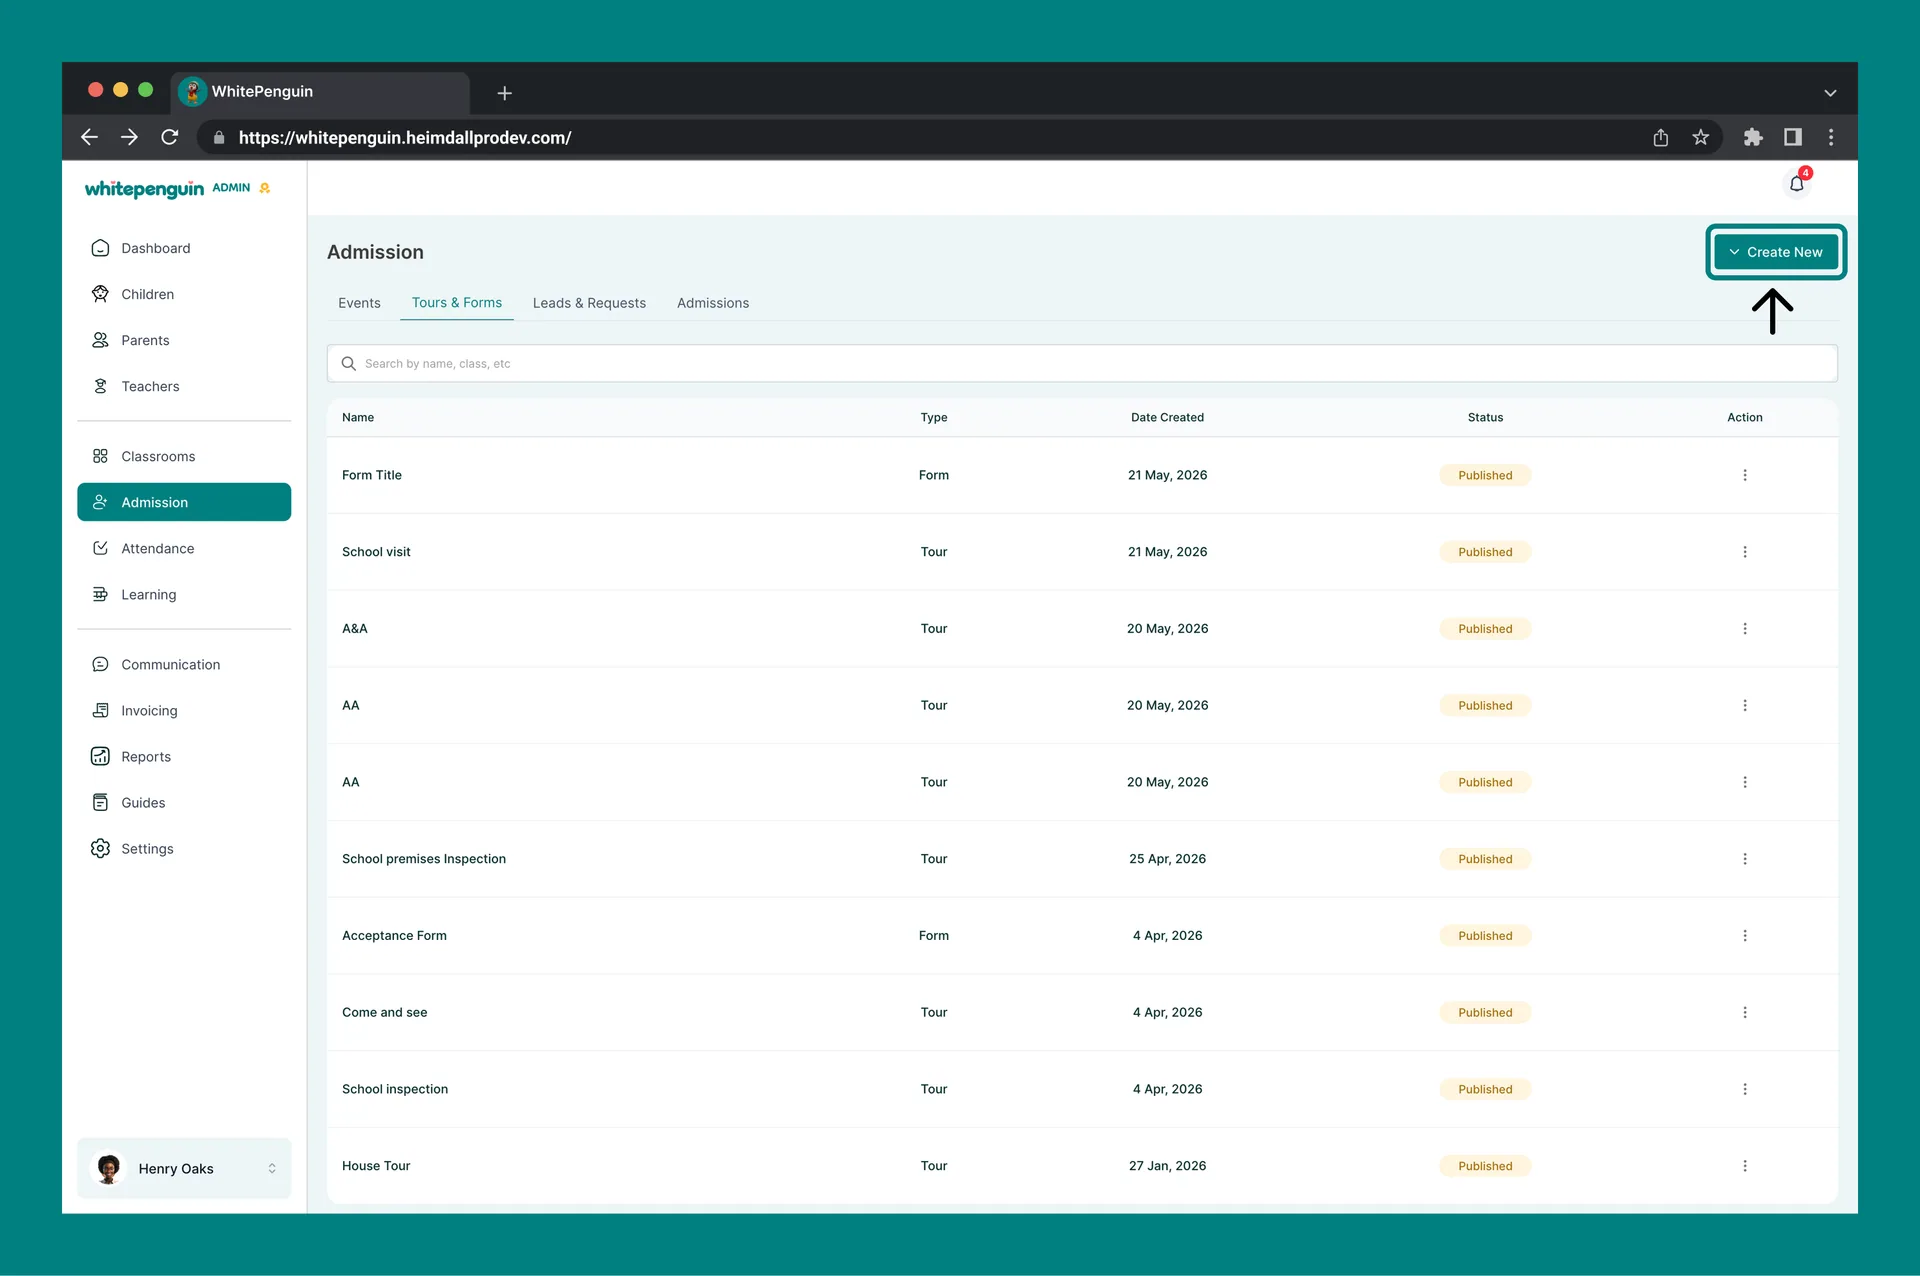
3. You will see a list of all existing tours and forms with their **Name**, **Type**, **Date Created**, and **Status**.
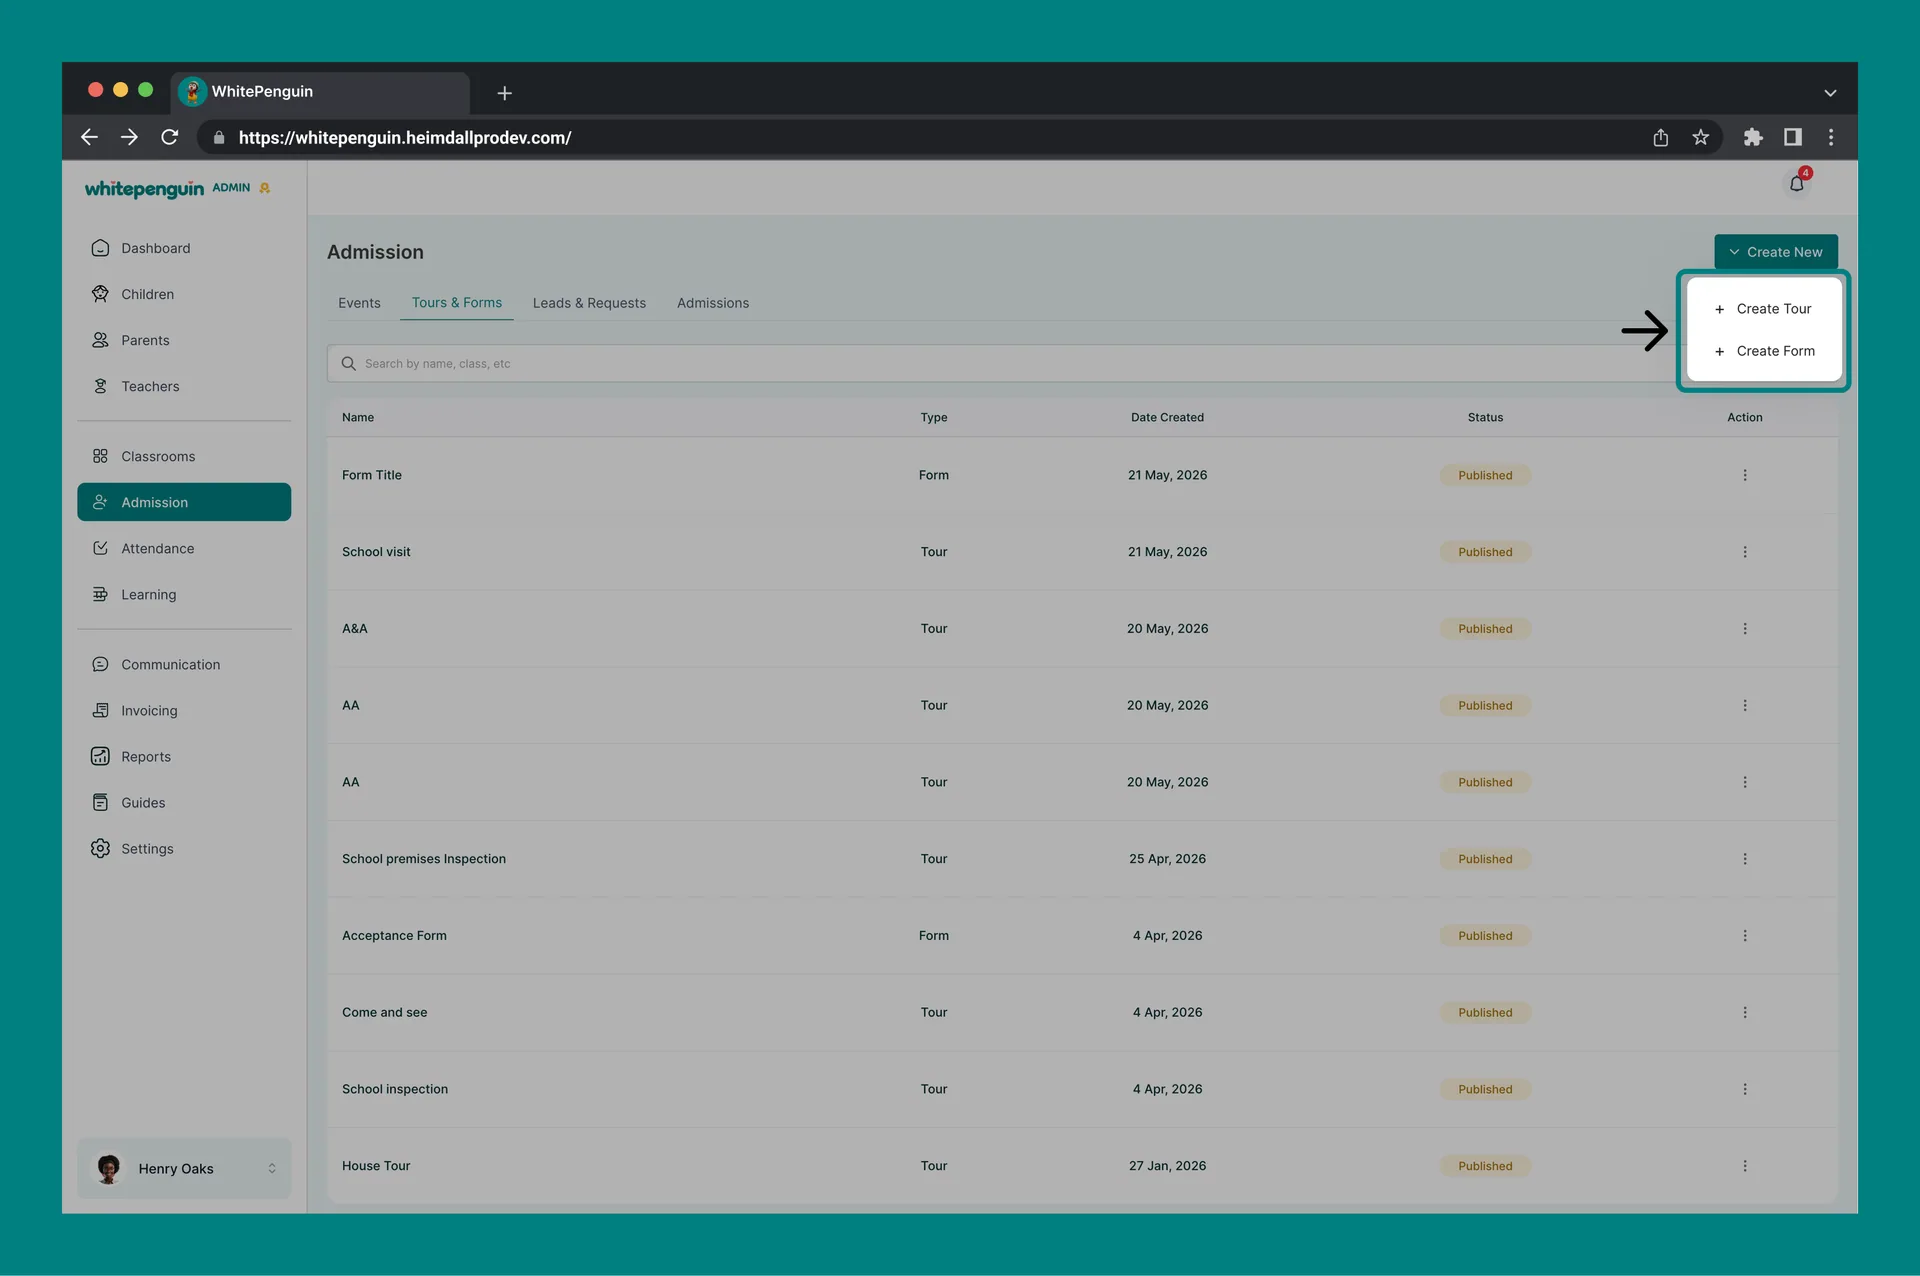
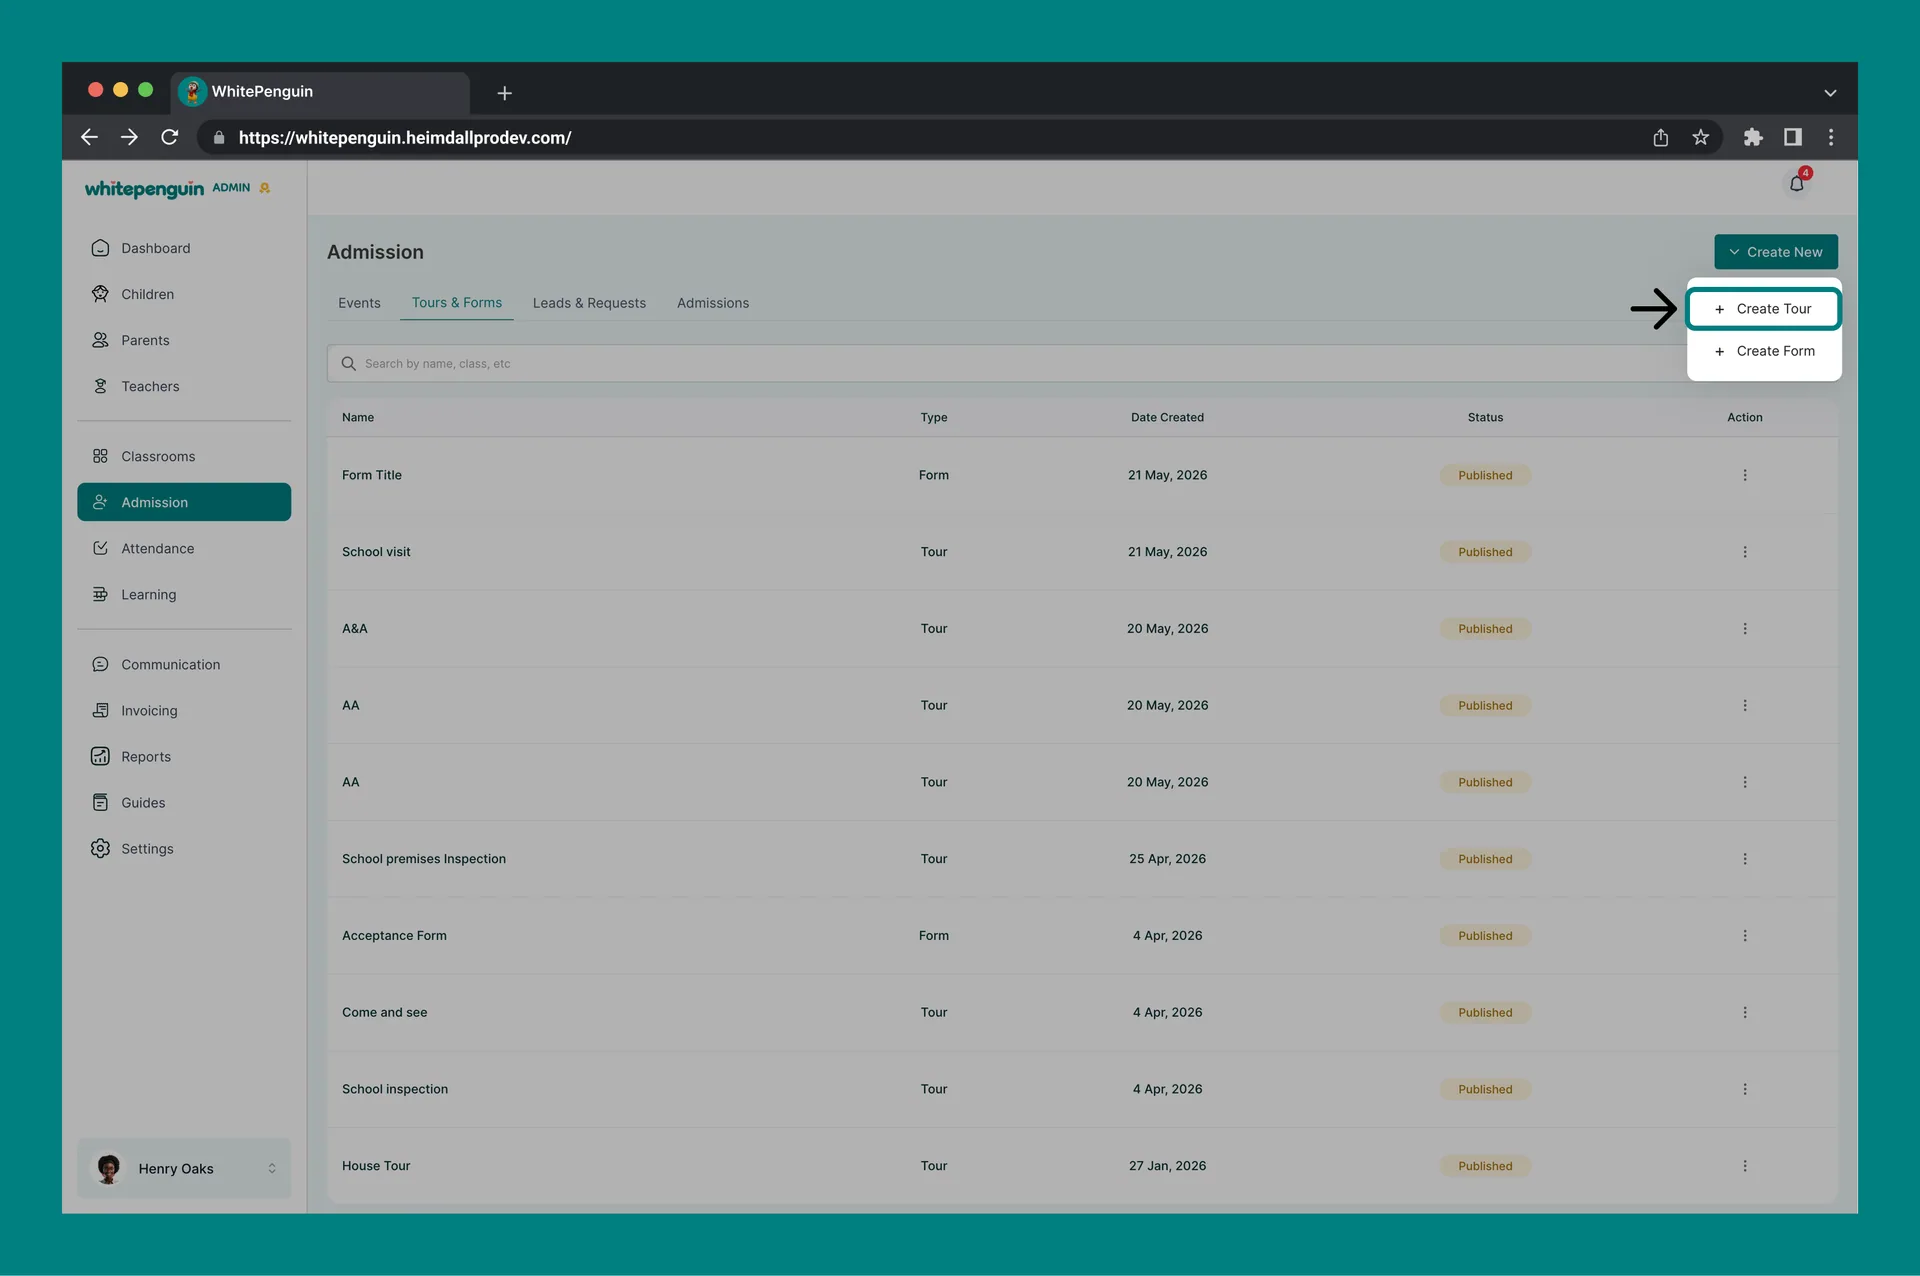
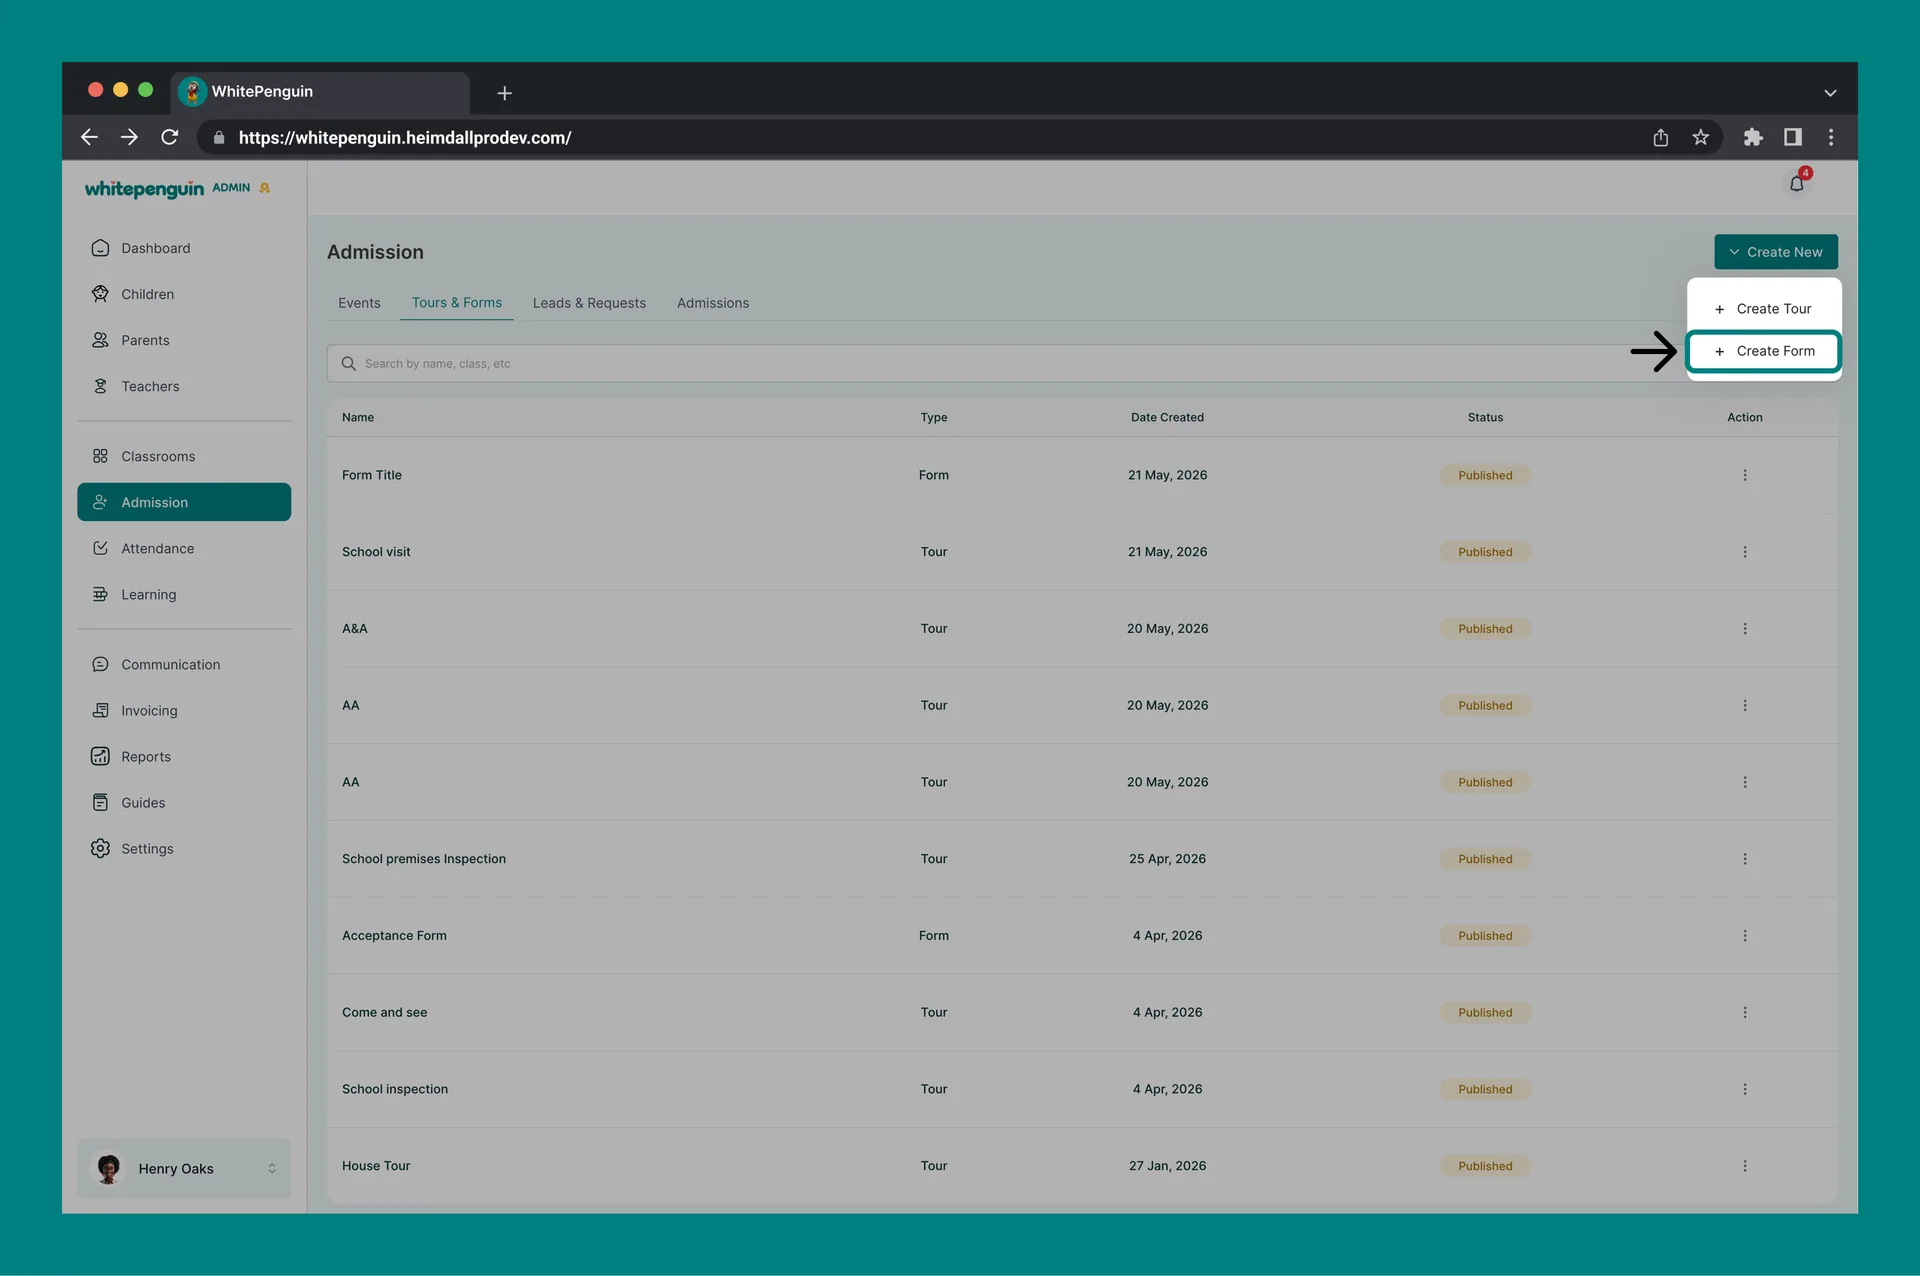
4. To create a new one, click the **Create New** button (top right) and choose either **+ Create Tour** or **+ Create Form**.
Each row has a three-dot **Action** menu that lets you **Preview**, **View Responses**, **Edit**, **Unpublish**, or **Delete** the tour or form.
## PART 1 — Tour [#part-1--tour]
A **Tour** is a bookable event that parents can reserve through a public link. It captures their details, syncs to your Events calendar, and creates a new lead automatically.
### Tour Flow Overview [#tour-flow-overview]
**Stage 1 — Setup**
1. Admin creates a tour and sets the schedule (dates, time slots, capacity per slot).
2. Admin copies and shares the tour booking link (via WhatsApp, email, website, etc.).
**Stage 2 — Booking**
1. Parent opens the link and selects a preferred time slot.
2. Parent fills in their details and confirms the booking.
3. Both the parent and admin receive a booking confirmation notification.
4. The booking appears in:
* **Events tab** — showing the scheduled date and time.
* **Leads & Requests tab** — as a new lead with status: *Tour Scheduled*.
**Stage 3 — Tour Management**
1. Admin can reschedule or cancel the tour if needed (parent is notified).
2. On the day of the tour, admin marks the tour as completed.
3. The lead status updates to *Tour Completed* on the Leads & Requests tab.
**Stage 4 — Offer**
1. Admin proceeds to send an offer to the parent from the lead record.
2. A **Send Offer** modal opens, which triggers an invoice modal — admin fills in the admission fee details and sends.
3. Parent receives:
* An admission offer letter.
* An invoice for the admission fee.
* A platform invite (account created, but child marked as *Inactive*).
4. Immediately upon sending the offer:
* The lead moves from Leads & Requests to the **Admissions** section.
* Lead status updates to: *Offer Sent*.
* Parent profile is automatically created with status: *Inactive*.
* Child profile is automatically created with status: *Inactive*.
**Stage 5 — Payment & Activation**
1. Parent pays the invoice — two possible paths:
* **Online** — parent pays directly via Paystack (if the school has enabled Paystack).
* **Manual** — admin records the payment from the invoice page, or from the parent's profile on the **Parents** tab by marking the invoice as paid.
2. Once payment is confirmed:
* Child profile status changes to: *Active*.
* Admission is complete.
### How to Create a Tour [#how-to-create-a-tour]
1. From the **Tours & Forms** tab, click **Create New** → **+ Create Tour**.
2. The **Create Tour Event** wizard opens with four steps in the left rail: **Basic**, **Availability**, **Notifications**, and **Questions**.
3. Complete each step and click **Save** at the top right when done.
#### Tour Form Fields — Step by Step [#tour-form-fields--step-by-step]
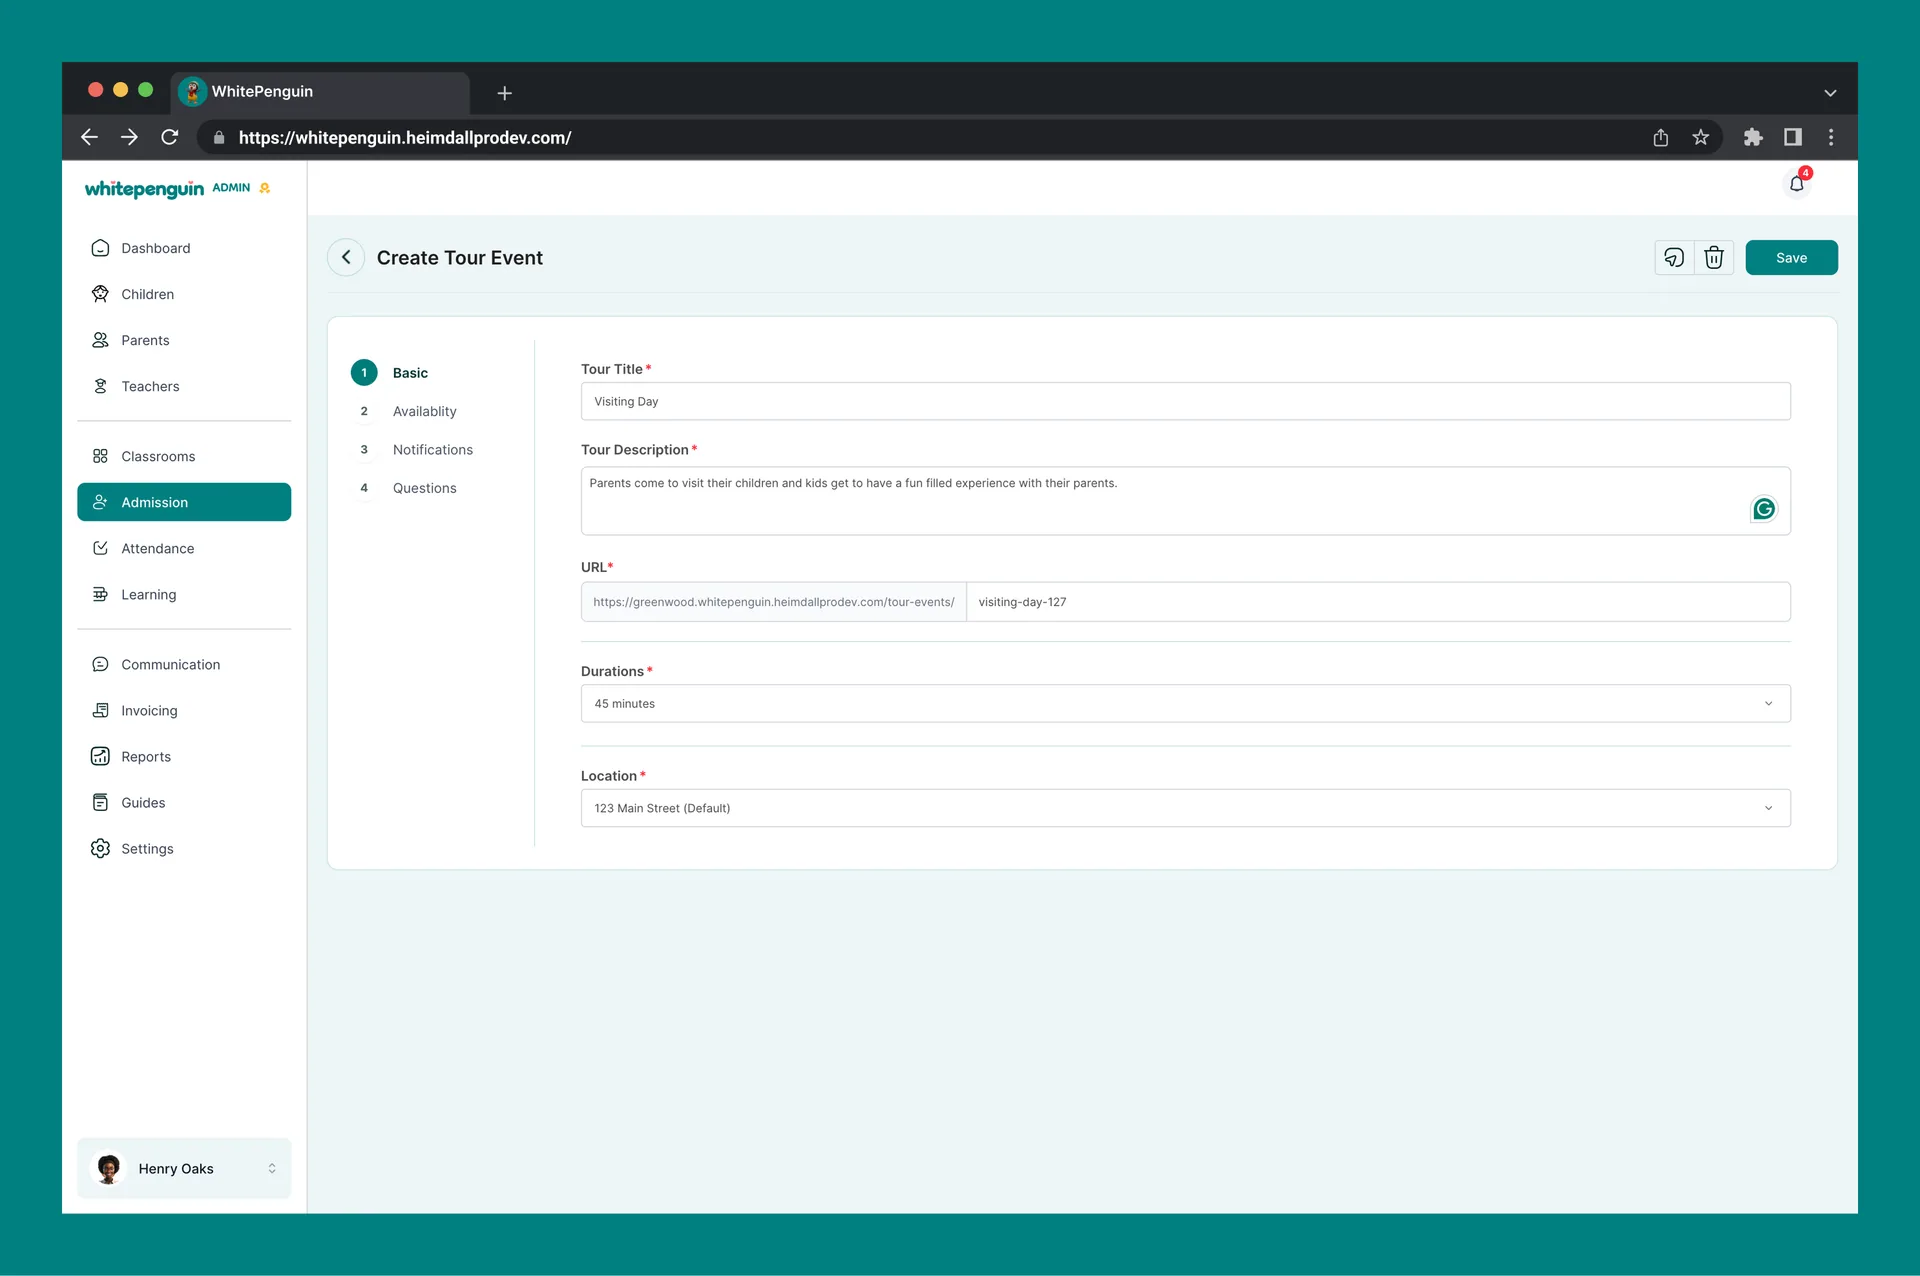
##### 1. Basic *(required)* [#1-basic-required]
Defines the tour's identity and where parents will land when they open the link.
* **Tour Title**\* — a clear, recognizable name (e.g. *Open House Tour*, *Toddler Room Visit*).
* **Tour Description**\* — a short summary parents will read before booking.
* **URL**\* — the public booking link. The first part is fixed to your school domain; the second part is editable (e.g. `test-2345`).
* **Durations**\* — how long each tour slot lasts (e.g. 15 minutes, 30 minutes, 1 hour).
* **Location**\* — the campus or branch where the tour takes place.
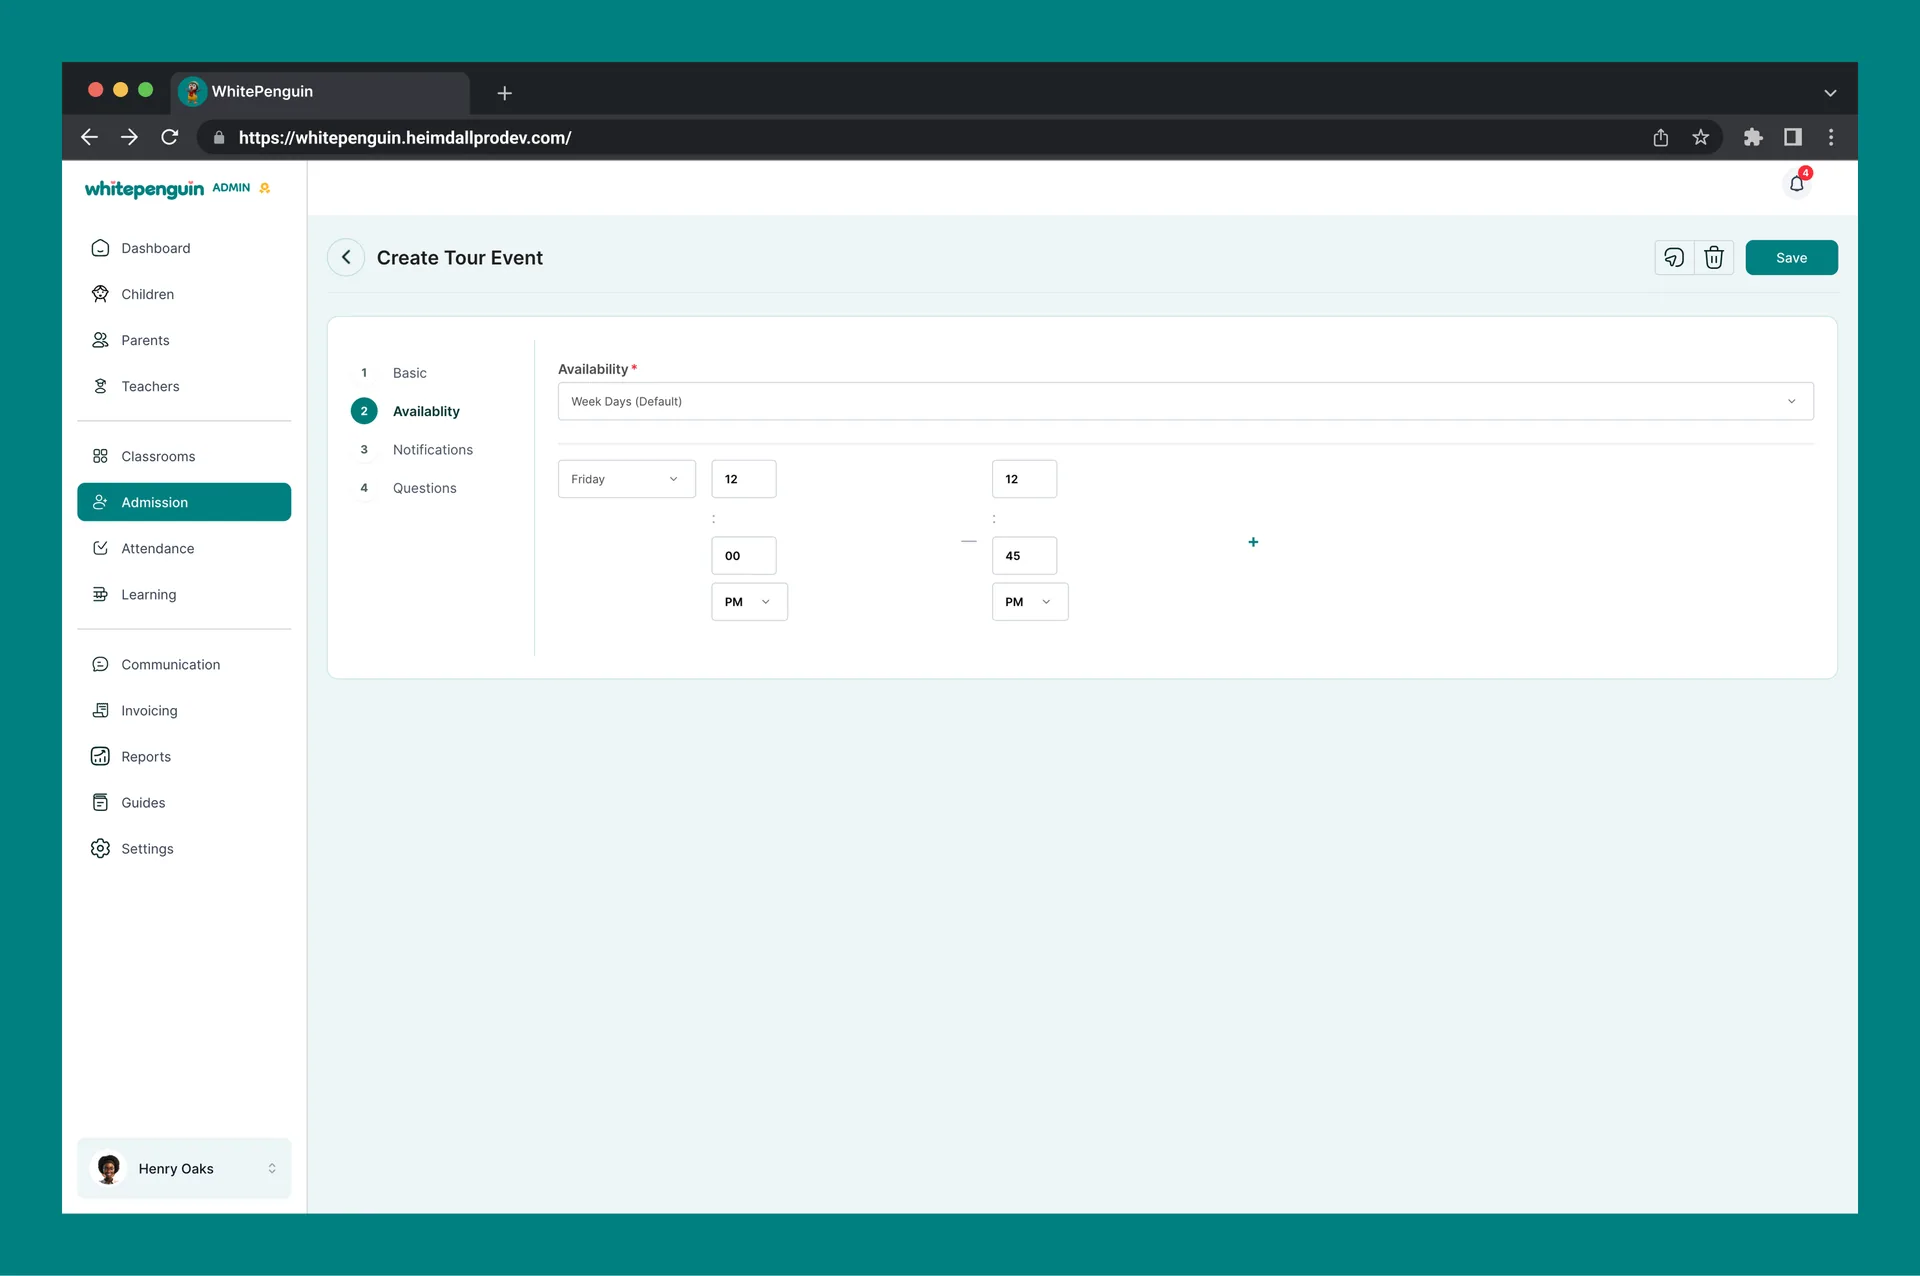
##### 2. Availability *(required)* [#2-availability-required]
Defines when parents can book.
* **Availability**\* — choose a preset pattern: Week Days (Default), Everyday, or Weekends.
* For each enabled day, set the **start time** and **end time** (hours, minutes, AM/PM).
* Click the **+** icon to add more time ranges for the same day.
At least one availability slot is required, or the **Save** button will stay disabled and you will see the warning: *"At least one availability slot is required."*
##### 3. Notifications *(required)* [#3-notifications-required]
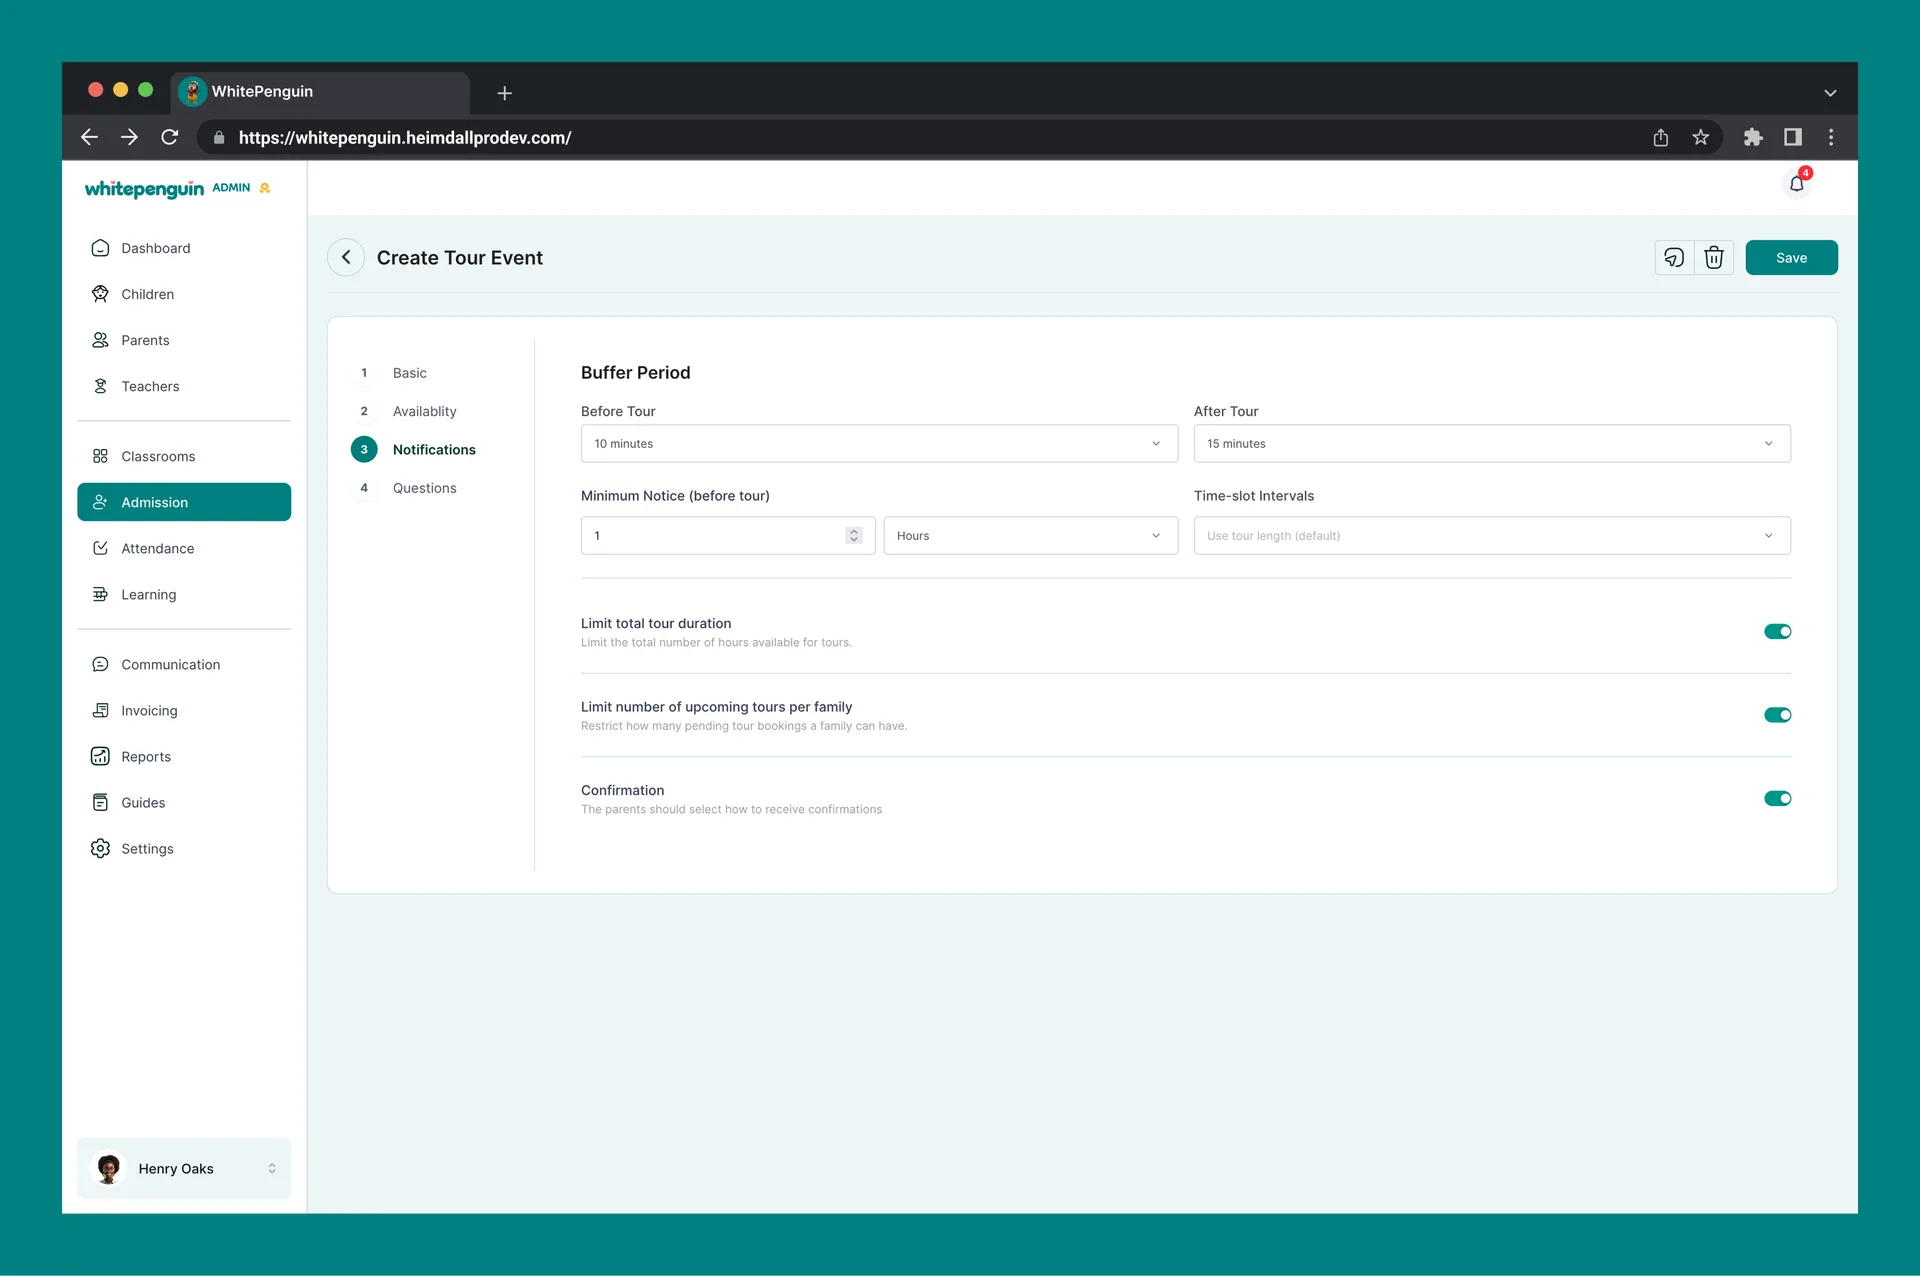
Controls buffer times, limits, and confirmation behavior.
* **Before Tour** — buffer period before each tour (e.g. 5 minutes).
* **After Tour** — buffer period after each tour (e.g. 5 minutes).
* **Minimum Notice (before tour)** — how far in advance parents must book (e.g. 1 hour).
* **Time-slot Intervals** — spacing between bookable slots (e.g. 5 minutes).
* **Limit total tour duration** *(toggle)* — caps the total number of hours available for tours.
* **Limit number of upcoming tours per family** *(toggle)* — restricts how many pending tour bookings a family can have.
* **Confirmation** *(toggle)* — lets parents choose how they want to receive confirmations.
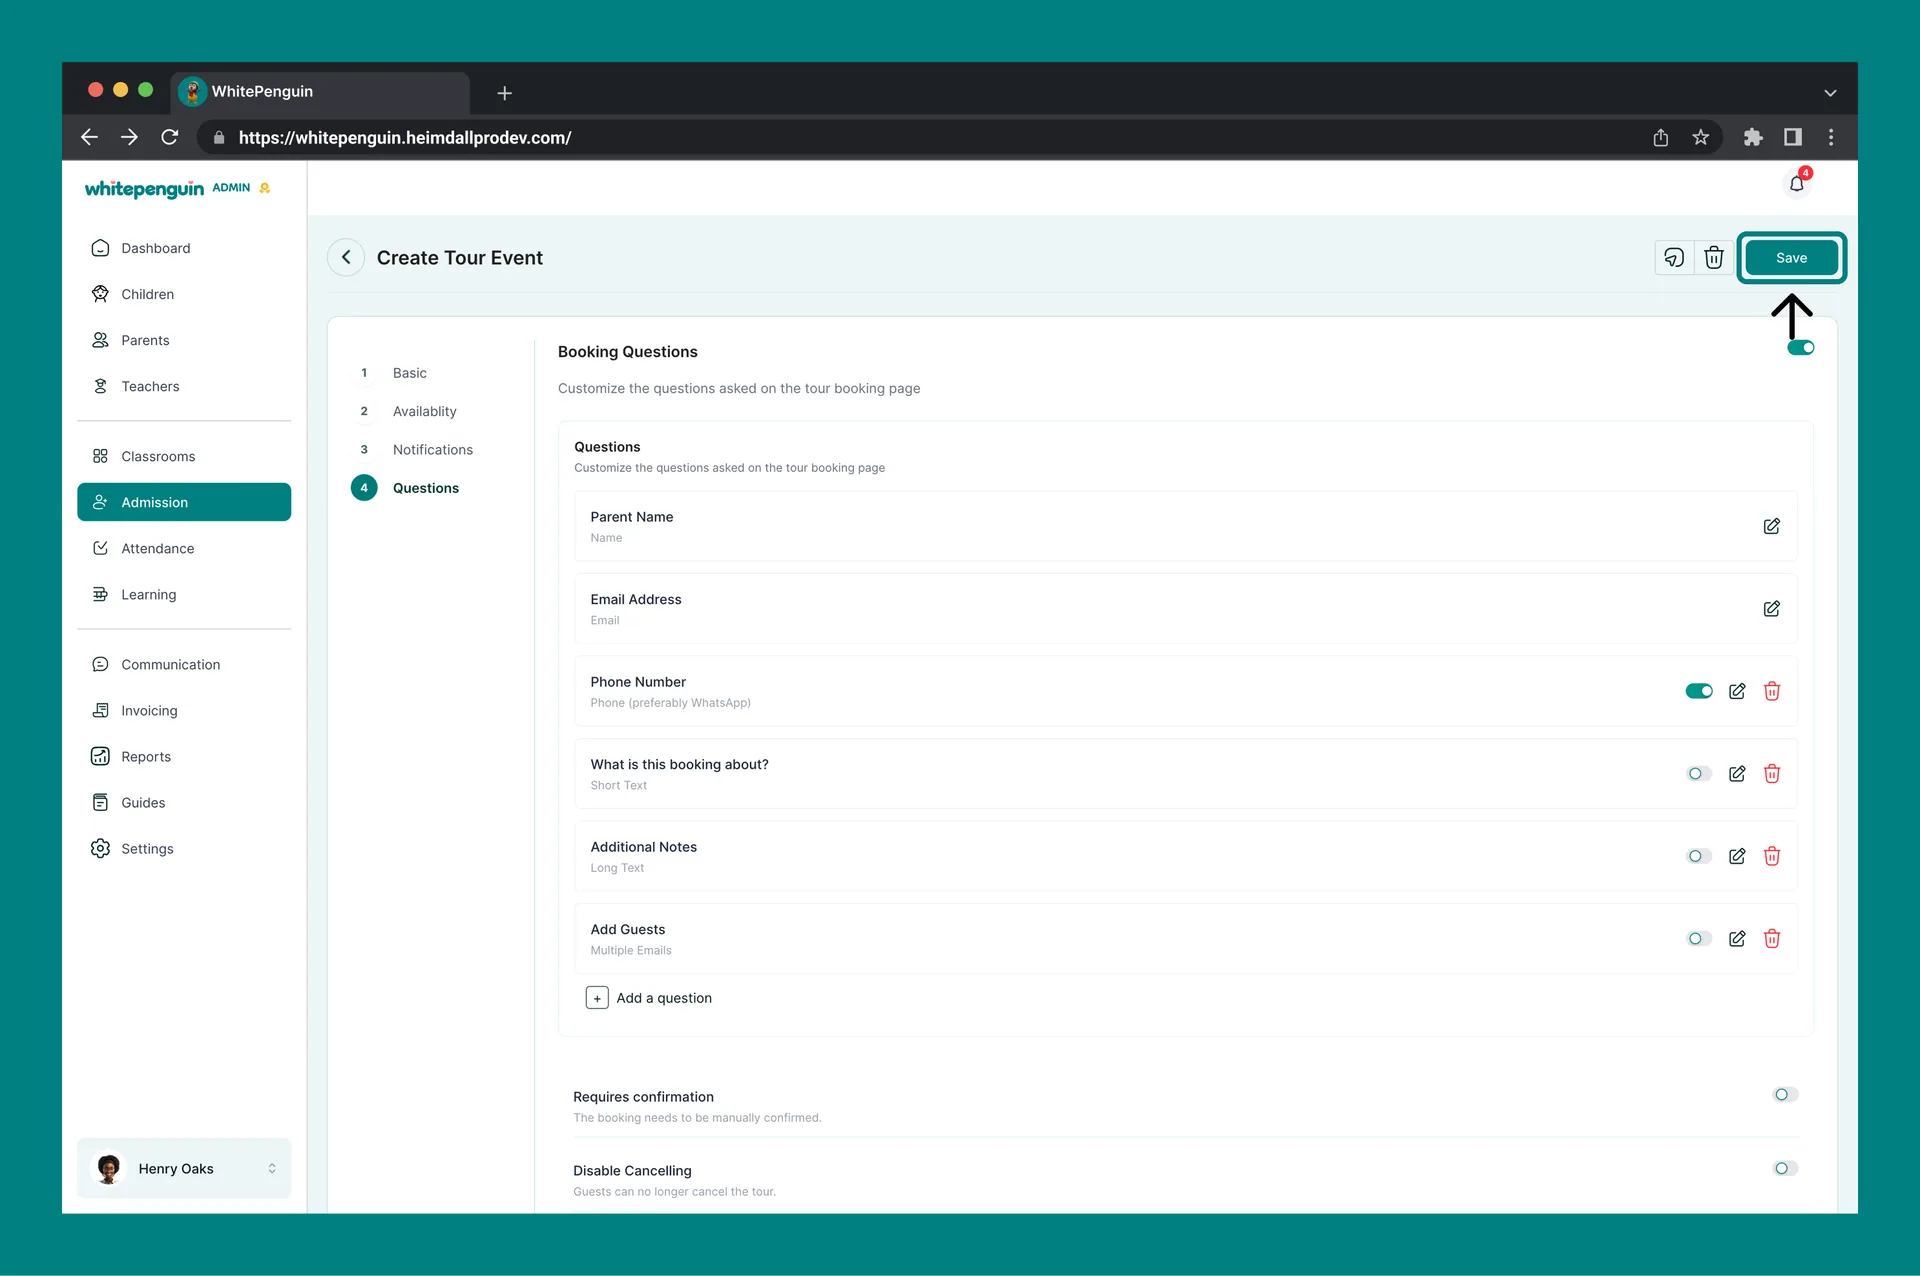
##### 4. Questions *(required)* [#4-questions-required]
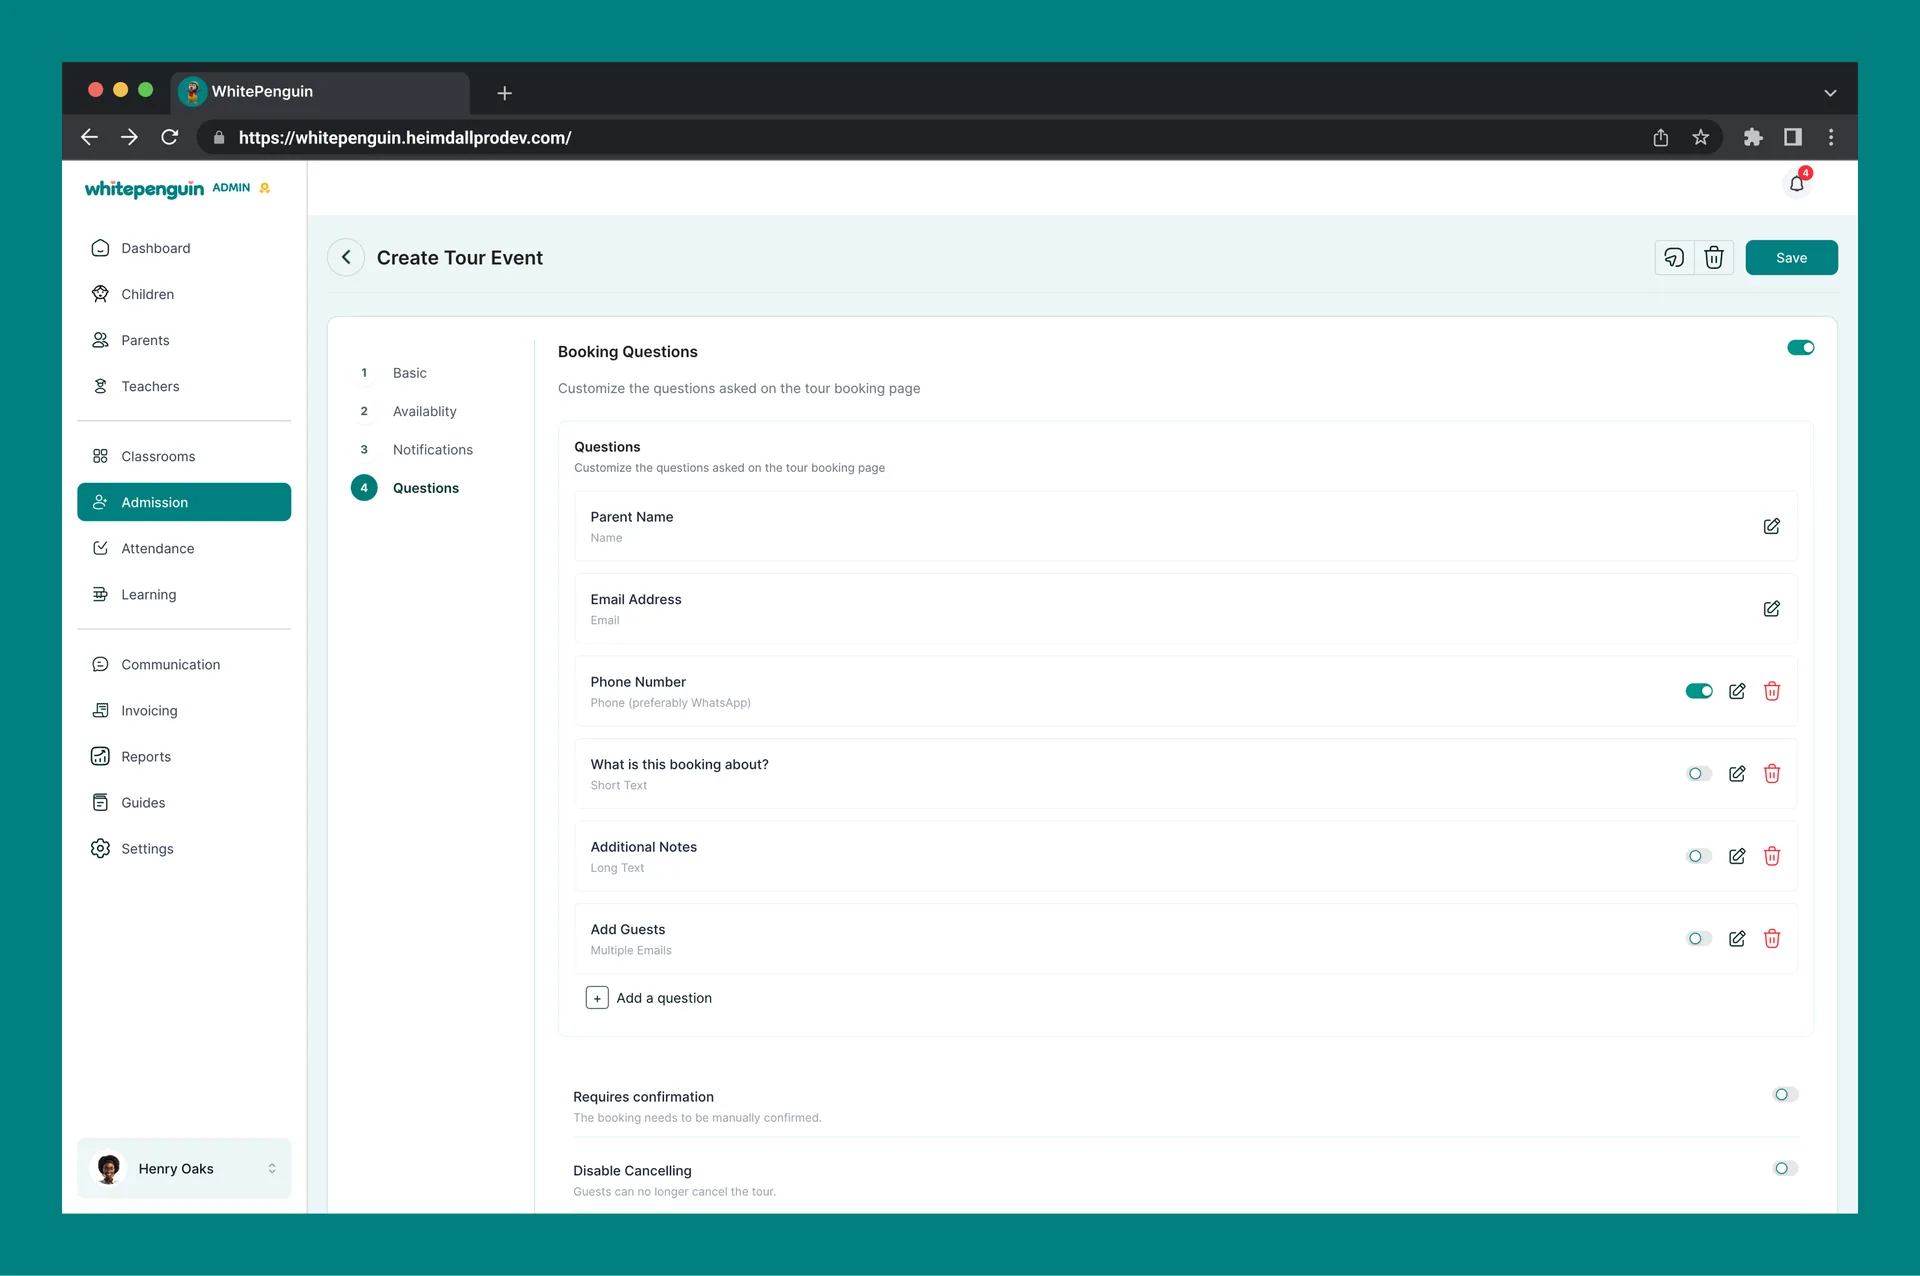
Customize what parents are asked when booking.
Default questions (always shown):
* **Parent Name** — Name field.
* **Email Address** — Email field.
Optional questions (toggle on/off):
* **Phone Number** *(preferably WhatsApp)*.
* **What is this booking about?** — Short Text.
* **Additional Notes** — Long Text.
* **Add Guests** — Multiple Emails.
Click **+ Add a question** to create a custom field.
At the bottom of the step you can also toggle:
* **Requires confirmation** — bookings must be manually confirmed by the admin.
* **Disable Cancelling** — parents cannot cancel.
* **Disable Rescheduling** — parents cannot reschedule.
#### After Saving the Tour [#after-saving-the-tour]
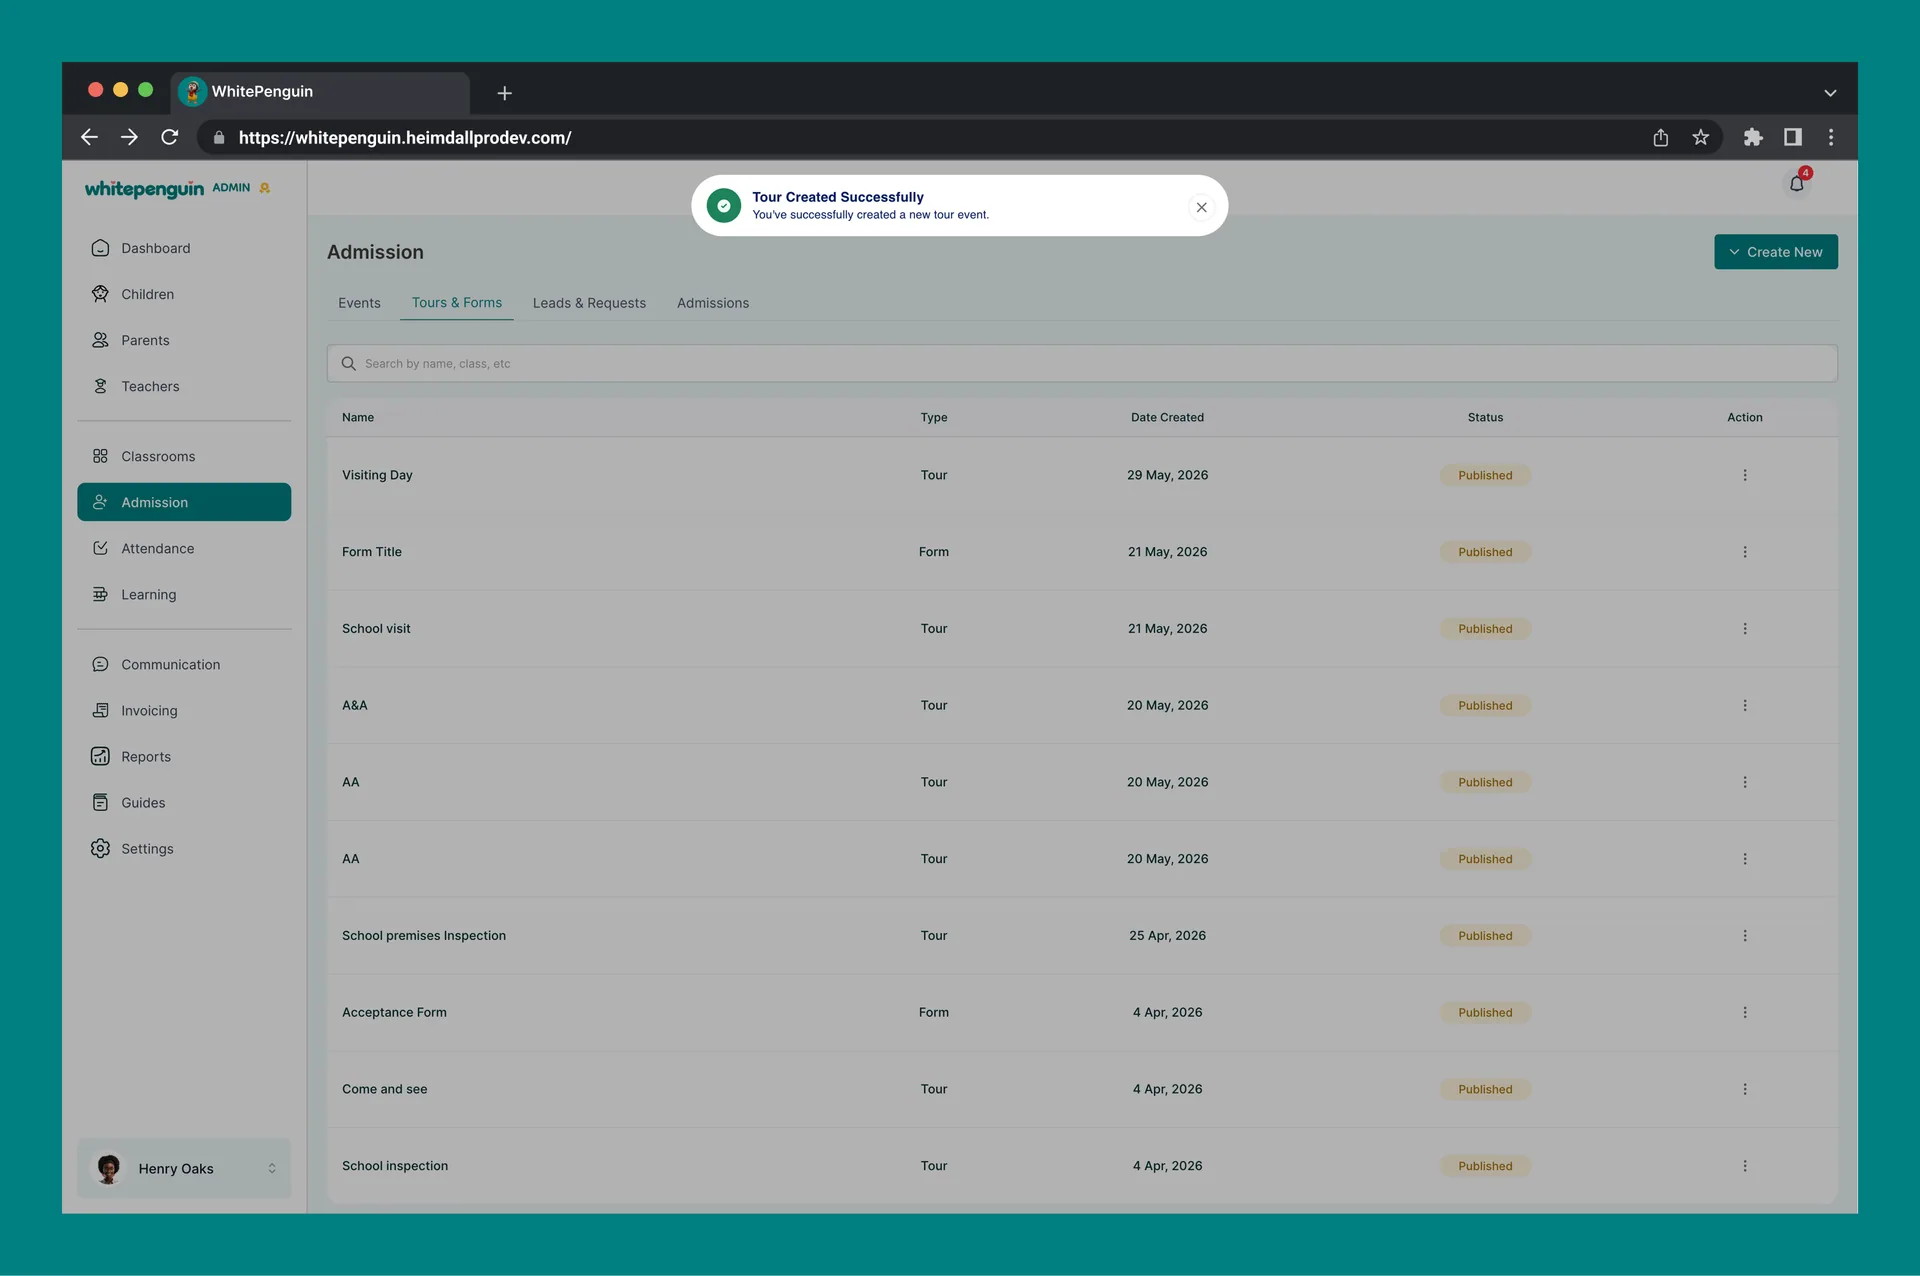
* A success toast appears: *"Tour Created Successfully — You've successfully created a new tour event."*
* The tour now shows in the **Tours & Forms** list with **Type: Tour** and **Status: Published**.
* The booking URL is live and can be shared with parents.
## PART 2 — Form [#part-2--form]
A **Form** is a customisable submission form that parents fill in to express interest, join a waiting list, or send admission details. Each submission becomes a new lead.
### Form Flow Overview [#form-flow-overview]
**Stage 1 — Setup**
1. Admin creates a form and configures the fields (name, child's name, age/grade interest, contact details, any custom questions).
2. Admin sets the form purpose — interest registration, waiting list, enquiry, or general admissions intake.
3. Admin copies and shares the form link (via WhatsApp, email, website, etc.).
**Stage 2 — Submission**
1. Parent opens the link and fills in the form.
2. Parent submits the form.
3. Parent receives a submission confirmation (email or on-screen acknowledgement).
4. Admin receives a notification of a new form submission.
5. The submission appears in the **Leads & Requests tab** as a new lead with status: *Form Submitted*.
**Stage 3 — Lead Review & Follow-up**
1. Admin reviews the submission from the **Leads & Requests** tab.
2. Admin reaches out to the parent (offline — via call, WhatsApp, or email) to discuss next steps.
3. Admin updates the lead status accordingly.
**Stage 4 — Offer**
1. Admin proceeds to send an offer to the parent from the lead record.
2. A **Send Offer** modal opens, which triggers an invoice modal — admin fills in the admission fee details and sends.
3. Parent receives:
* An admission offer letter.
* An invoice for the admission fee.
* A platform invite (account created, but child marked as *Inactive*).
4. Immediately upon sending the offer:
* The lead moves from Leads & Requests to the **Admissions** section.
* Lead status updates to: *Offer Sent*.
* Parent profile is automatically created with status: *Inactive*.
* Child profile is automatically created with status: *Inactive*.
**Stage 5 — Payment & Activation**
1. Parent pays the invoice — two possible paths:
* **Online** — parent pays directly via Paystack (if the school has enabled Paystack).
* **Manual** — admin records the payment from the invoice page, or from the parent's profile on the **Parents** tab by marking the invoice as paid.
2. Once payment is confirmed:
* Child profile status changes to: *Active*.
* Admission is complete.
### How to Create a Form [#how-to-create-a-form]
1. From the **Tours & Forms** tab, click **Create New** → **+ Create Form**.
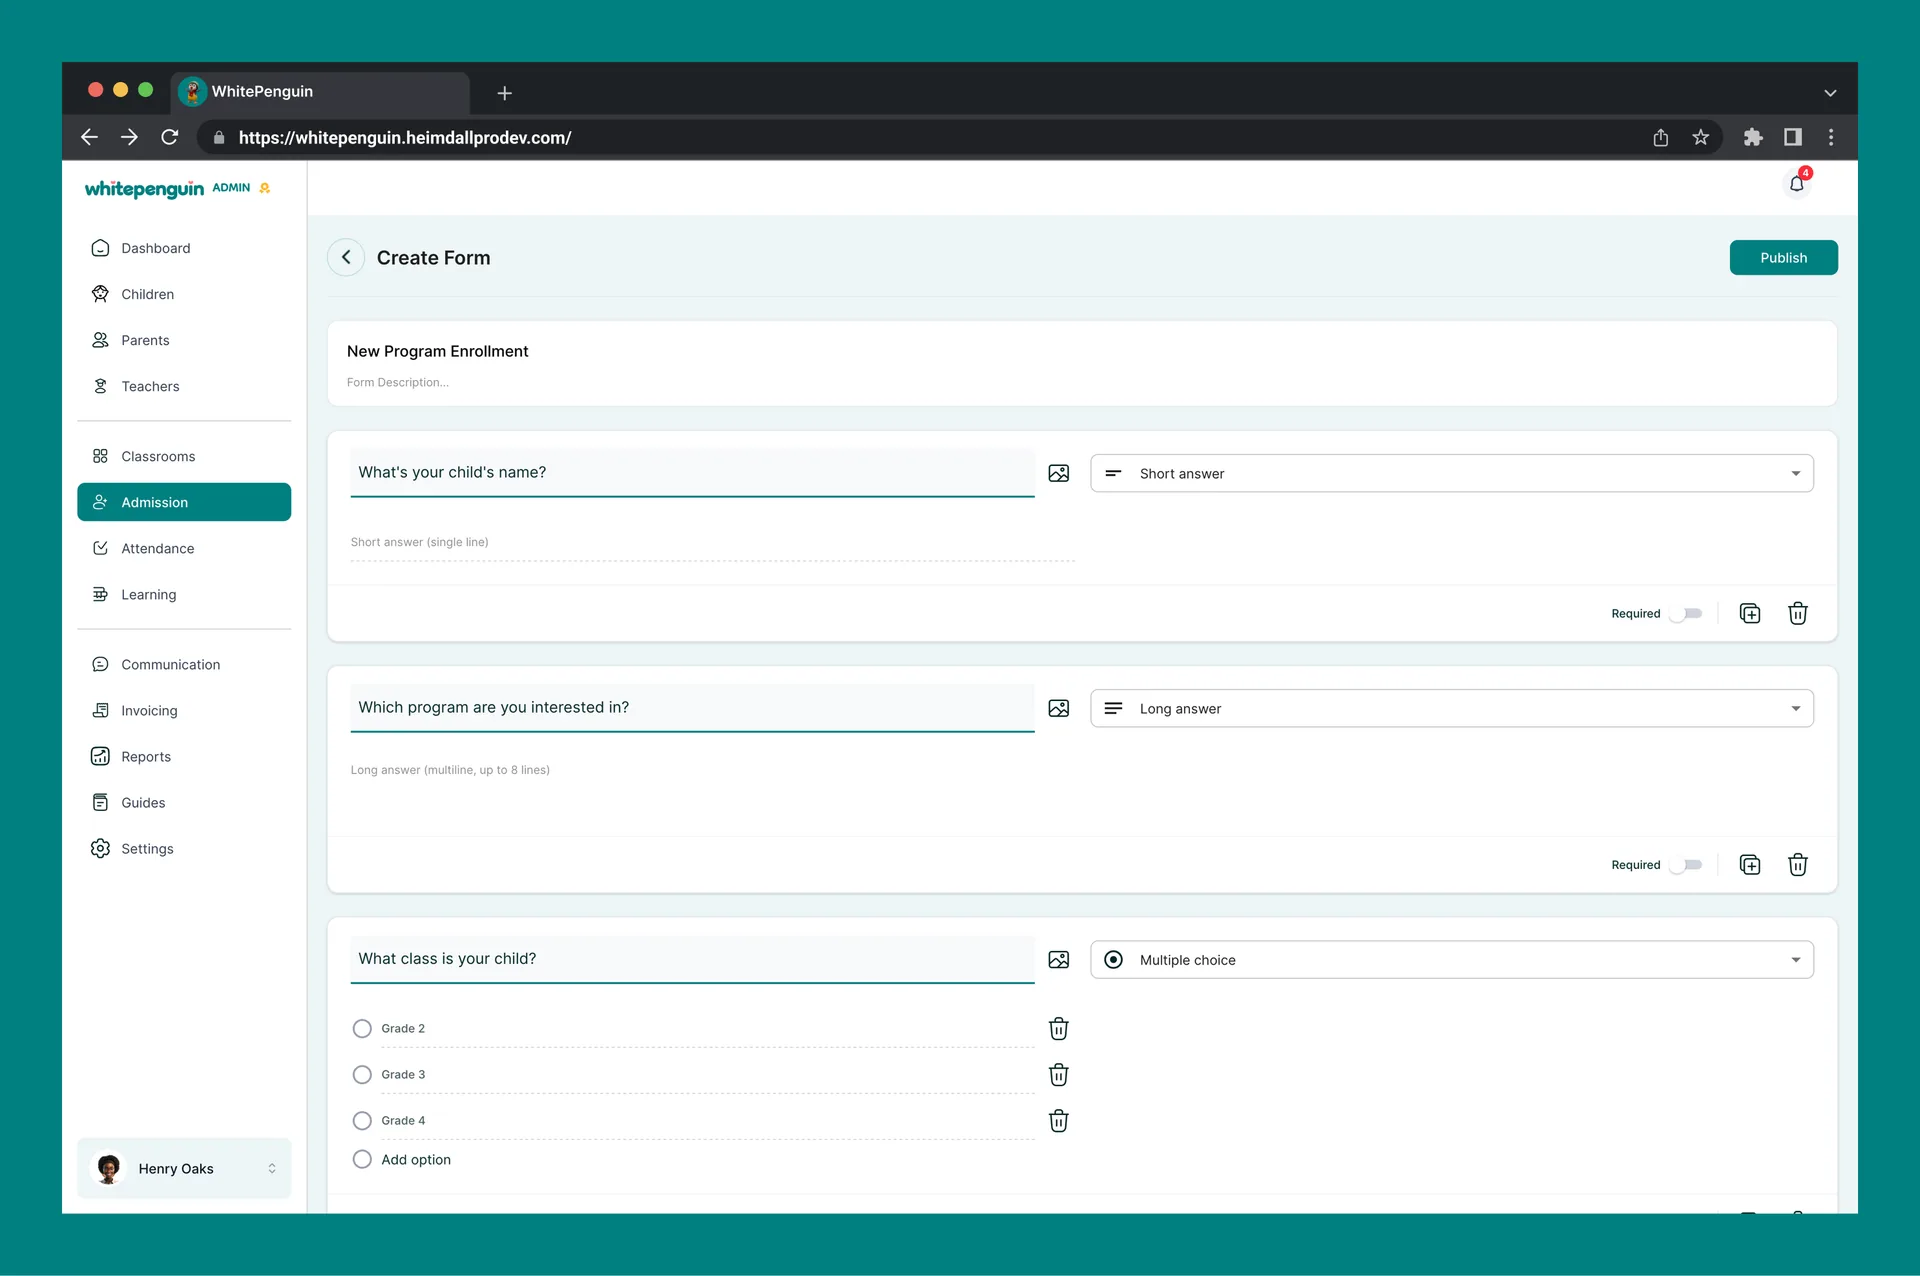
2. The **Create Form** builder opens with the form title at the top and a list of question blocks below.
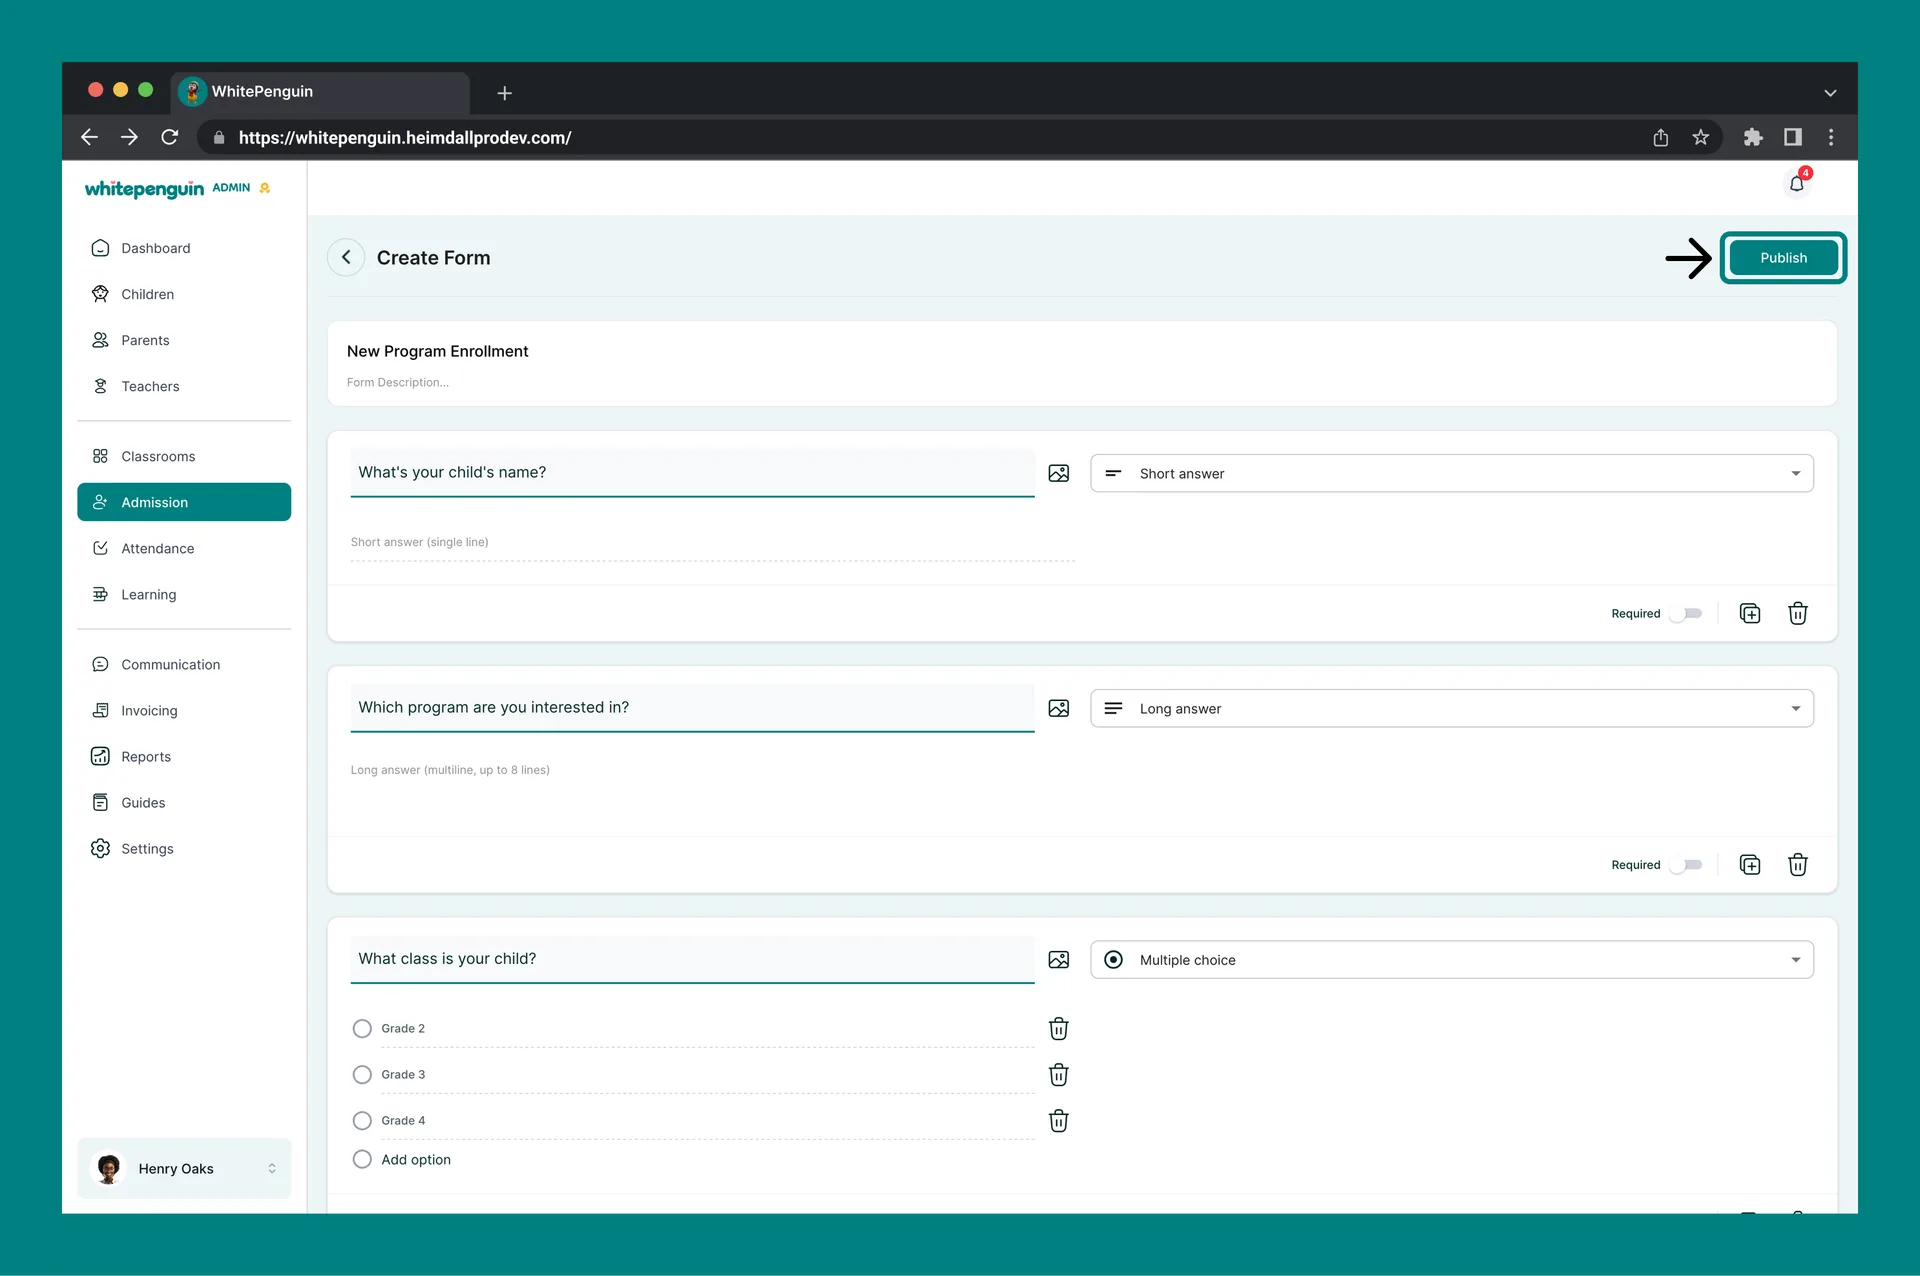
3. Add and configure questions, then click **Publish** at the top right when ready.
#### Form Builder — Step by Step [#form-builder--step-by-step]
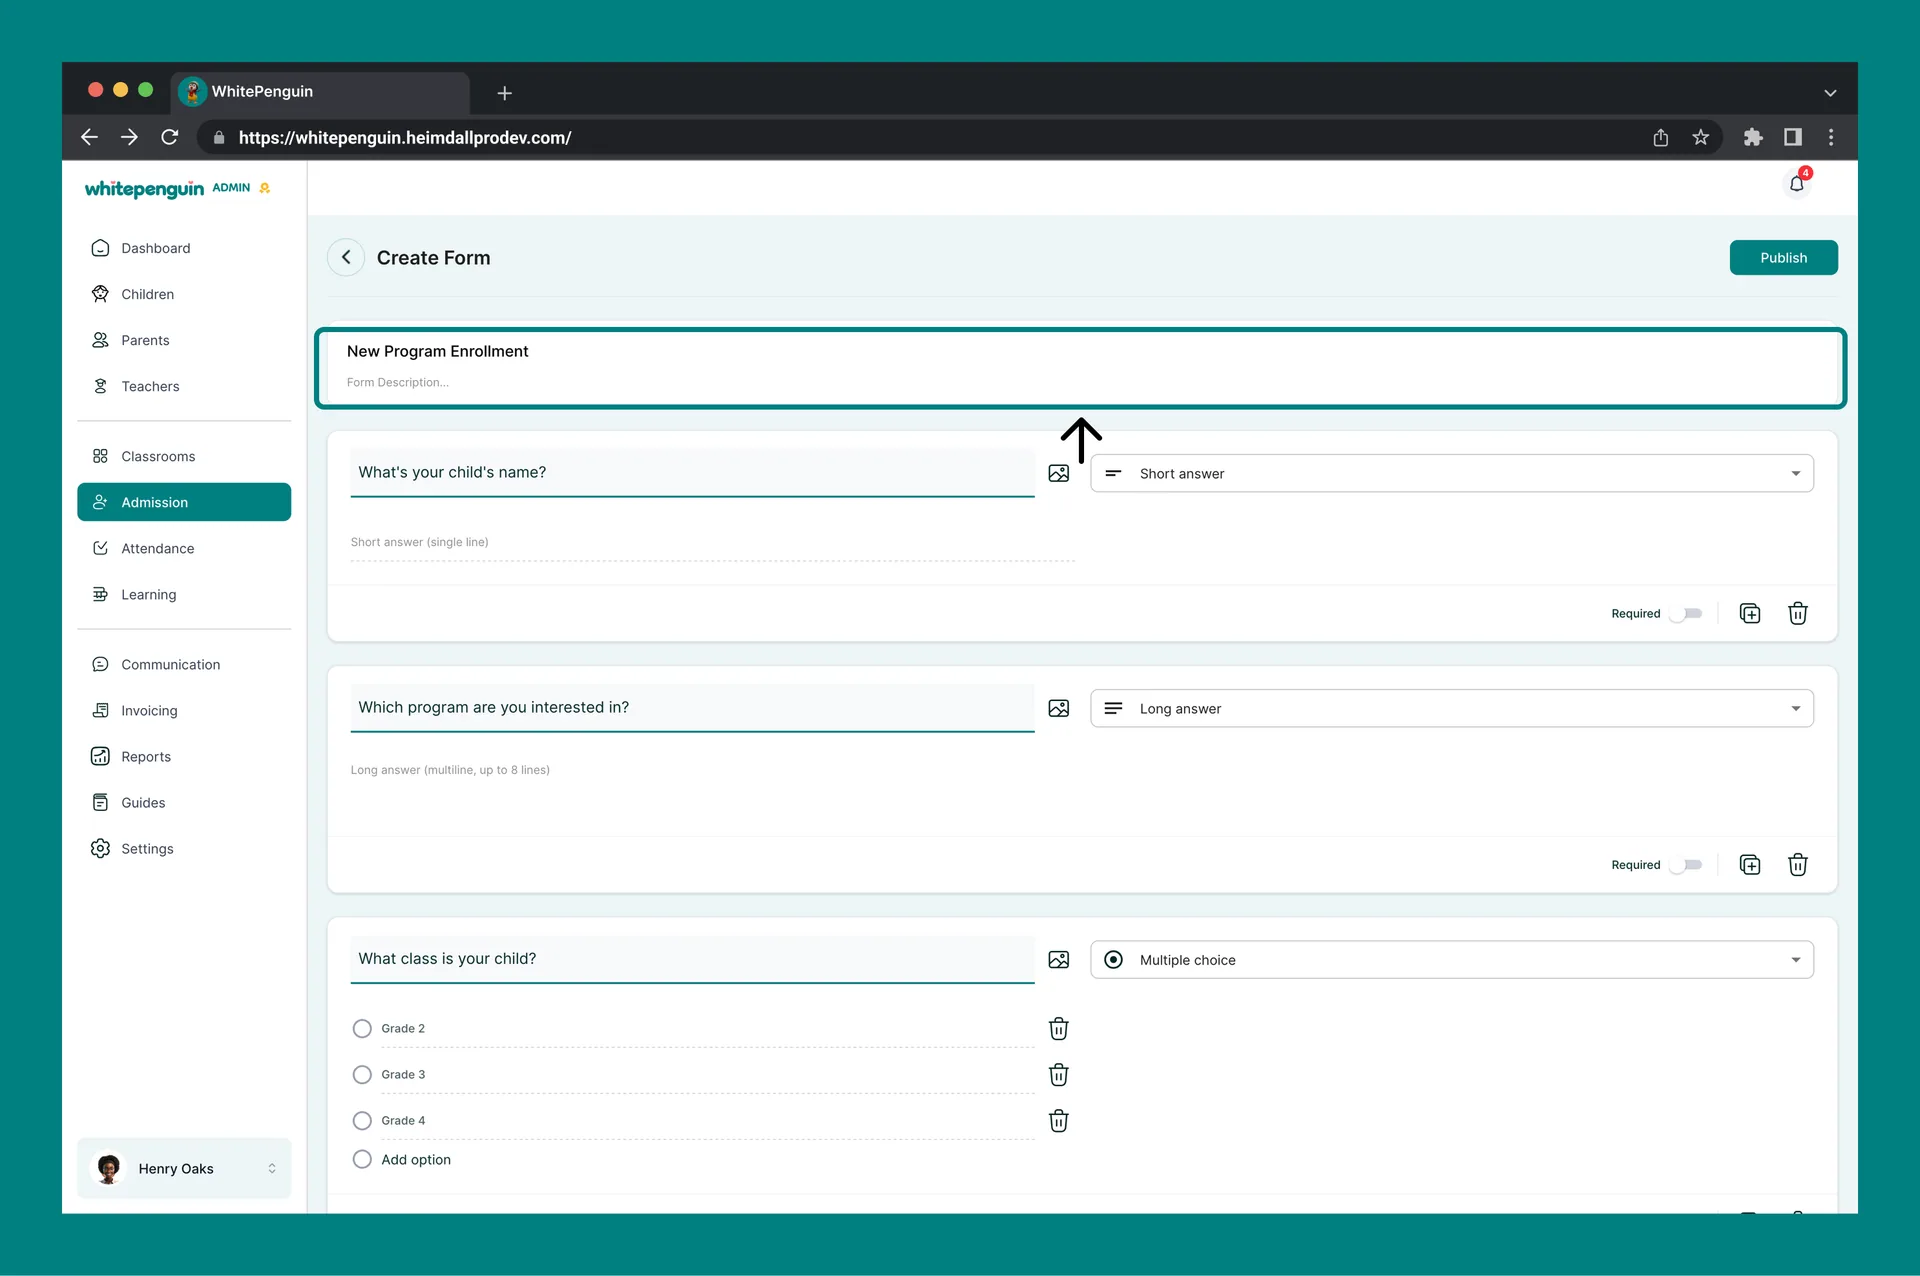
##### 1. Form Title & Description *(required)* [#1-form-title--description-required]
* **Form Title** — a clear name parents will see (e.g. *Admission Enquiry*, *Waiting List Registration*).
* **Form Description** — a short paragraph that introduces the form and what parents should expect.
##### 2. Add & Configure Questions [#2-add--configure-questions]
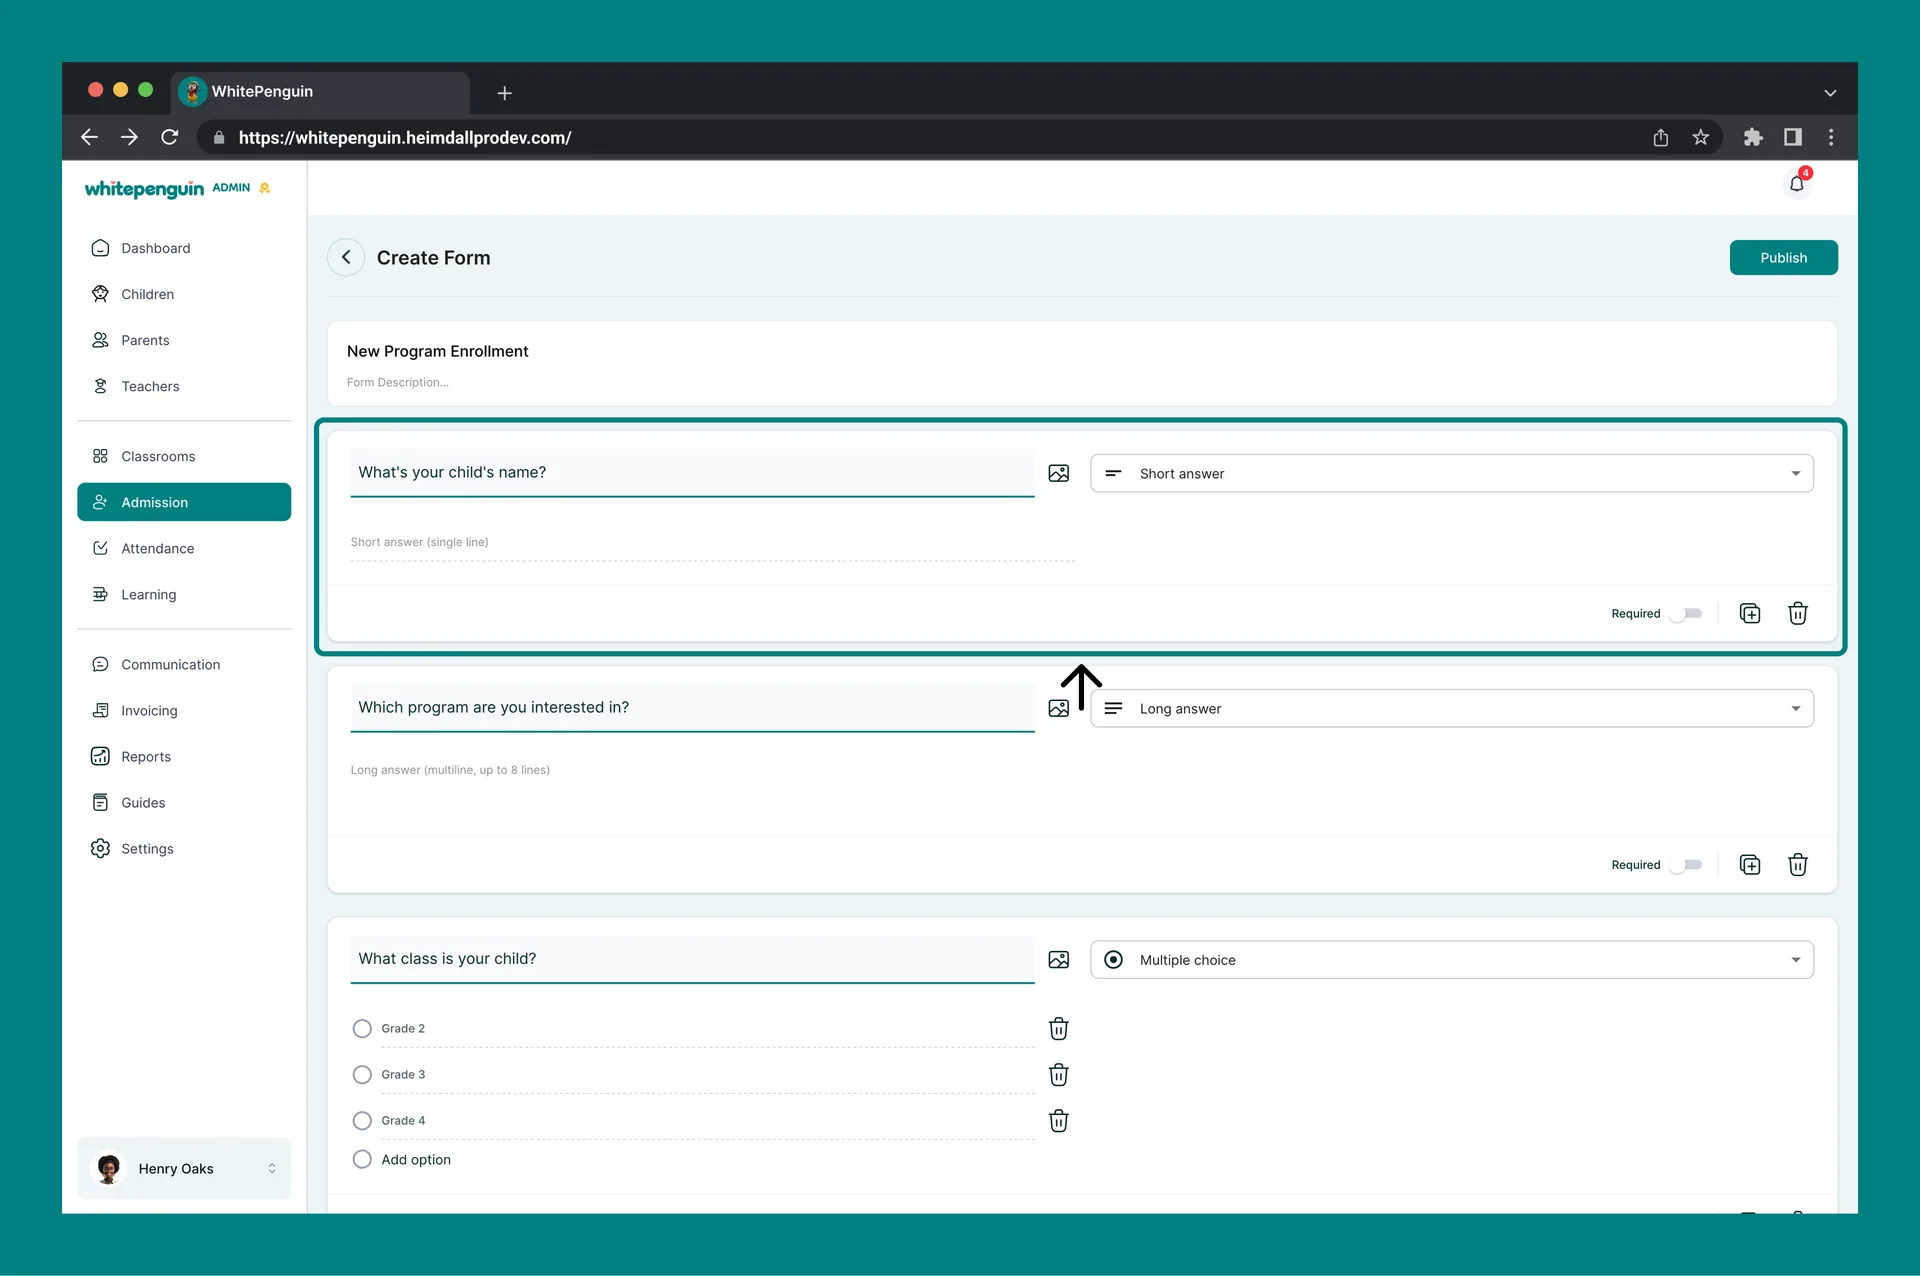
Each question block has:
* A **question label** (e.g. *Parent Name*, *Phone Number*).
* An optional **image** (click the picture icon to add one).
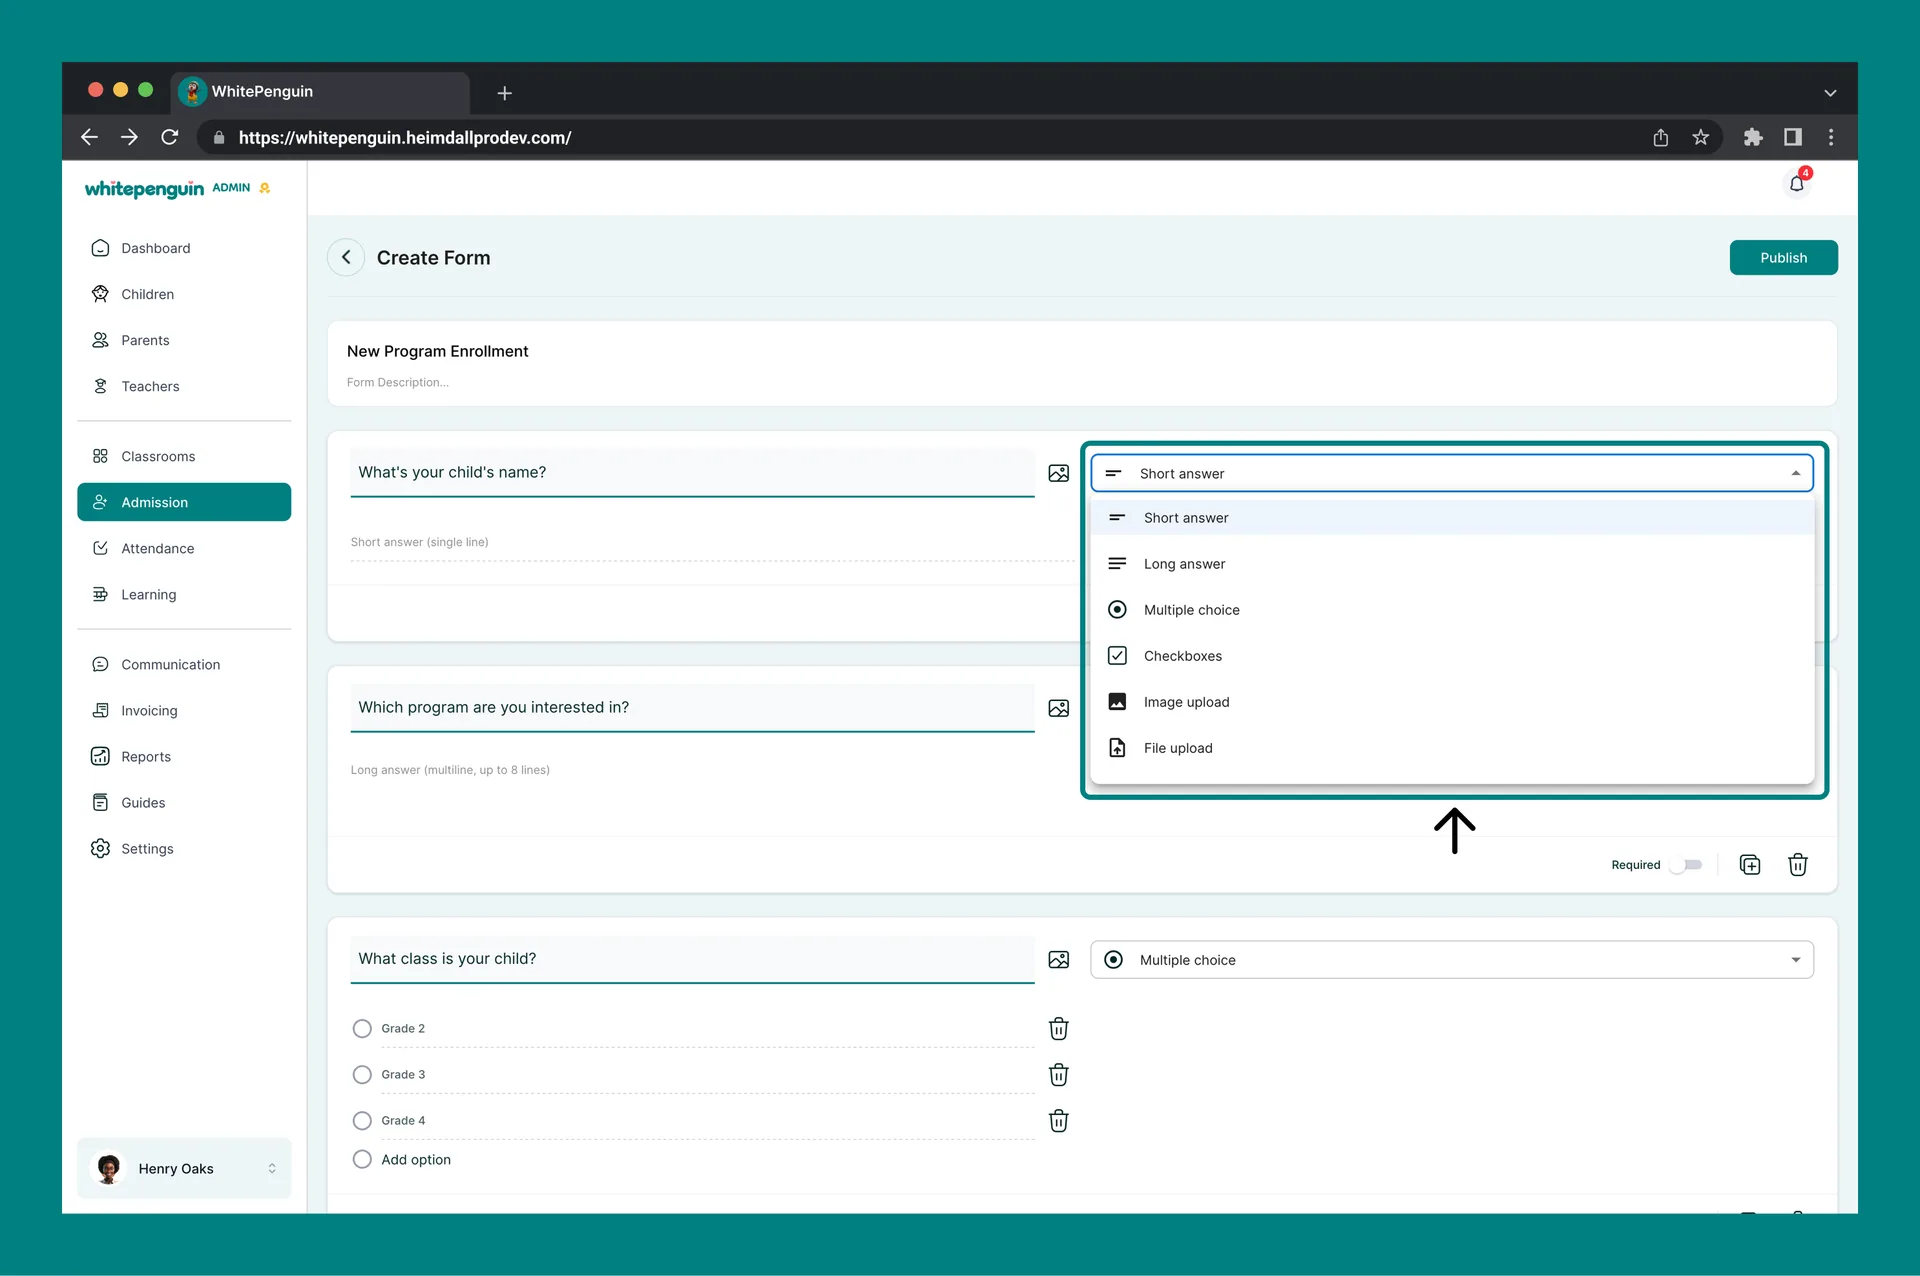
* A **question type** dropdown.
* A **Required** toggle.
* **Duplicate** and **Delete** icons on the right.
Supported question types:
* **Short answer** — single-line text (e.g. *Parent Name*, *Phone Number*).
* **Long answer** — multi-line text, up to 8 lines (e.g. *Overview*).
* **Multiple choice** — single-select with custom options. Click **Add option** to add more.
* **Checkboxes** — multi-select with custom options. Click **Add option** to add more.
* **Image upload** — respondent can attach an image to this question.
* **File upload** — respondent can attach a document to this question.
Use the **Required** toggle on each question to mark it as mandatory. Parents will not be able to submit the form until all required questions are answered.
##### 3. Add More Questions [#3-add-more-questions]
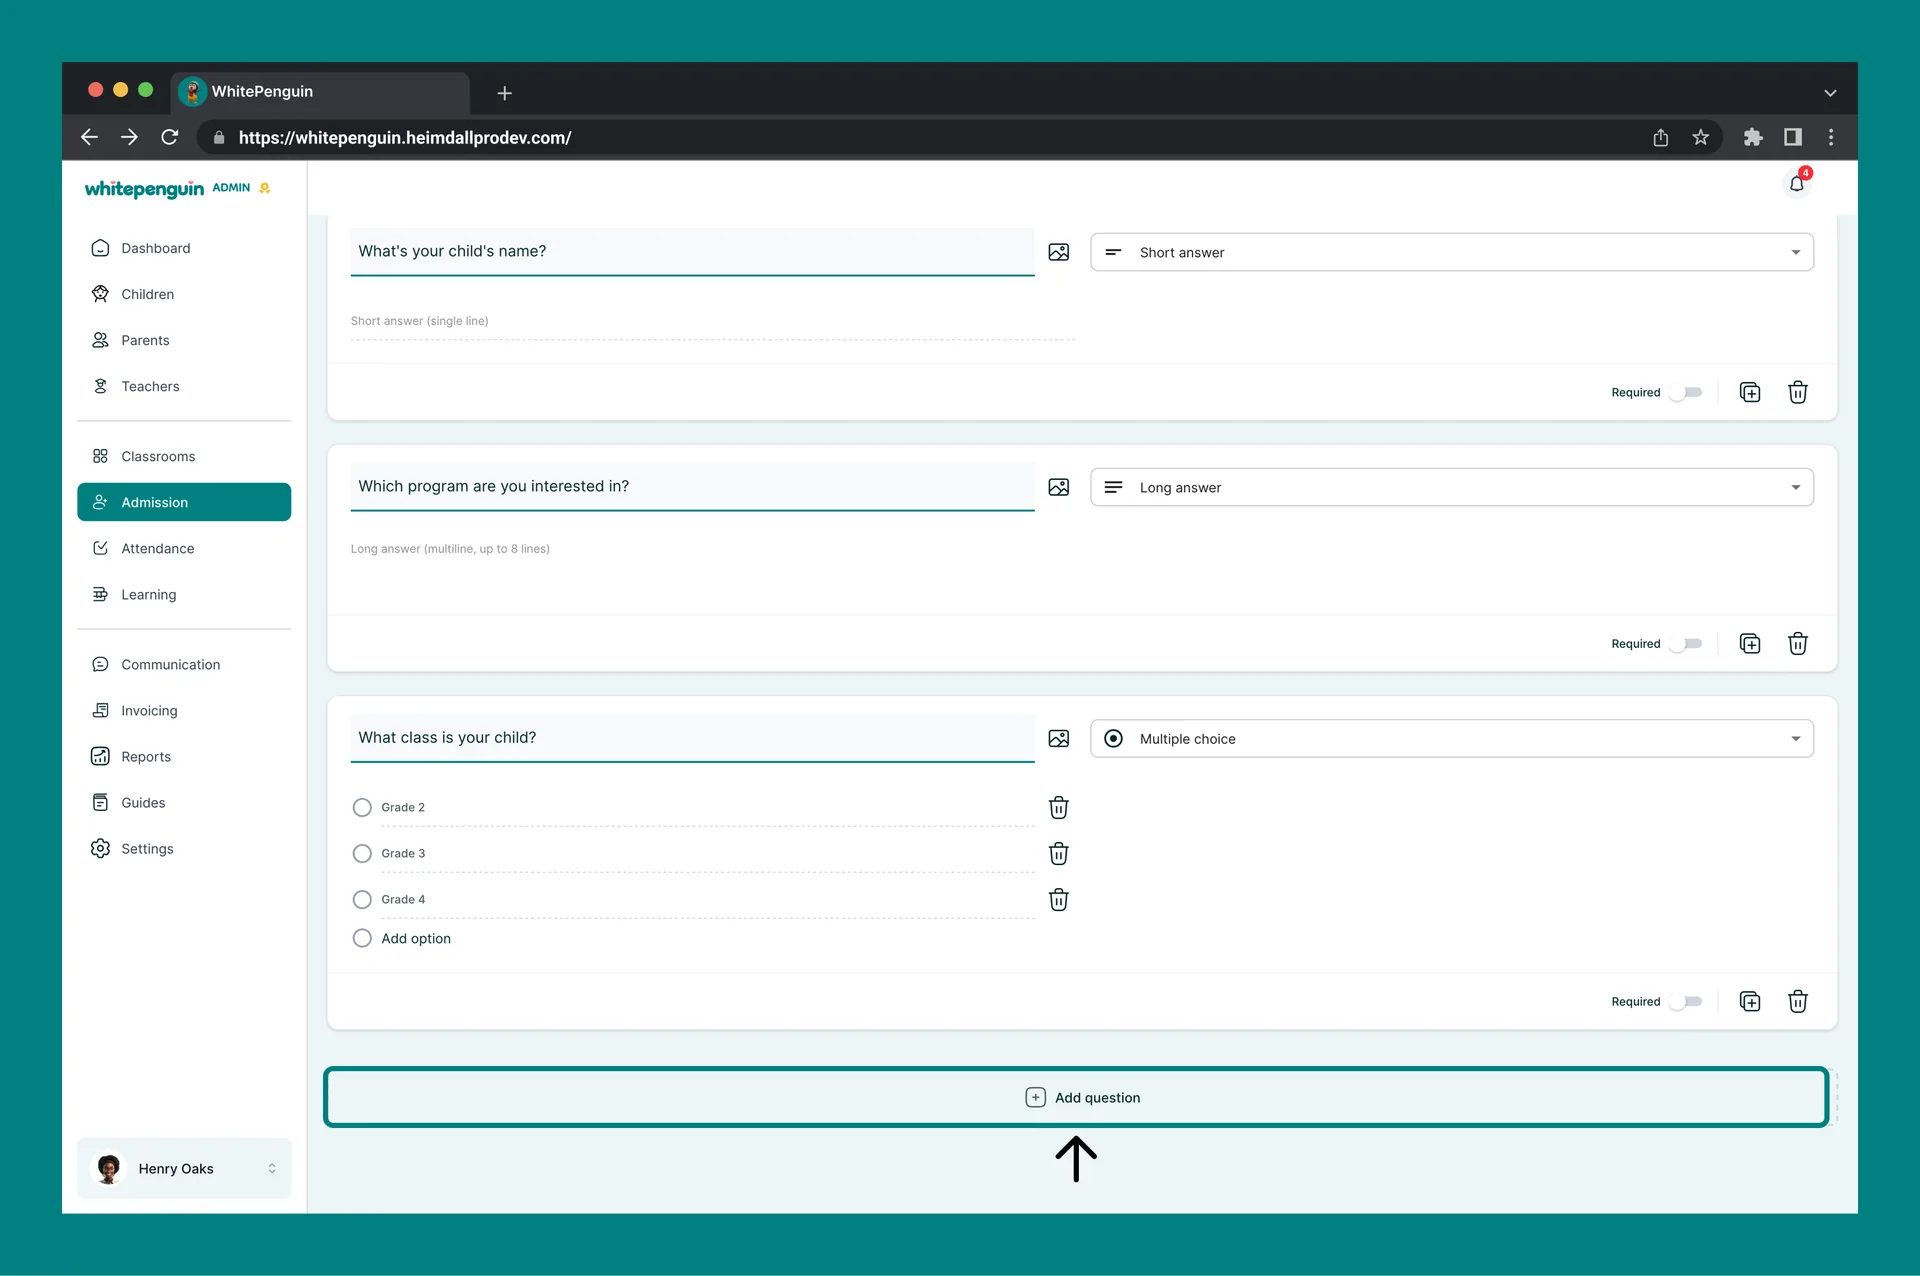
Click **+ Add question** at the bottom of the form to insert a new question block. You can reorder, duplicate, or delete any question at any time before publishing.
#### After Publishing the Form [#after-publishing-the-form]
* A success toast appears: *"Form published — Your admission form has been published."*
* The form now shows in the **Tours & Forms** list with **Type: Form** and **Status: Published**.
* The form URL is live and can be shared with parents.
### Key Status Progression [#key-status-progression]
| Stage | Tour Lead Status | Form Lead Status |
| ------------------------------ | -------------------------------- | -------------------------------- |
| Initial booking / submission | Tour Scheduled | Form Submitted |
| Tour completed / lead reviewed | Tour Completed | Reviewed (custom) |
| Offer sent | Offer Sent (moved to Admissions) | Offer Sent (moved to Admissions) |
| Payment confirmed | Child profile → Active | Child profile → Active |
### Tips & Related Info [#tips--related-info]
* **Reuse the same link** — once published, the tour or form URL stays the same. Share it across WhatsApp, email, your website, and social media.
* **Preview before sharing** — use the **Preview Form** or **Preview Tour** action from the three-dot menu to see exactly what parents will see.
* **Unpublish, don't delete** — if a tour or form is temporarily not needed, use **Unpublish** to hide it from parents without losing your configuration. You can republish it any time.
* **View Responses** — open the three-dot menu on a form row and click **View Responses** to see all submissions for that form.
* **Buffer periods matter** — set sensible *Before Tour* and *After Tour* buffers so staff have time to reset between visits.
* **Limit upcoming tours per family** to prevent a single family from booking many slots and blocking other parents.
* **All bookings and submissions flow into Leads & Requests** — manage every conversion from a single place.
* **Offers always create both a parent and a child profile** as *Inactive*. Activation happens automatically once the admission invoice is paid.
### FAQs [#faqs]
A **Tour** is a bookable calendar event — parents pick a time slot and visit the school. A **Form** is a submission form — parents fill in details so the admin can follow up. Both create leads in the **Leads & Requests** tab.
For a tour, the link is built from the **URL** field in the **Basic** step (e.g. `https://yourschool.whitepenguin.com/tour-events/your-slug`). For a form, the link is generated automatically when you publish it. You can copy either link from the tour/form's settings or the **Tours & Forms** list.
Yes. In the **Availability** step of a tour, pick the day from the dropdown and set a start and end time. Click the **+** icon to add multiple time ranges per day, or repeat for each weekday you want to open.
The most common reason is that no availability slot has been added. You will see the warning: *"At least one availability slot is required."* Add at least one day with a valid start/end time, then **Save** will become active.
By default, bookings are confirmed automatically and both the parent and admin receive a confirmation. If you toggle on **Requires confirmation** in the **Questions** step, bookings will instead wait for the admin to confirm manually before they are finalized.
Yes. Open the three-dot menu on the row and click **Edit Form** or edit the tour from its action menu. You can update questions, availability, notifications, and notes at any time. Existing bookings and submissions are preserved.
Every submission and booking appears as a new lead in the **Leads & Requests** tab. Tour bookings also appear on the **Events** calendar. Once you send an offer, the lead moves to the **Admissions** section.
Two options: **Online** — the parent pays directly via Paystack (if your school has enabled Paystack); or **Manual** — the admin records the payment from the invoice page or from the parent's profile on the **Parents** tab. Once the invoice is marked paid, the child's profile becomes **Active**.
Yes. Open the three-dot menu on the row and click **Delete**. If you only want to stop accepting new bookings or submissions temporarily, use **Unpublish** instead — this preserves all responses and lets you republish later.
As soon as the offer is sent, a **Parent profile** and a **Child profile** are automatically created with status **Inactive**. Both remain inactive until the admission invoice is paid, after which the **Child profile** is automatically set to **Active** and admission is complete.