# Add & Upload Photos
URL: https://whitepenguin.sonicar.tech/docs/classrooms-activities/add-upload-photos/
> Add and upload photos in WhitePenguin to share classroom moments and (optionally) notify parents/guardians.
## Overview [#overview]
Use **Add Photo** to upload photos for a specific child. Uploaded media appears in the Activities feed and can be shared with parents depending on your notification settings.
You can include:
* **Classroom**
* **Student**
* **Photos/media upload**
* **Notes** (optional)
* **Notify parent/guardian** (optional)
## How to Access [#how-to-access]
* **Admins**
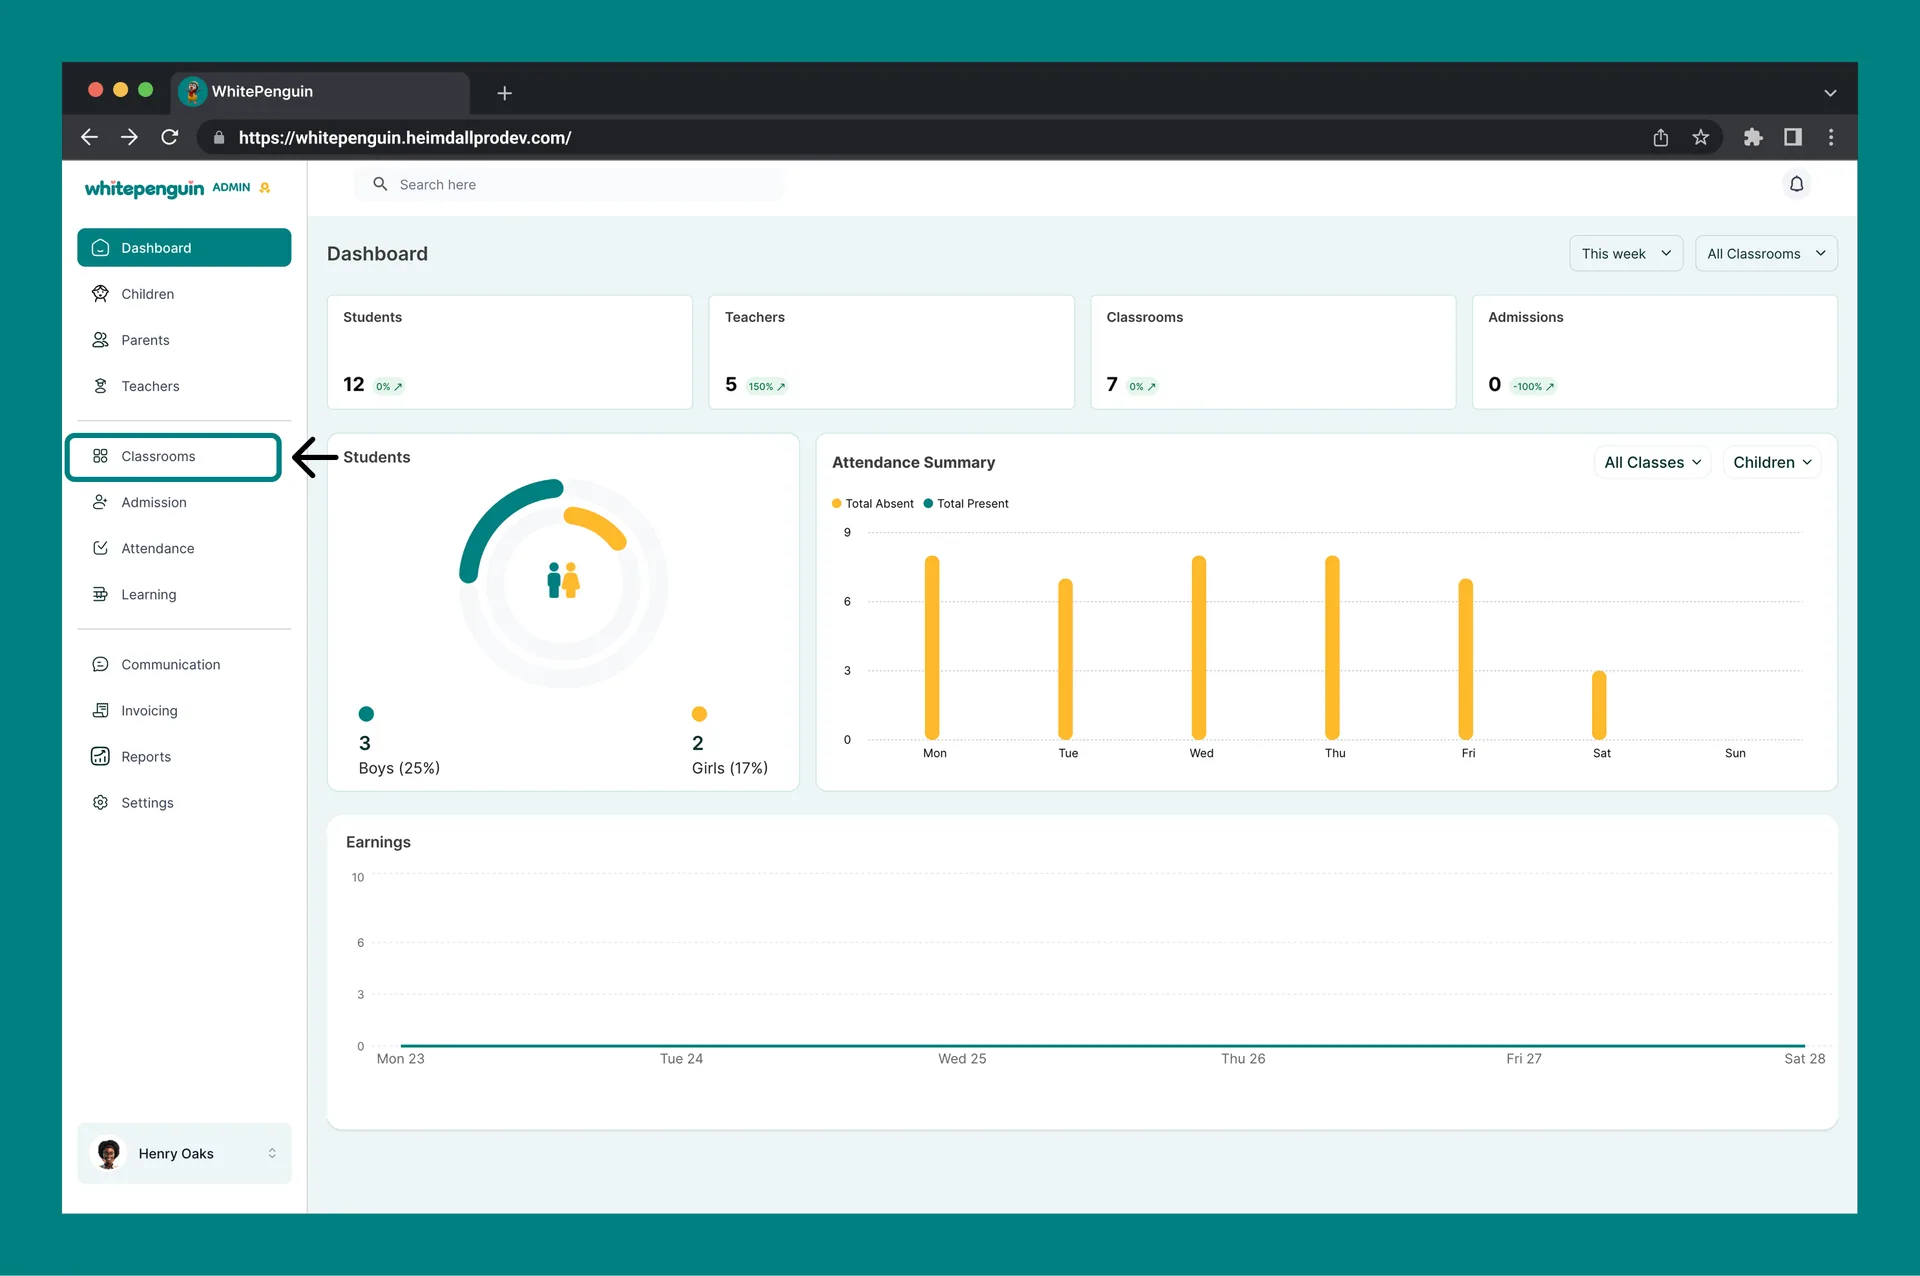
1. Click **Classrooms** in the left sidebar.
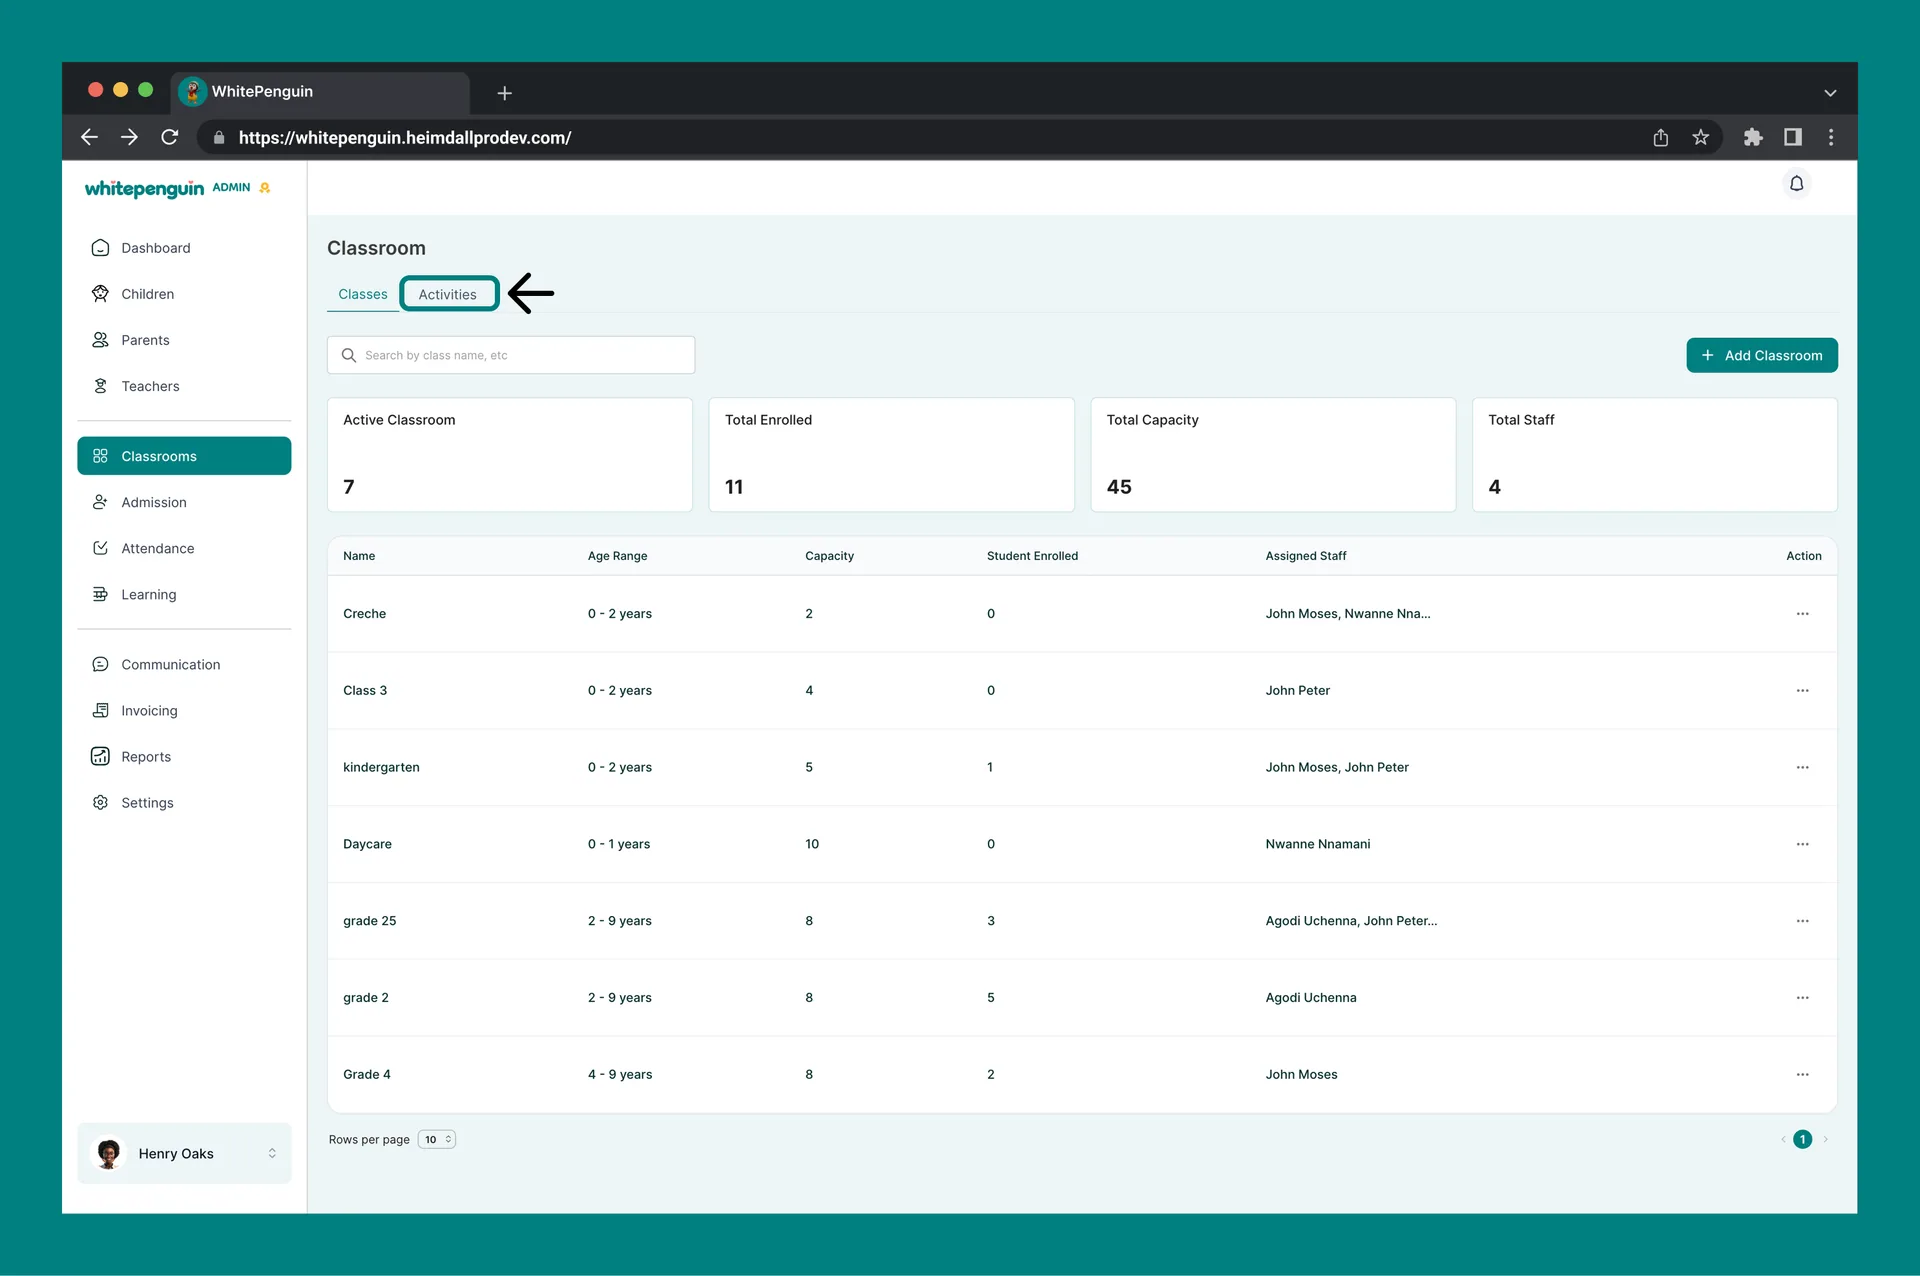
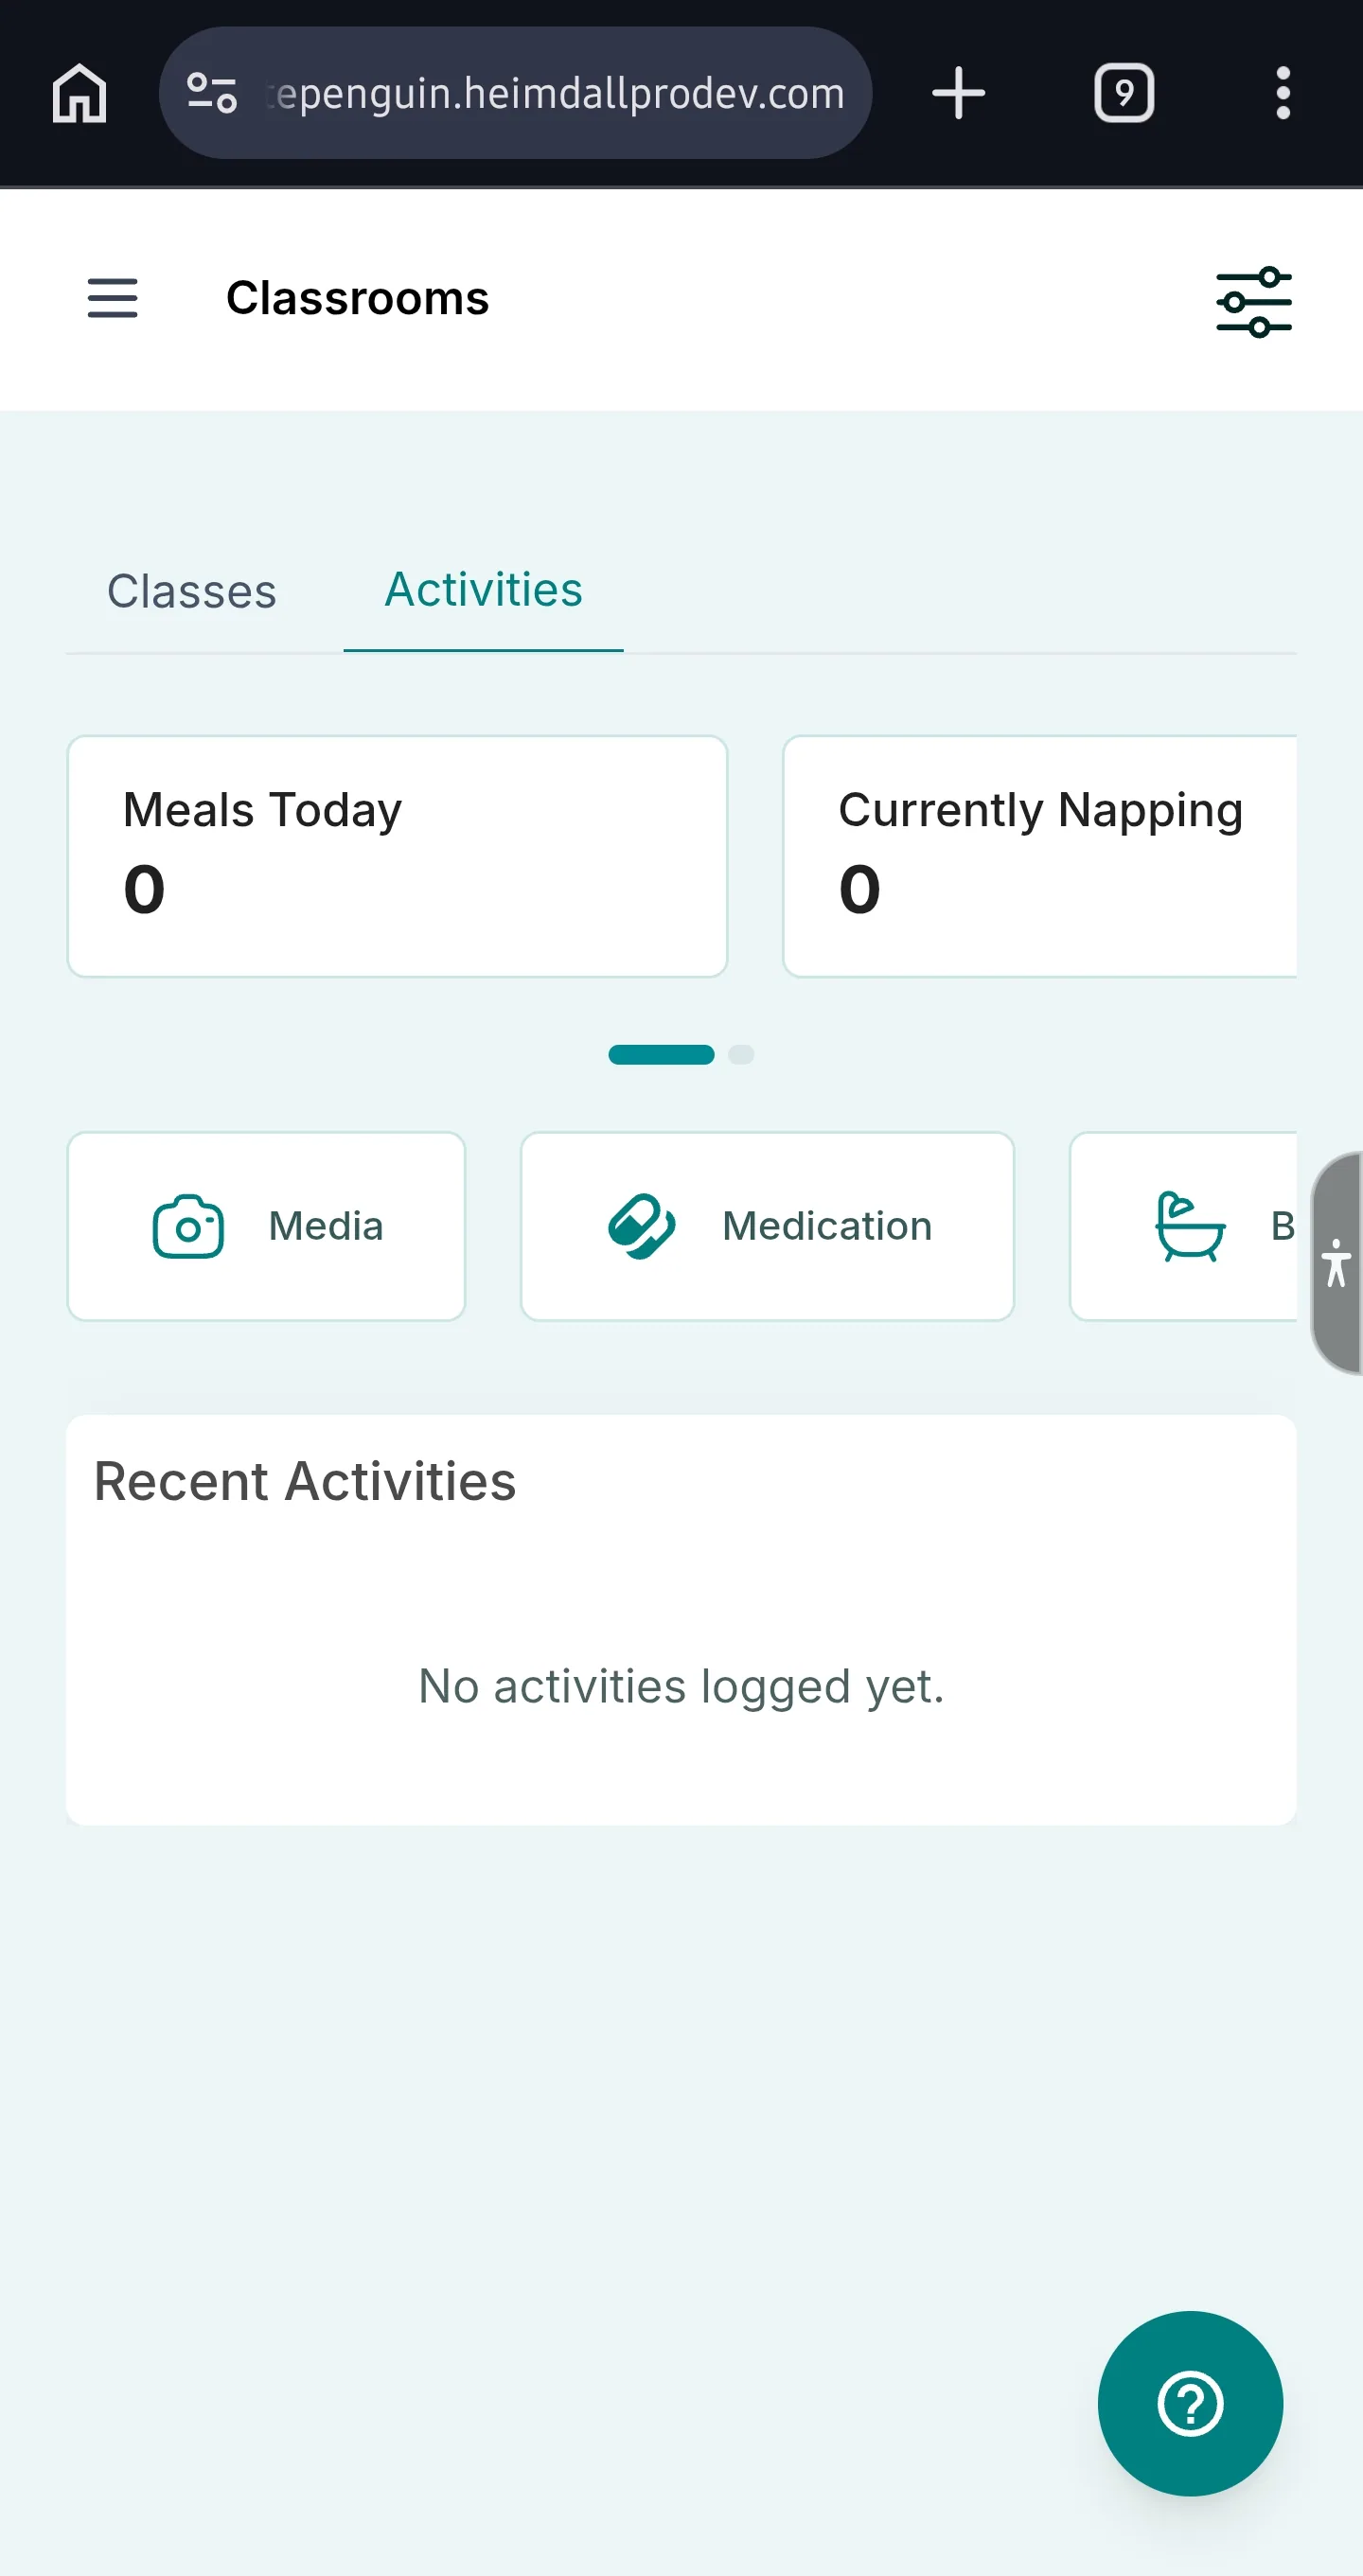
2. Open the **Activities** tab.
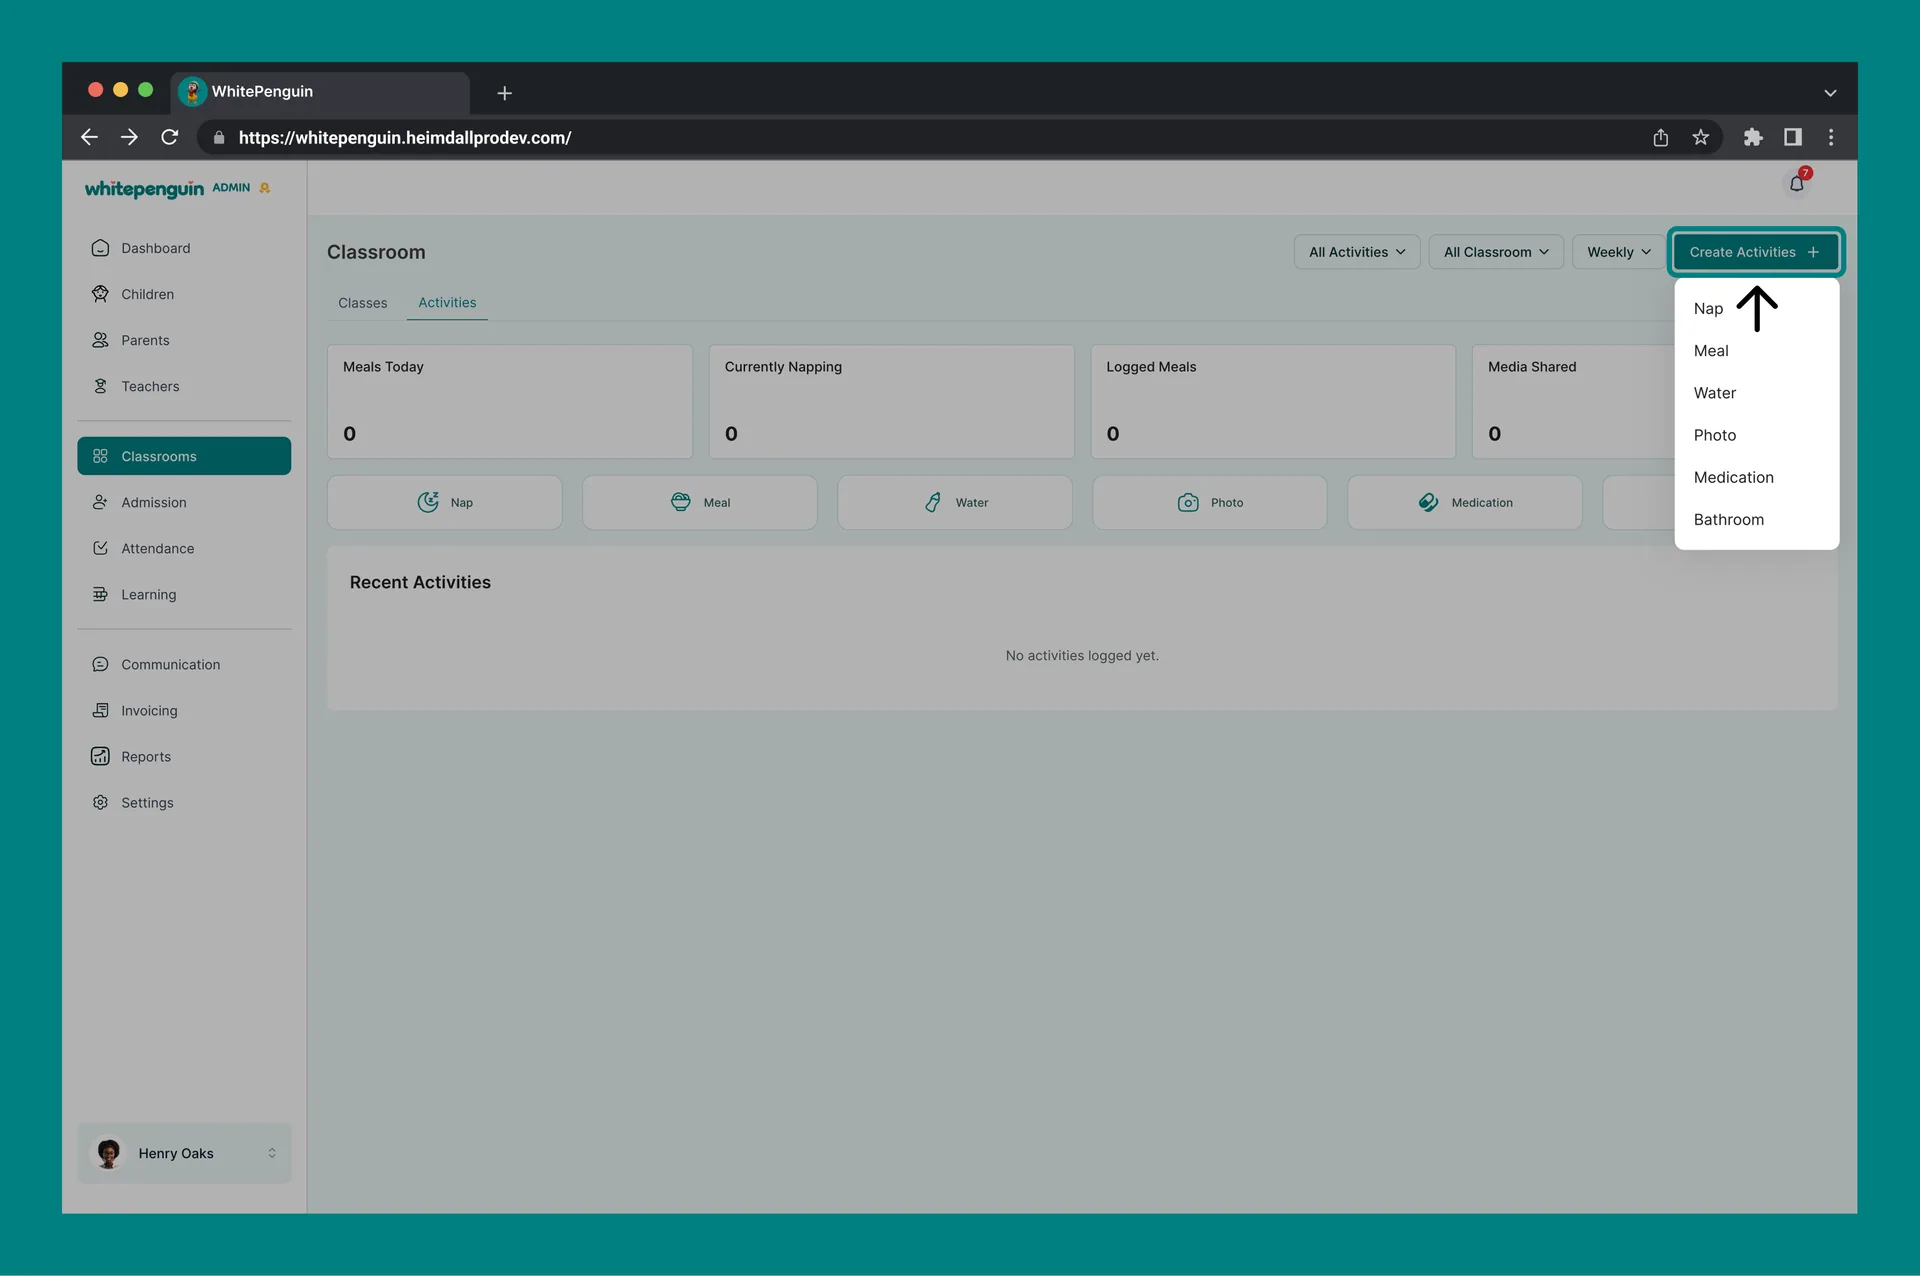
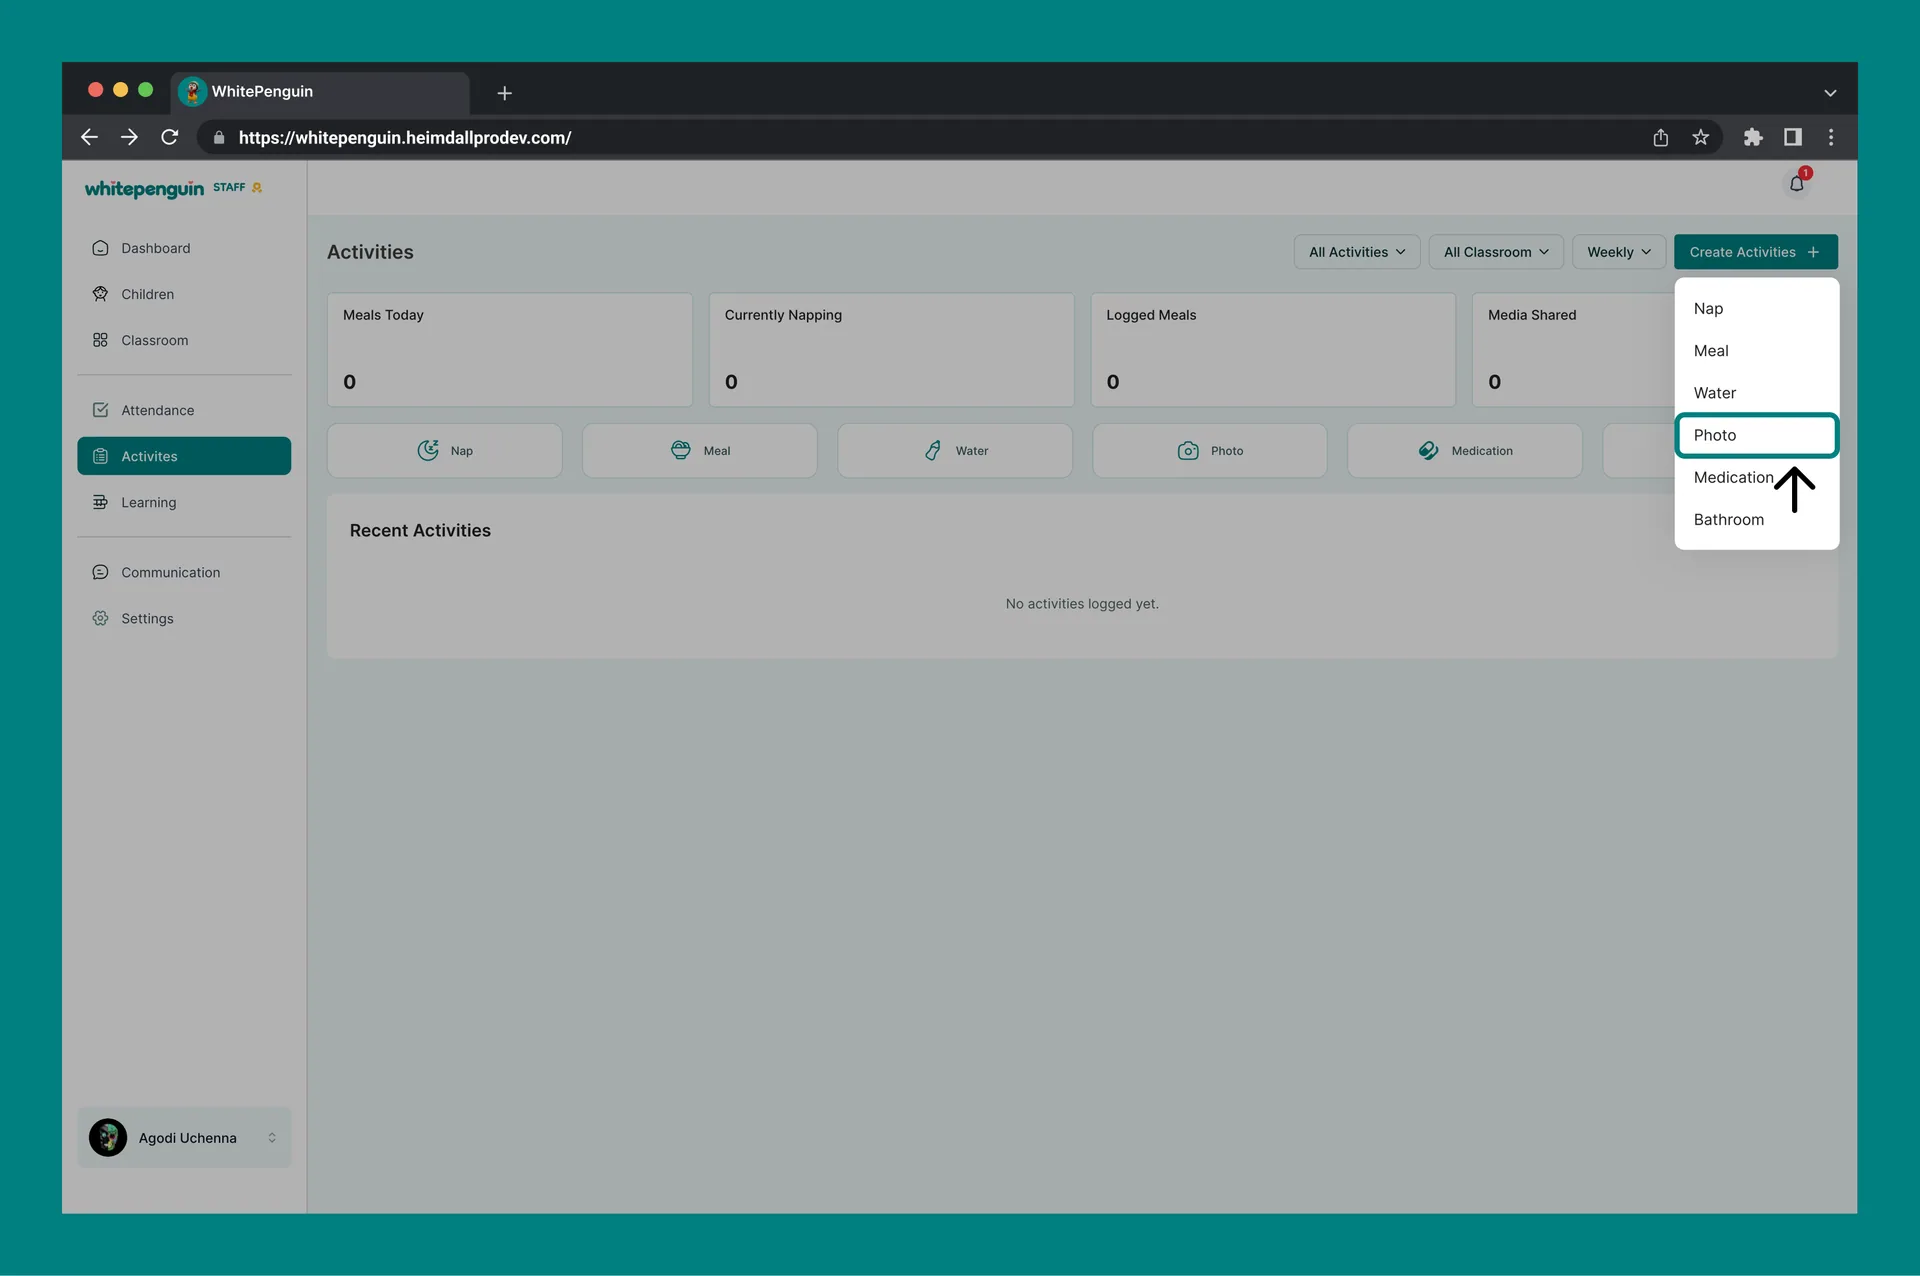
3. Click **Create Activities** (top right), then choose **Photo**.
* **Staff**
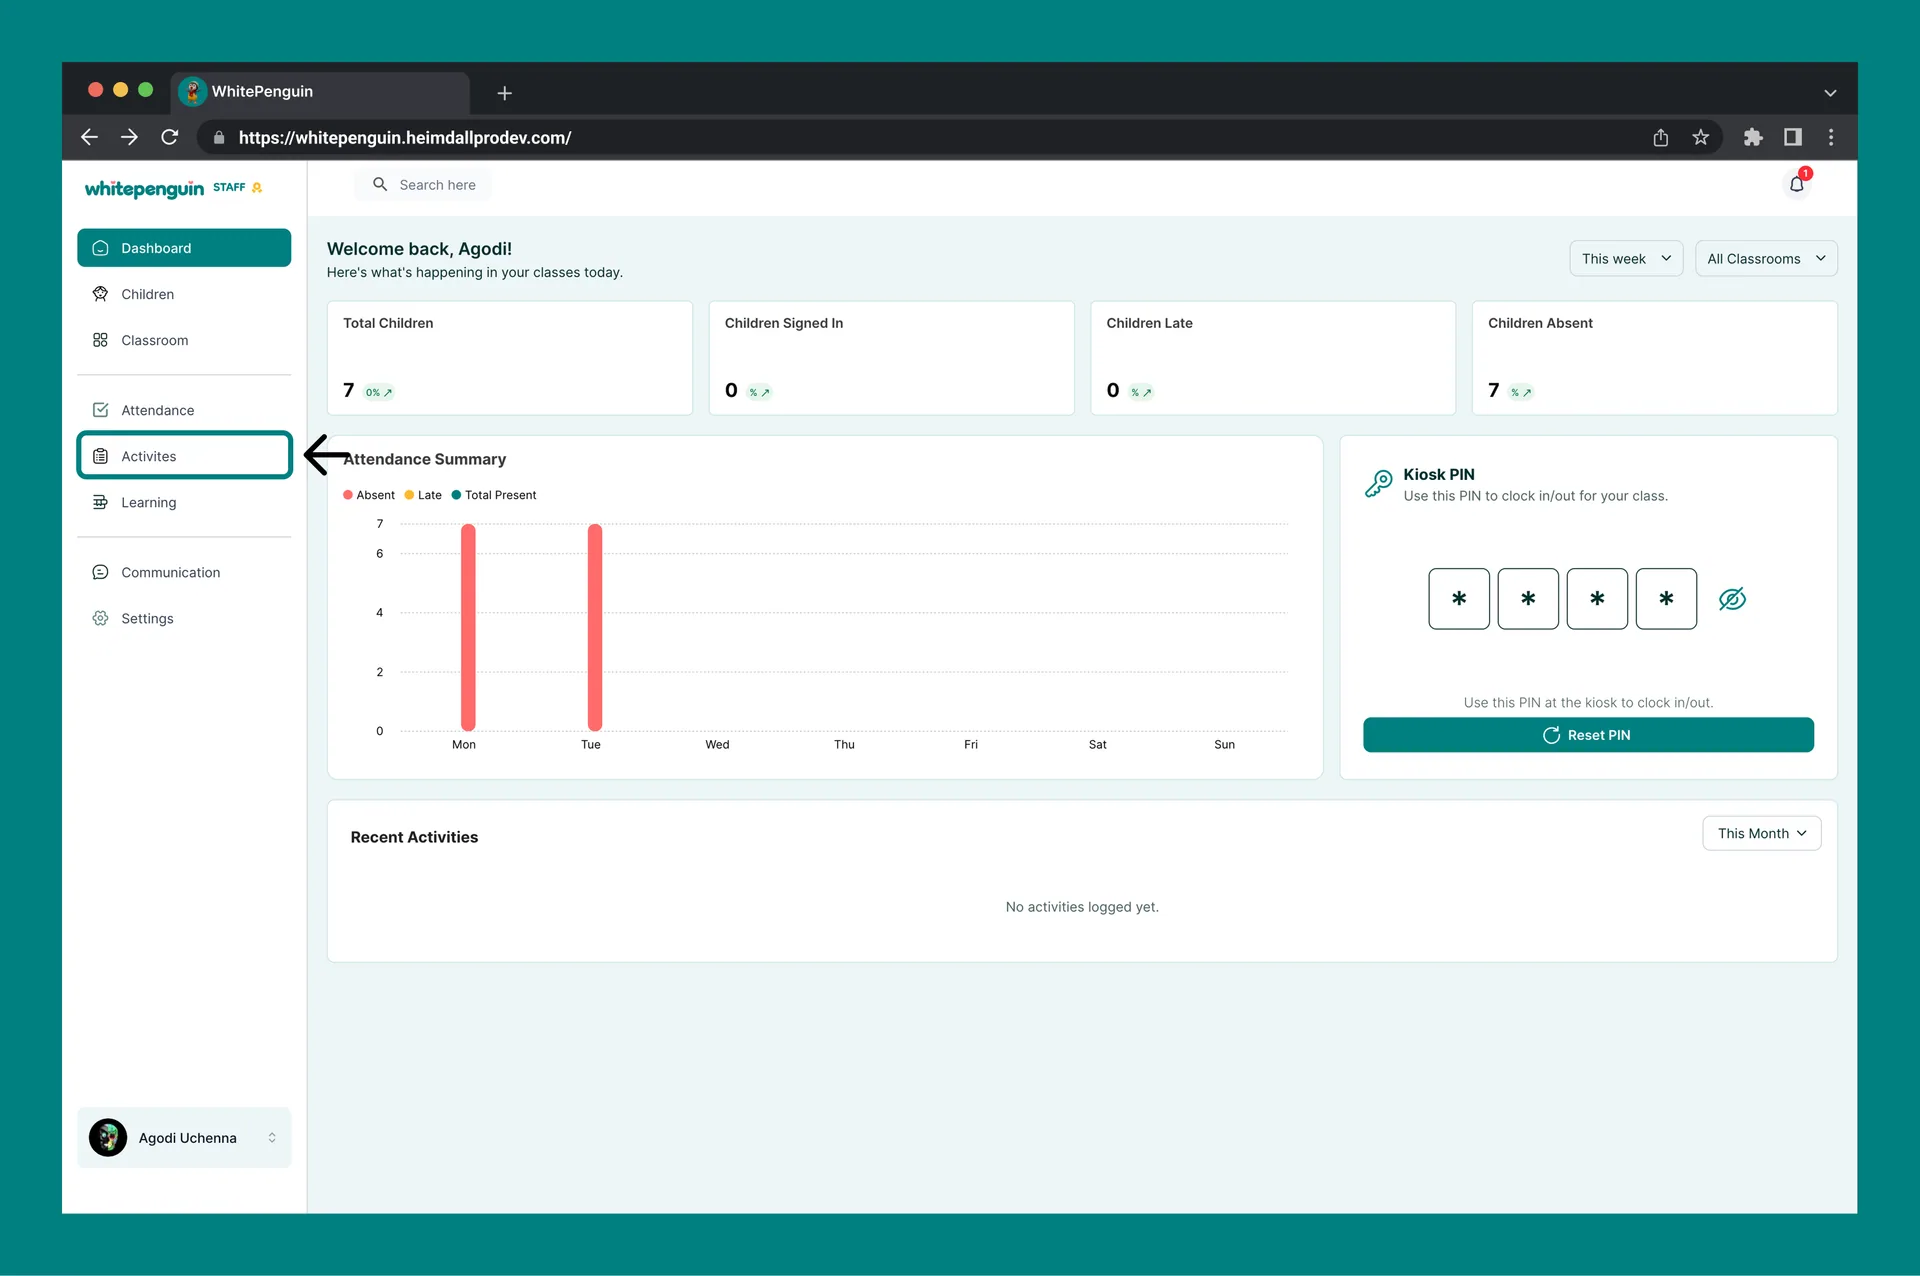
1. Click **Activities** in the left sidebar.
2. Click **Create Activities**, then choose **Photo**.
## Roles & Access [#roles--access]
**Access is based on custom roles.** Your **school admin** creates **custom roles** for all users and controls exactly which permissions each role has — **View**, **Edit**, **Create**, and **Delete** — for every section of the system, including Activities.
Whether you can upload photos depends entirely on the **custom role** assigned to you:
* Roles with **Create** permission for Activities can upload photos.
* Roles with **View** permission can see the Activities feed and shared media.
* Classroom and child visibility follows the role's permissions and the user's classroom assignments.
**Where to manage roles:** Go to **Settings → Roles & Permissions**, then click **+ Create Role** to build a new custom role, or select an existing role to toggle its permissions. **Super Admin** permissions are fixed and cannot be edited.
## How to Add and Upload Photos [#how-to-add-and-upload-photos]
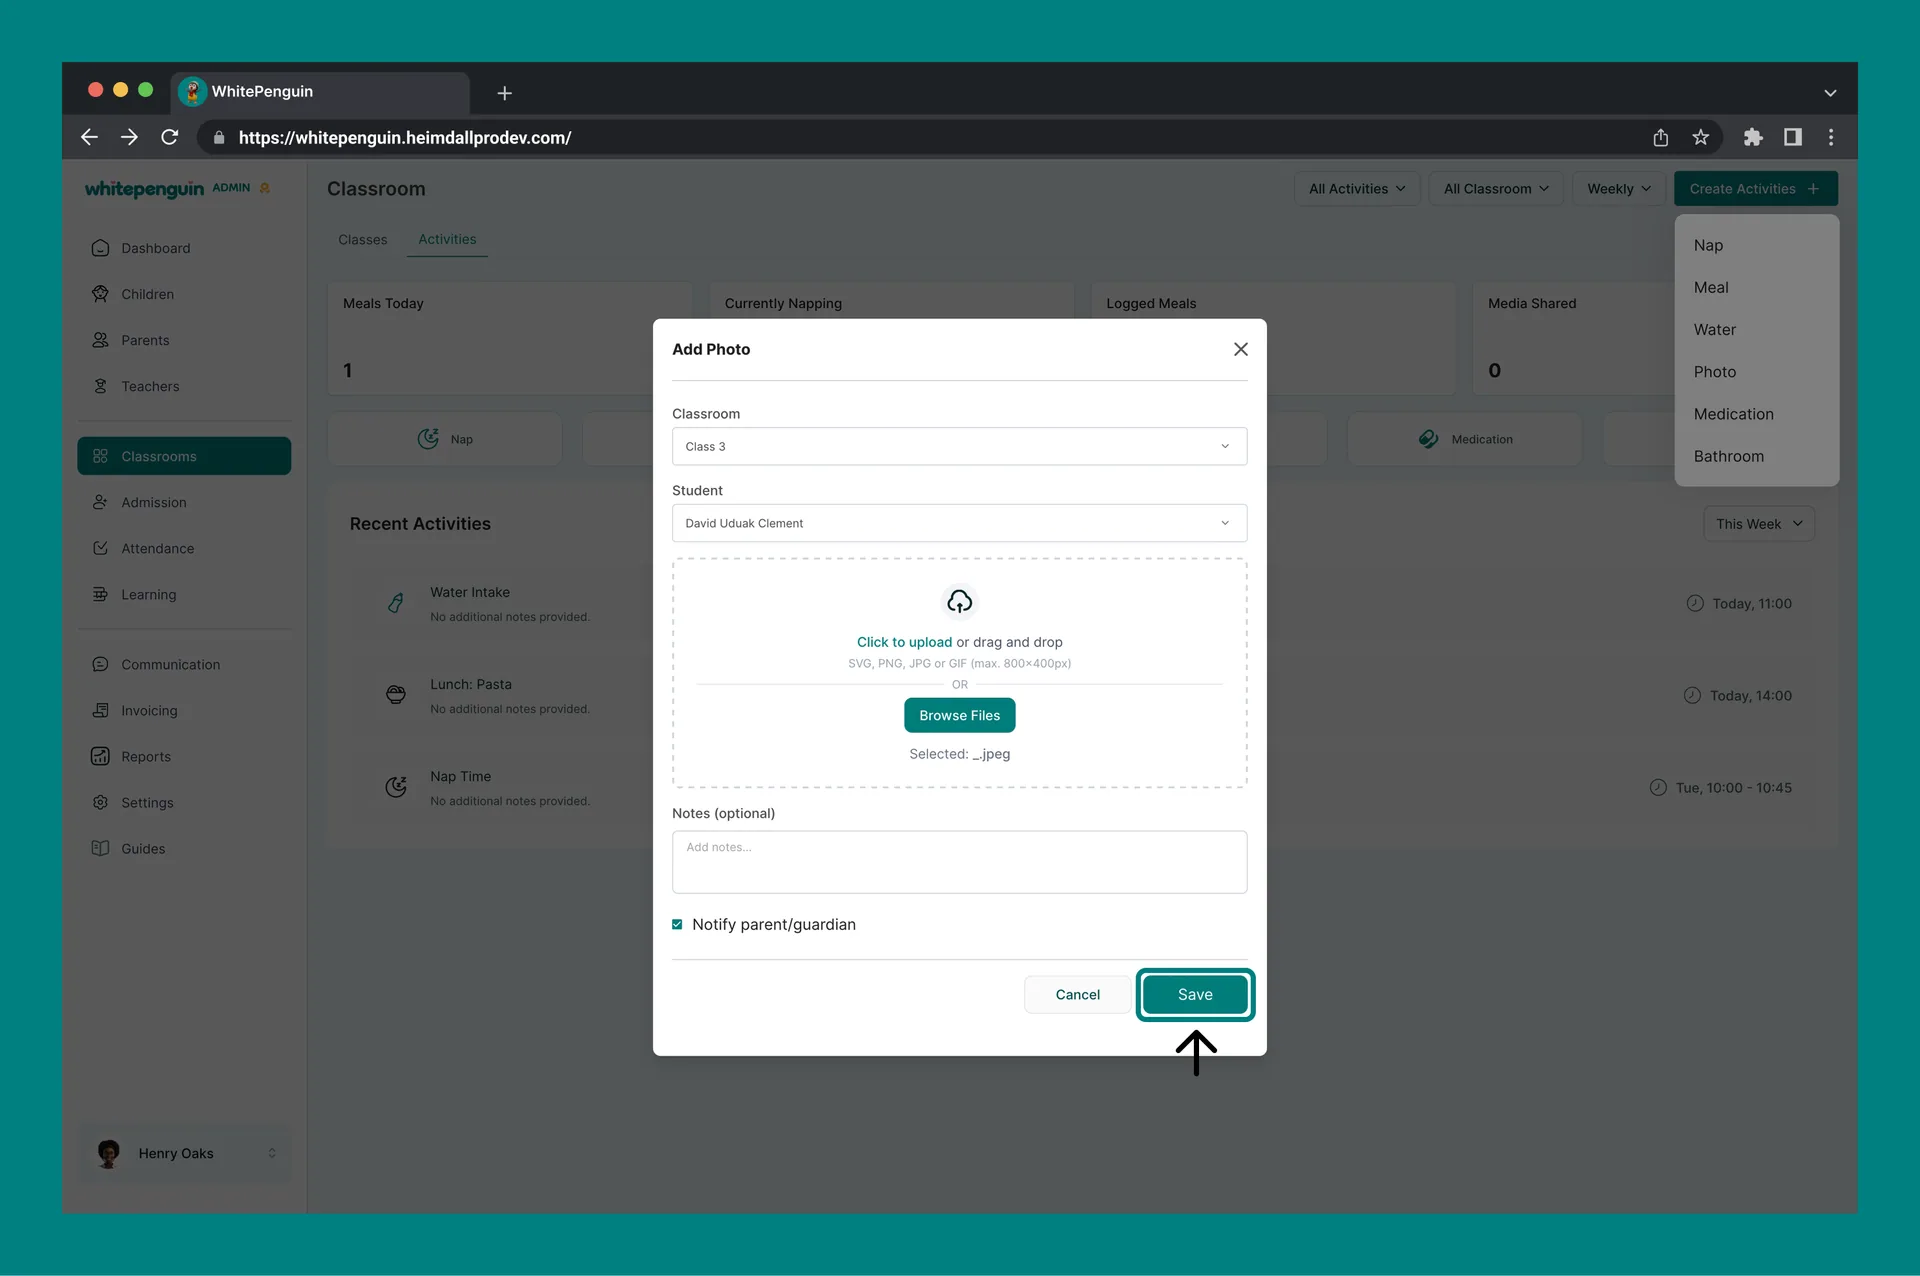
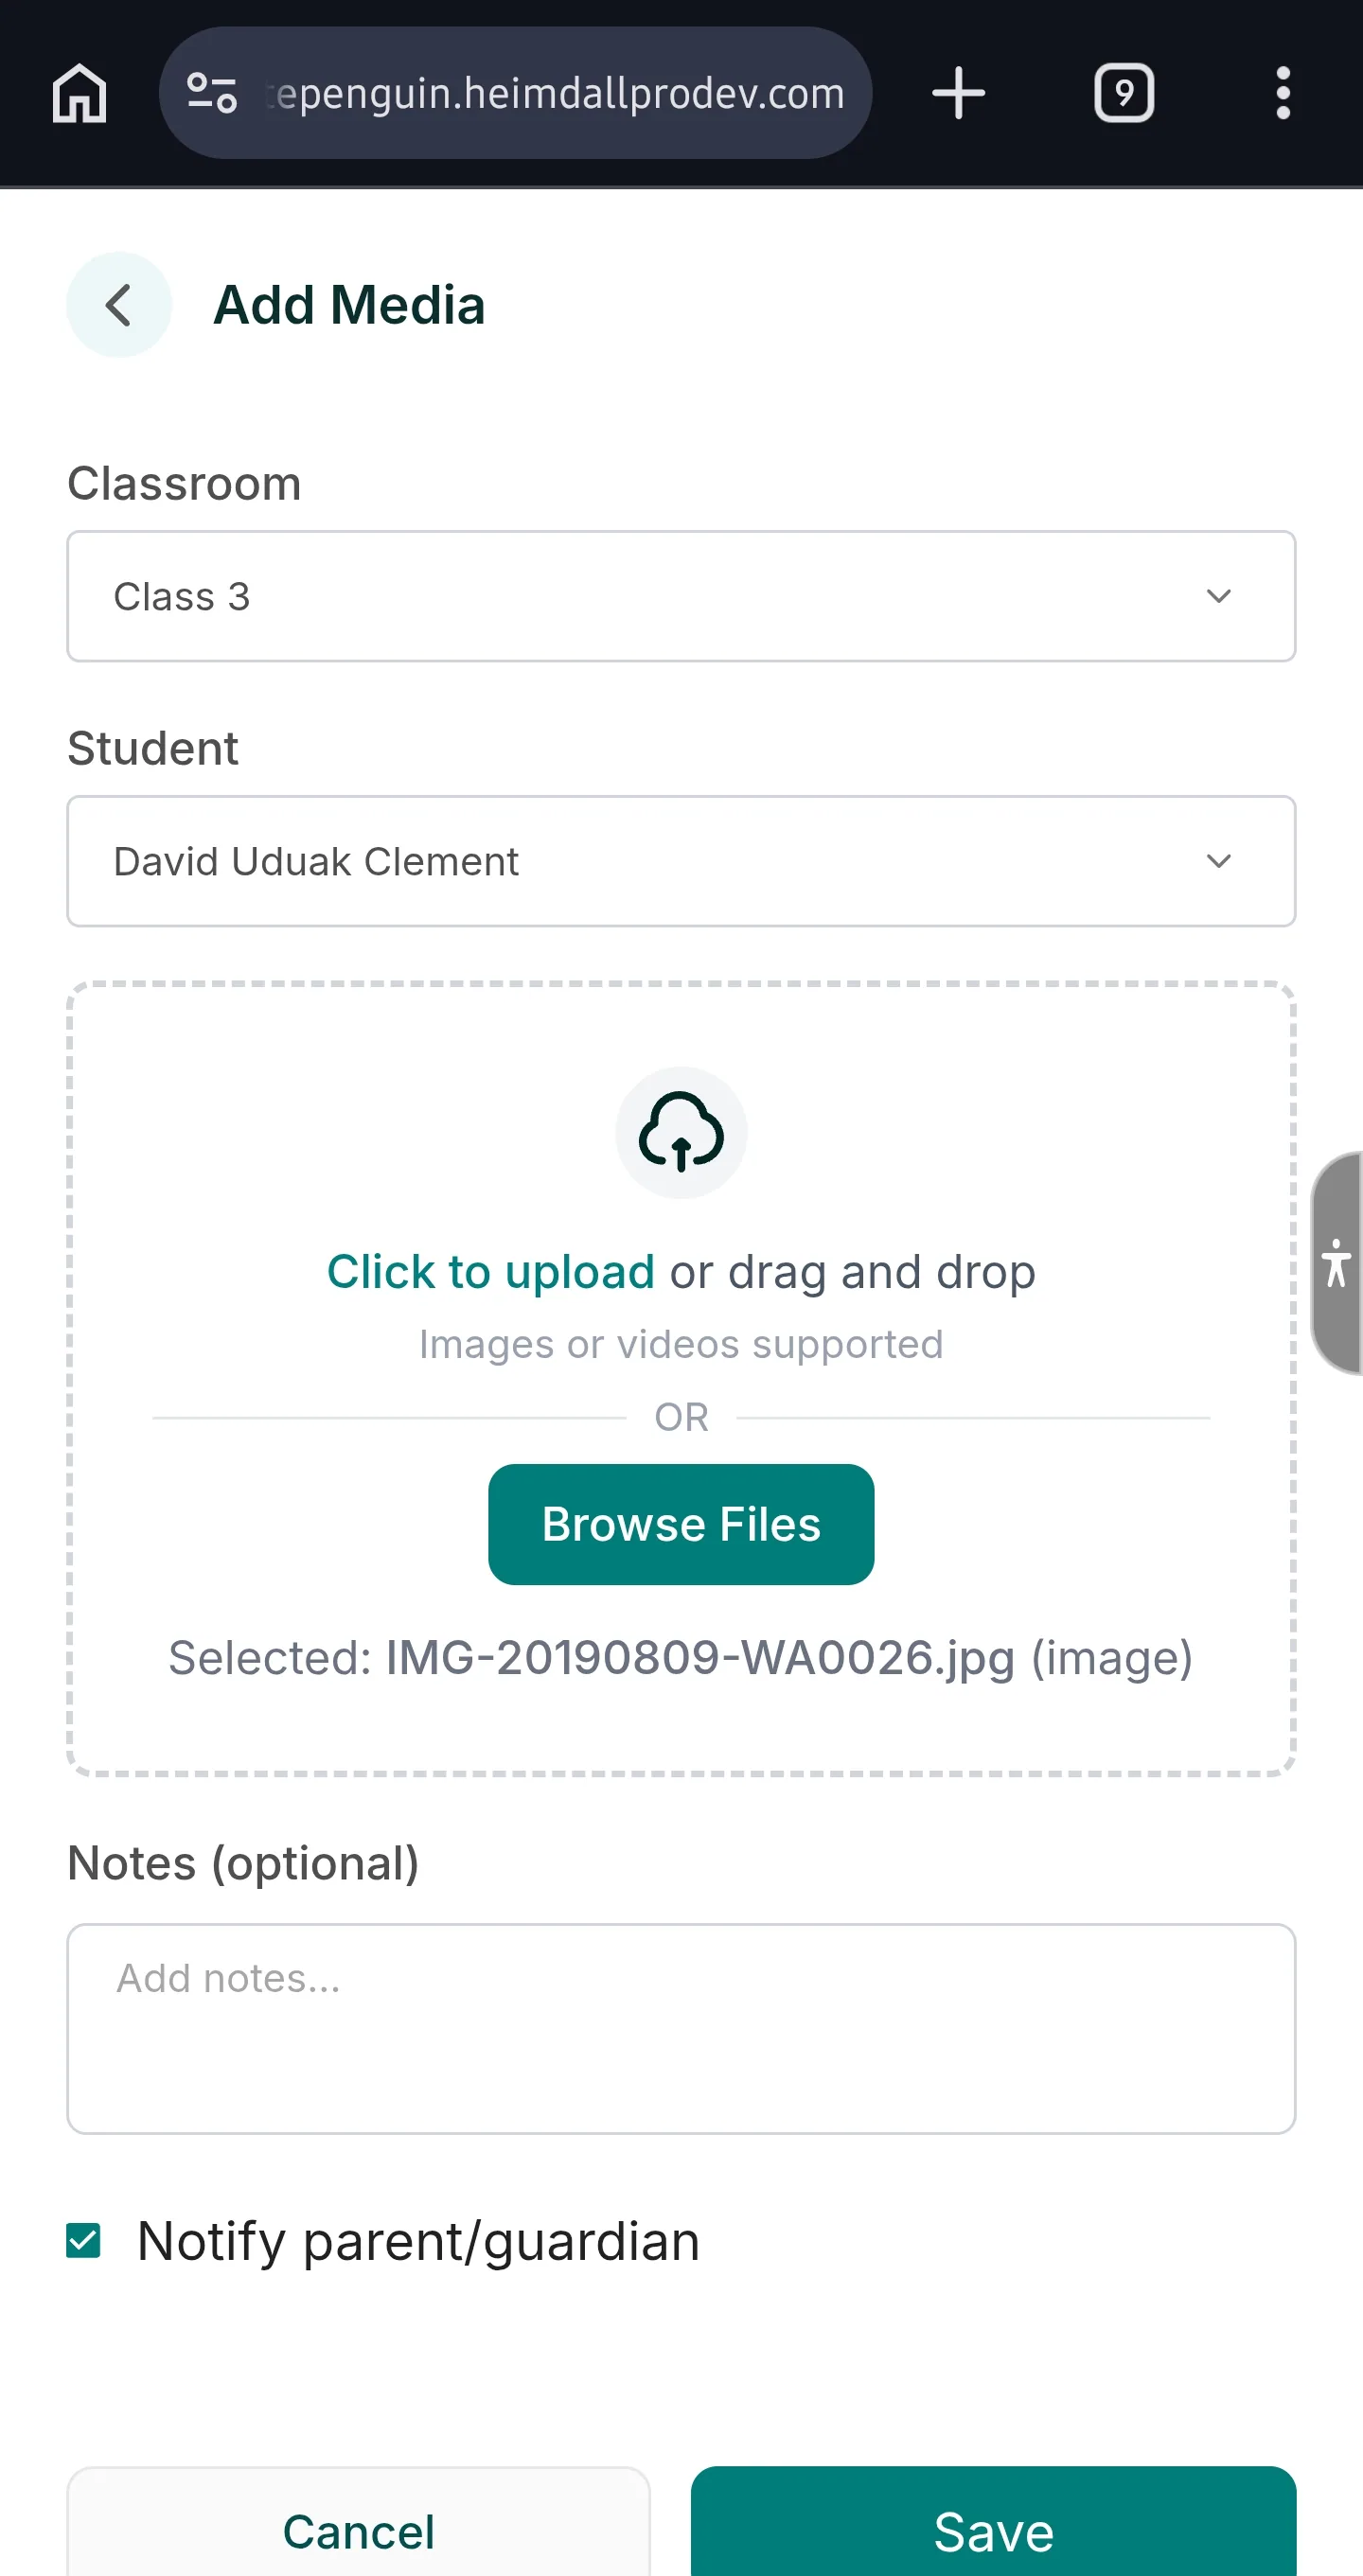
When the **Add Photo** window opens:
1. **Classroom**
* Select the classroom.
* **Admins:** can choose from all available classrooms.
* Other roles typically see only their assigned classroom (or assigned children).
2. **Student**
* Select the child.
* If the list is empty, select a classroom first.
3. **Upload photos**
* Click the upload area to add files, or drag and drop them.
* You can also click **Browse Files**.
4. **Notes (optional)**
* Add a short caption or context.
5. **Notify parent/guardian** (optional)
* Turn this on if you want the parent/guardian to be notified.
6. Click **Save**.
## Tips [#tips]
* Use short, friendly notes (for example, “Outdoor play time” or “Art activity”).
* If you can’t find the right classroom, ask an admin to confirm your classroom assignment.
## FAQs [#faqs]
Classroom visibility depends on your **custom role** and classroom assignments. Roles with full Classroom access see every classroom; others only see the classrooms (and children) they're assigned to.
Your custom role may not include **Create** permission for Activities. Ask your school admin to update your role in **Settings → Roles & Permissions**.
Parents/guardians receive a notification based on your school’s notification settings.
The upload box supports common image formats. If an upload fails, try a smaller file size or a different image format.