


How to Add a Children Profile
Learn how to create a complete child profile in WhitePenguin — fill in the child's details, add parent or guardian information, upload required documents, and save the profile to complete enrollment.
Overview
The Children section is where all enrolled children are managed. Adding a child profile is a 3-step process spread across three tabs — Profile, Parent, and Documents. All three tabs must be completed before the profile can be saved.
When you add a parent's email in the Parent tab, the system automatically sends them an email invitation to access the parent portal, where they can track their child's progress, activities, and more.
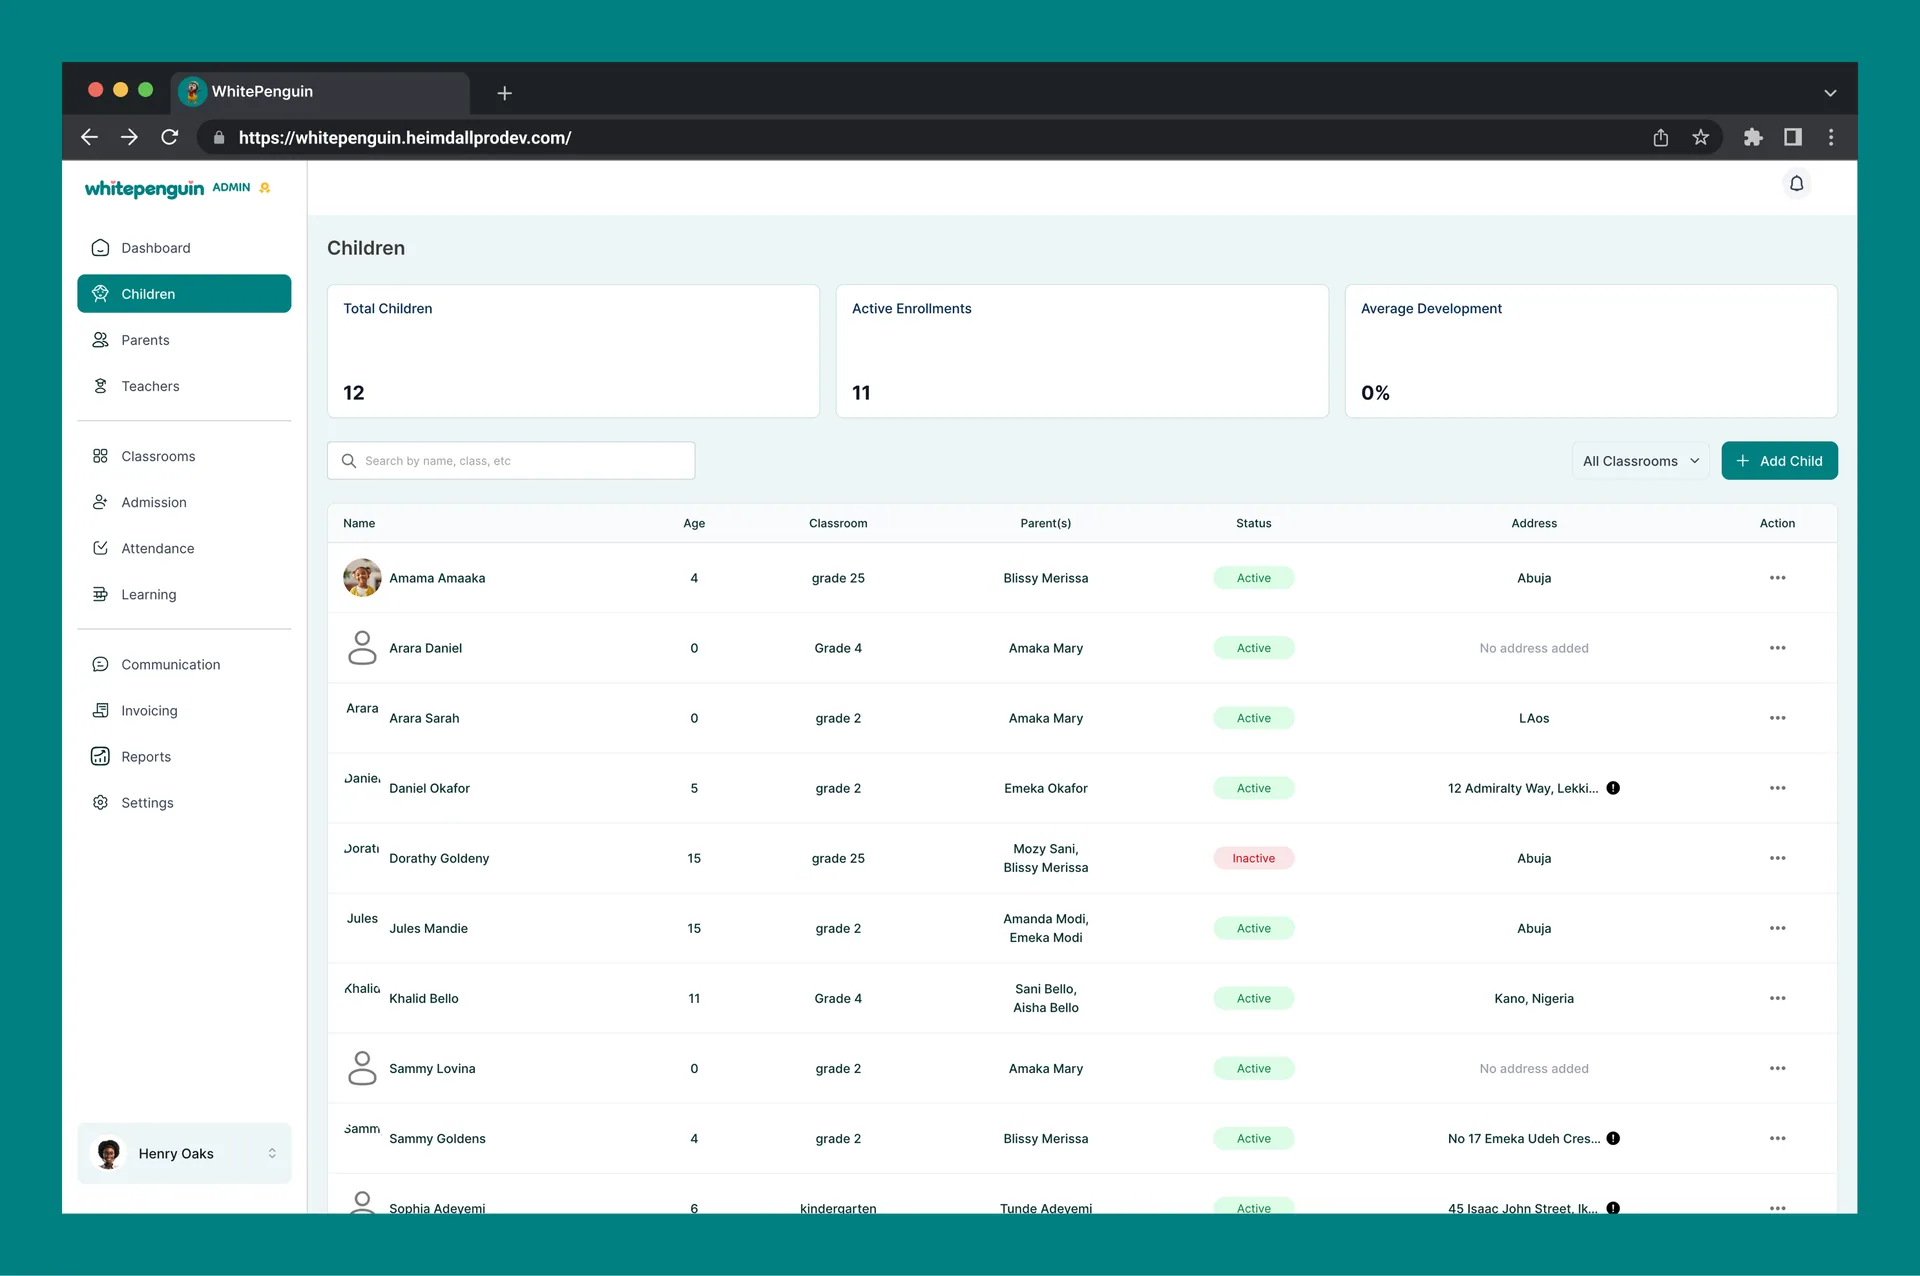
The Children page also shows three summary cards at the top:
| Card | What it shows |
|---|---|
| Total Children | Total number of children added to the school |
| Active Enrollments | Children currently marked as actively enrolled |
| Average Development | The average development score across all enrolled children |
How to Access the Add Child Form
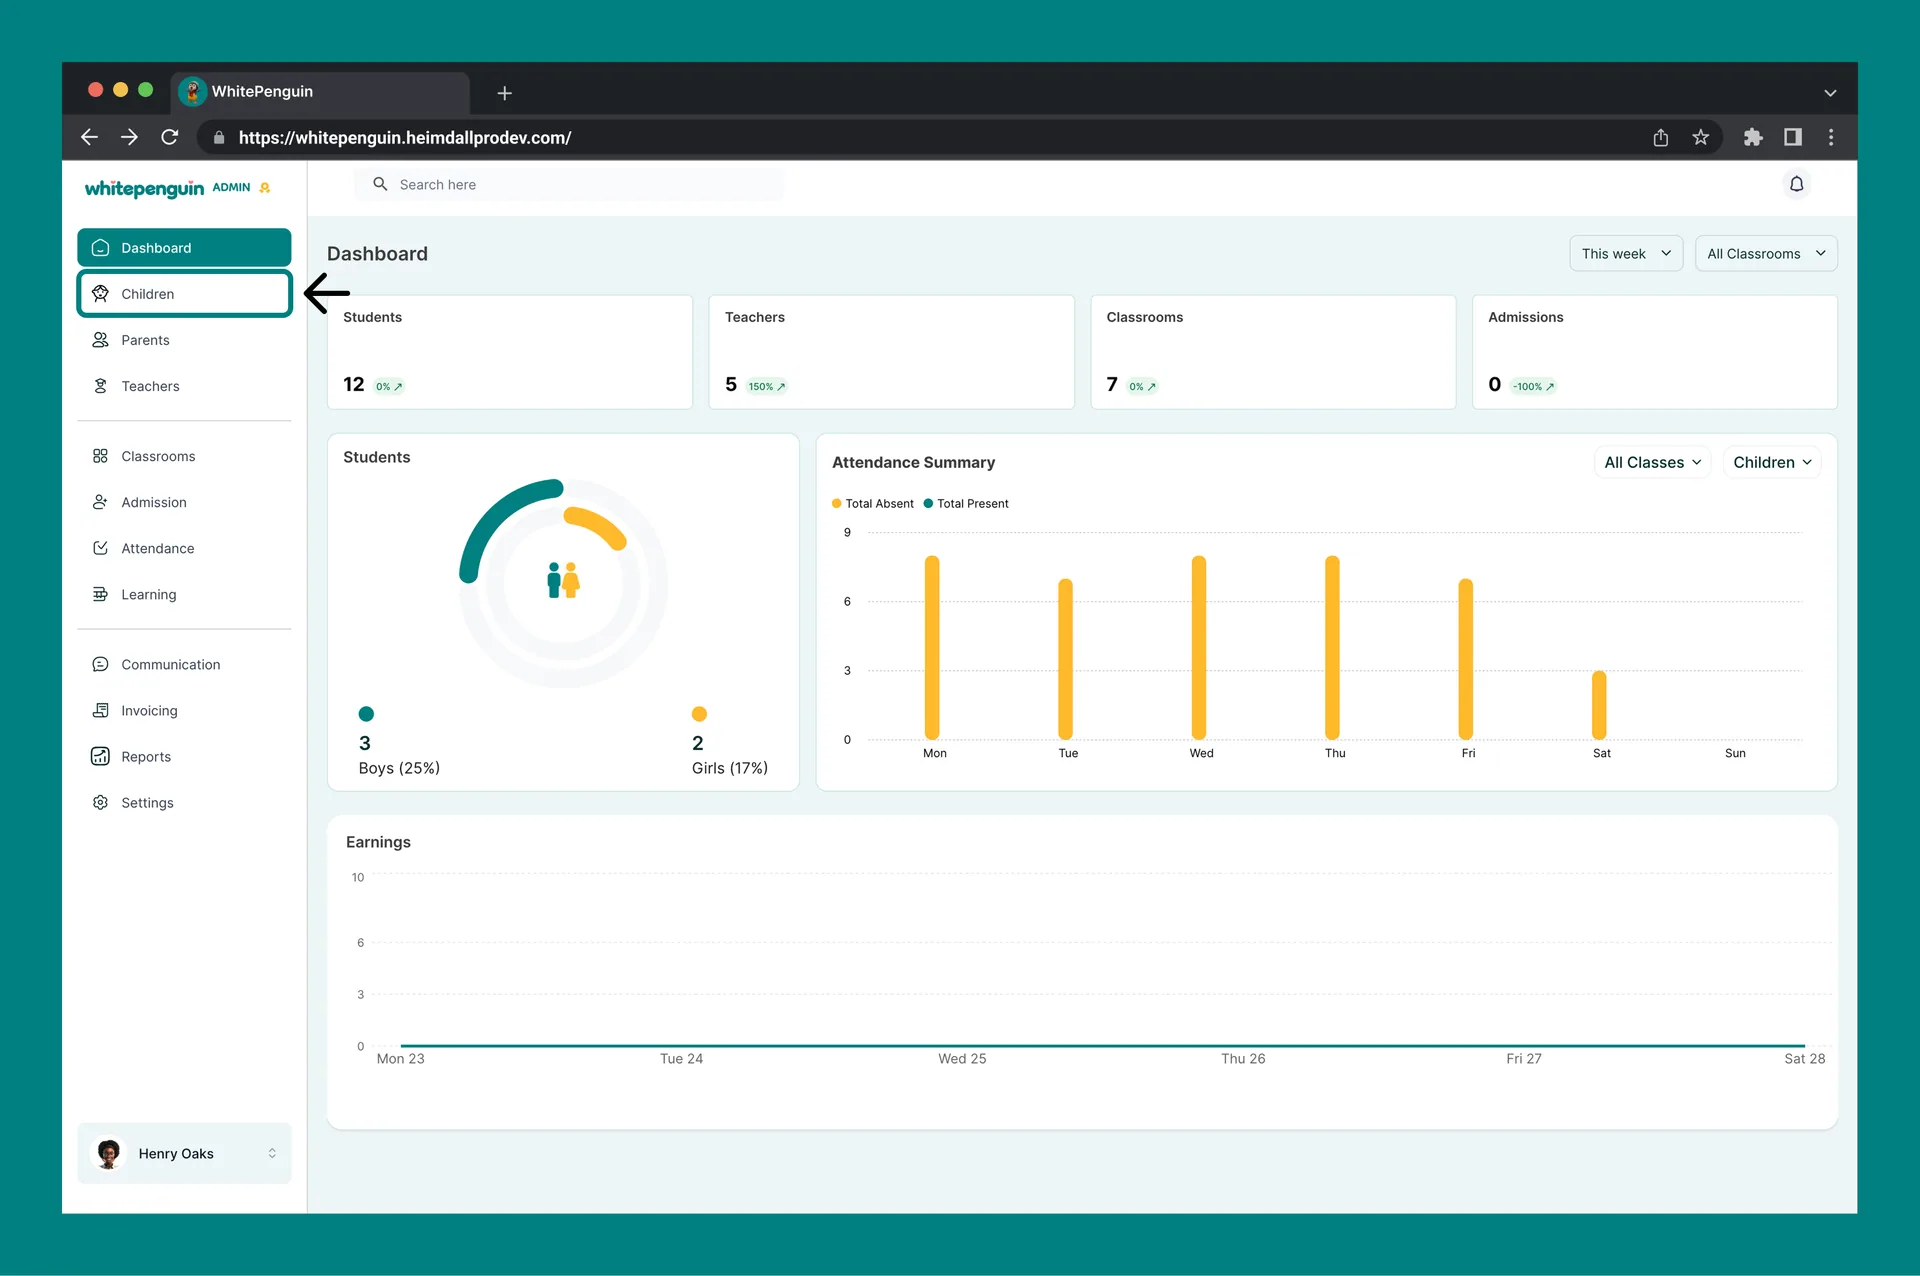
- Click Children in the left sidebar.
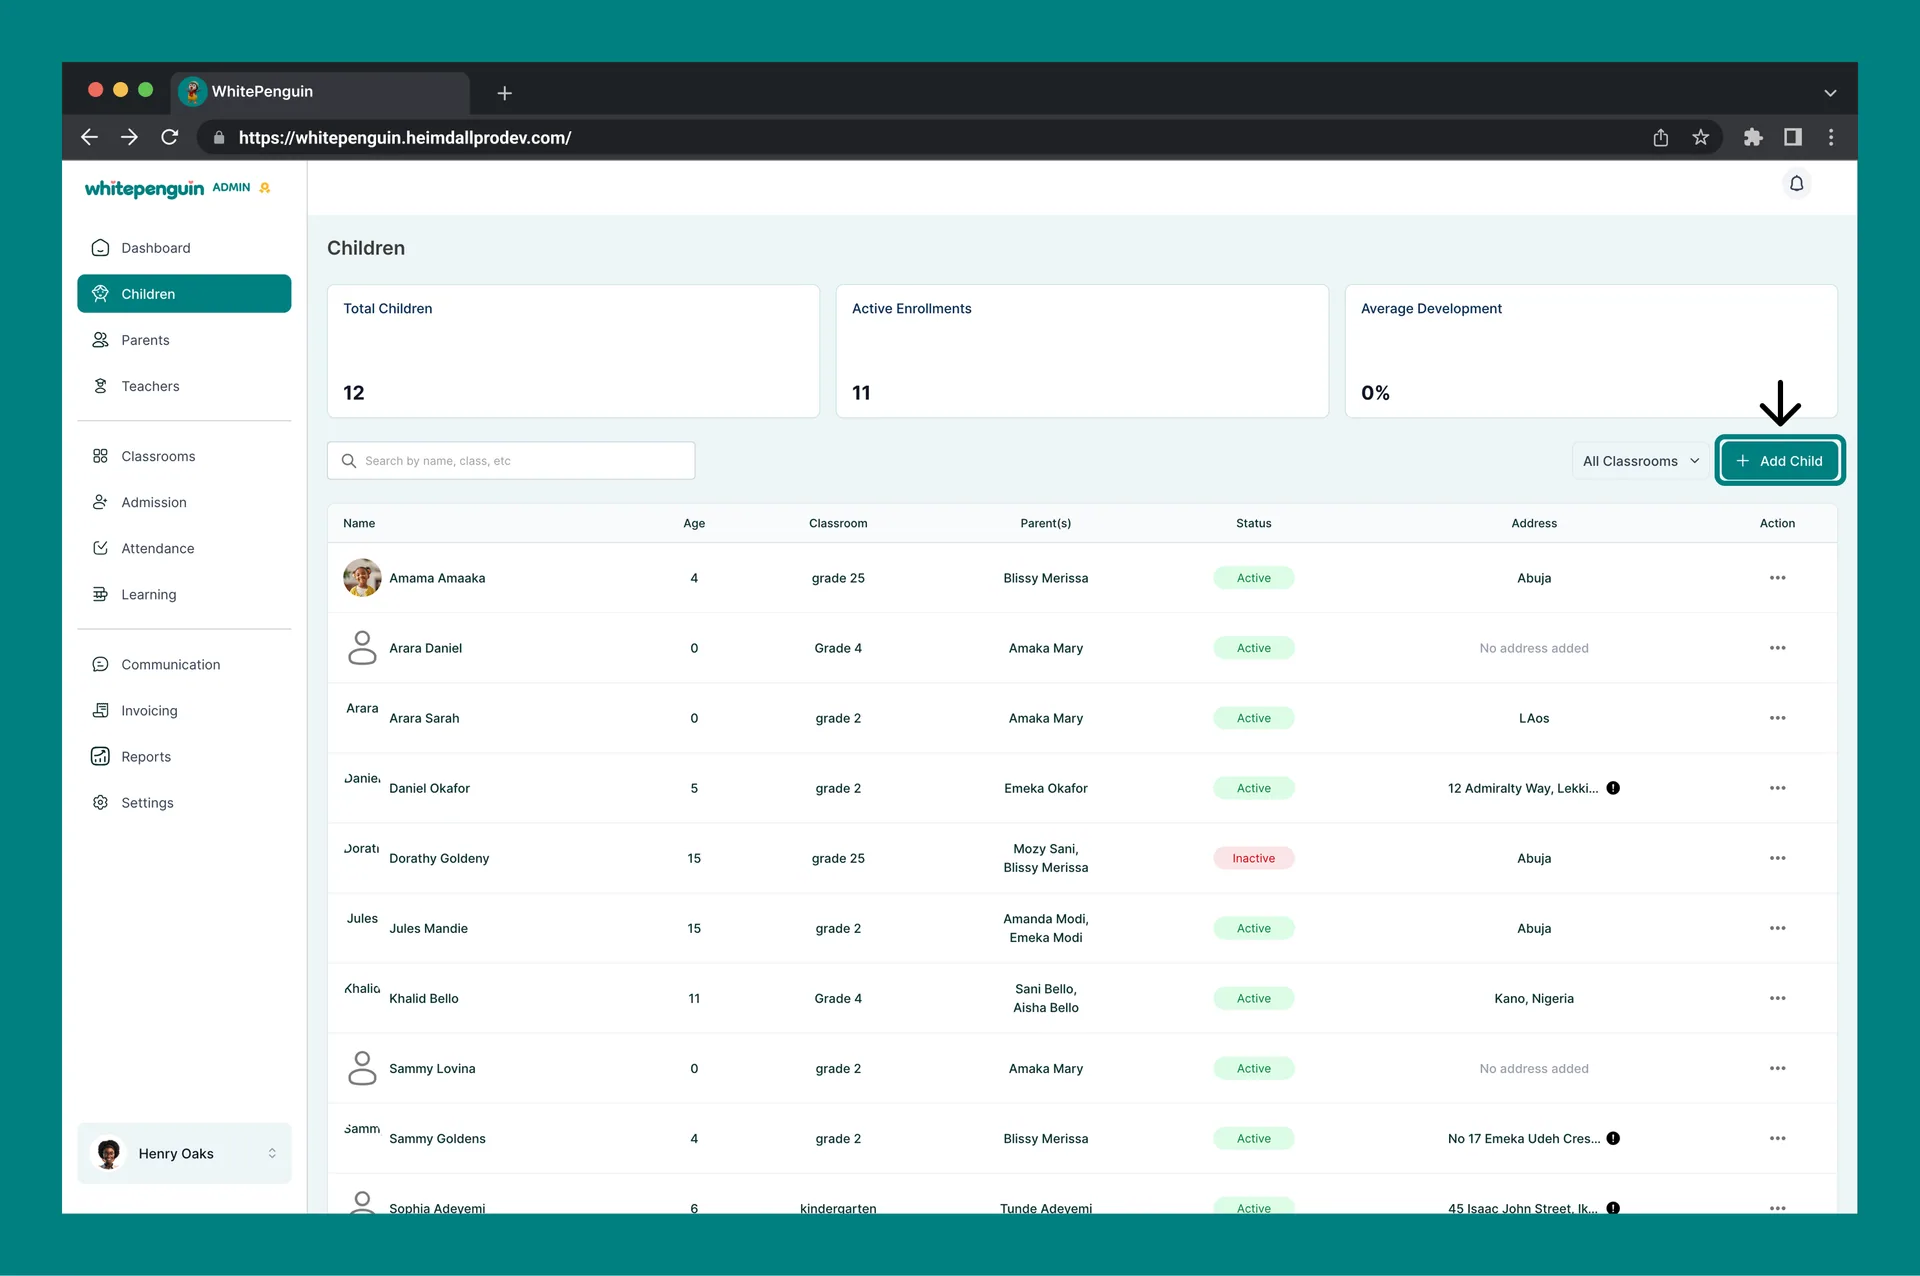
- Click the + Add Child button at the top right of the page.
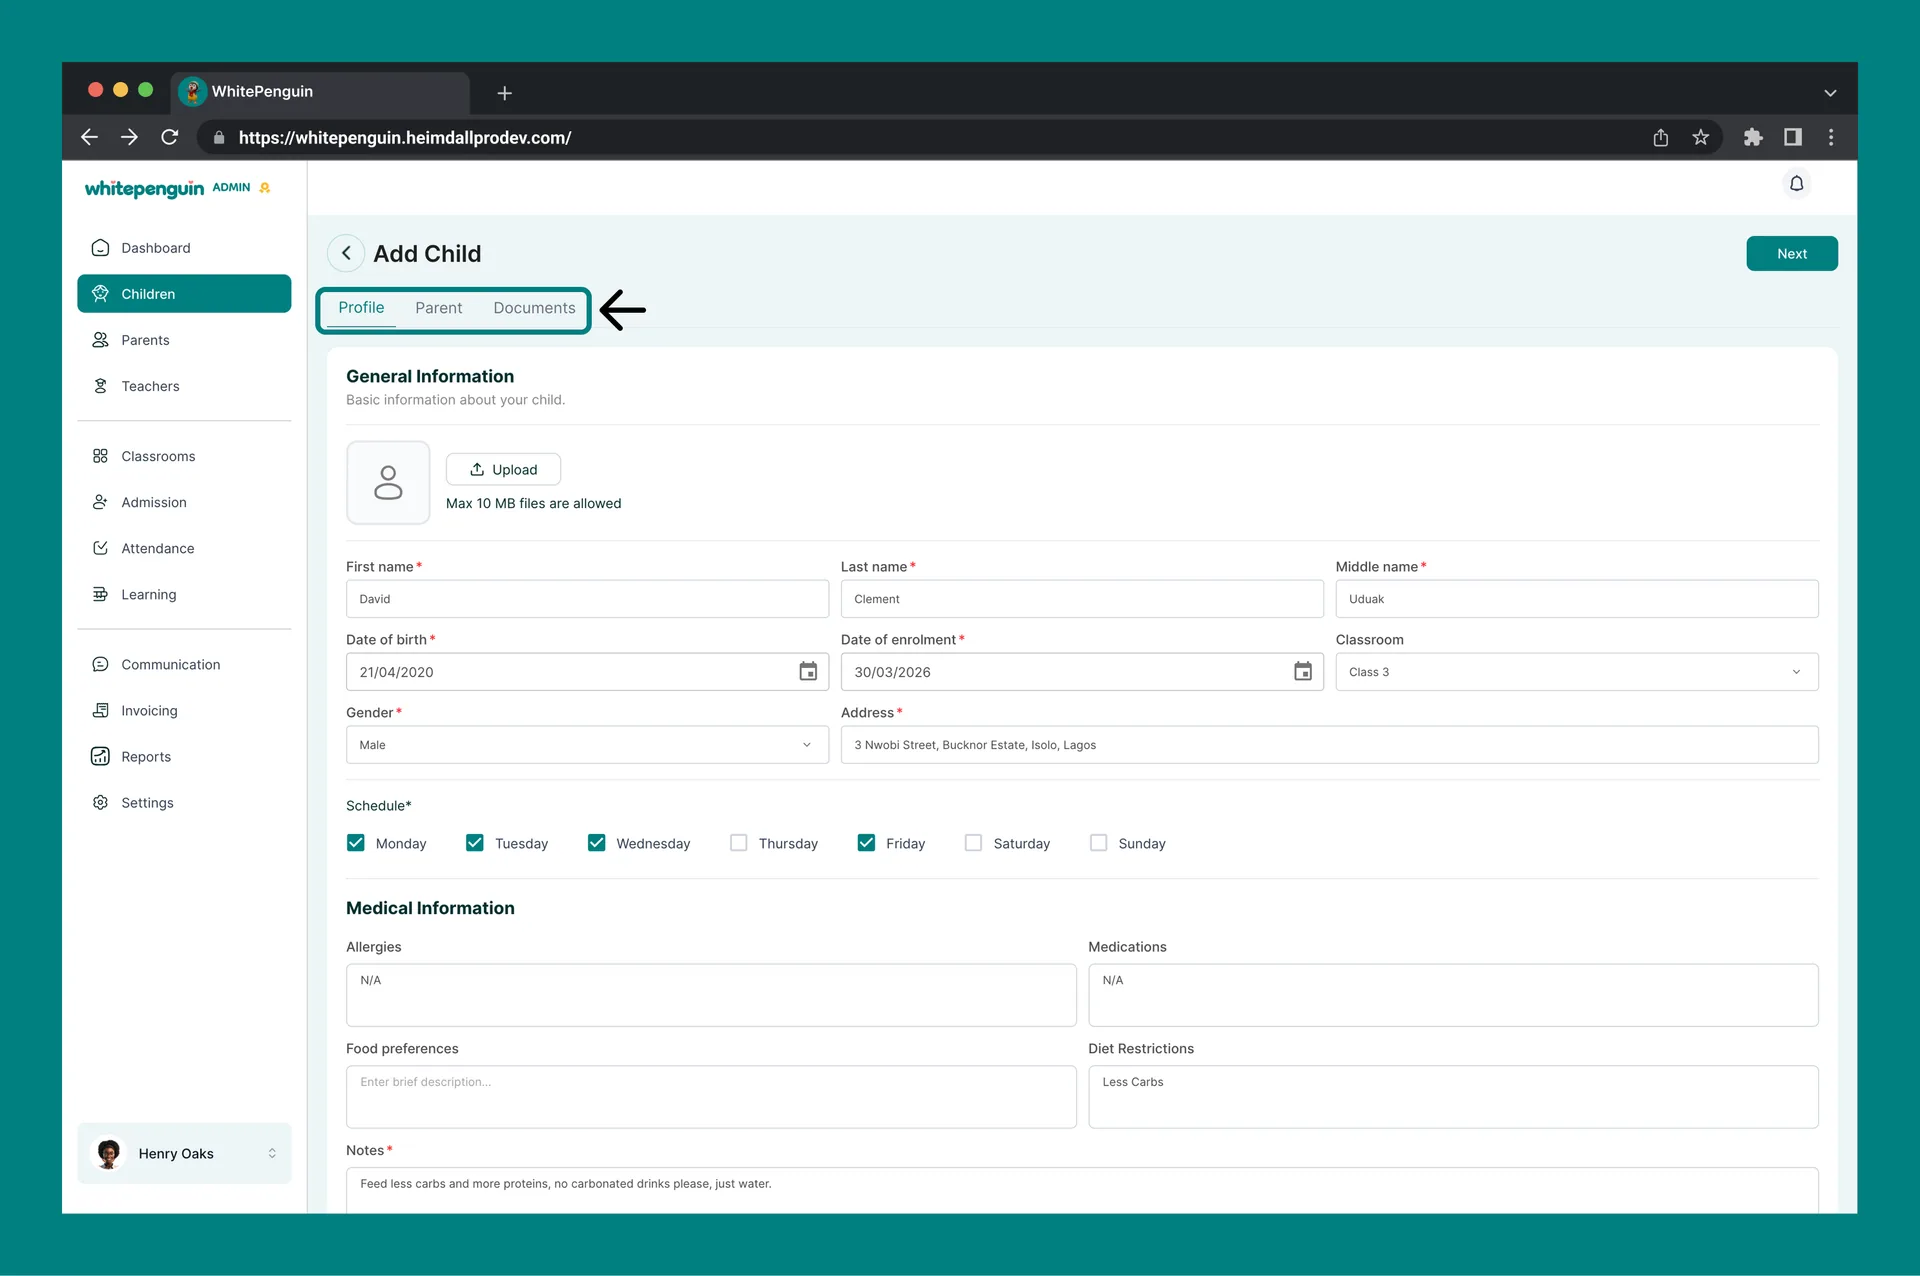
- The Add Child form will open with three tabs at the top: Profile, Parent, and Documents.
- Complete all three tabs in order.
- Click Save on the final tab to create the child's profile.
The form will not save until all required fields across all three tabs are filled and at least one document has been uploaded in the Documents tab. If any required field is missing, an error banner will appear at the top: "Please fix the errors below before saving."
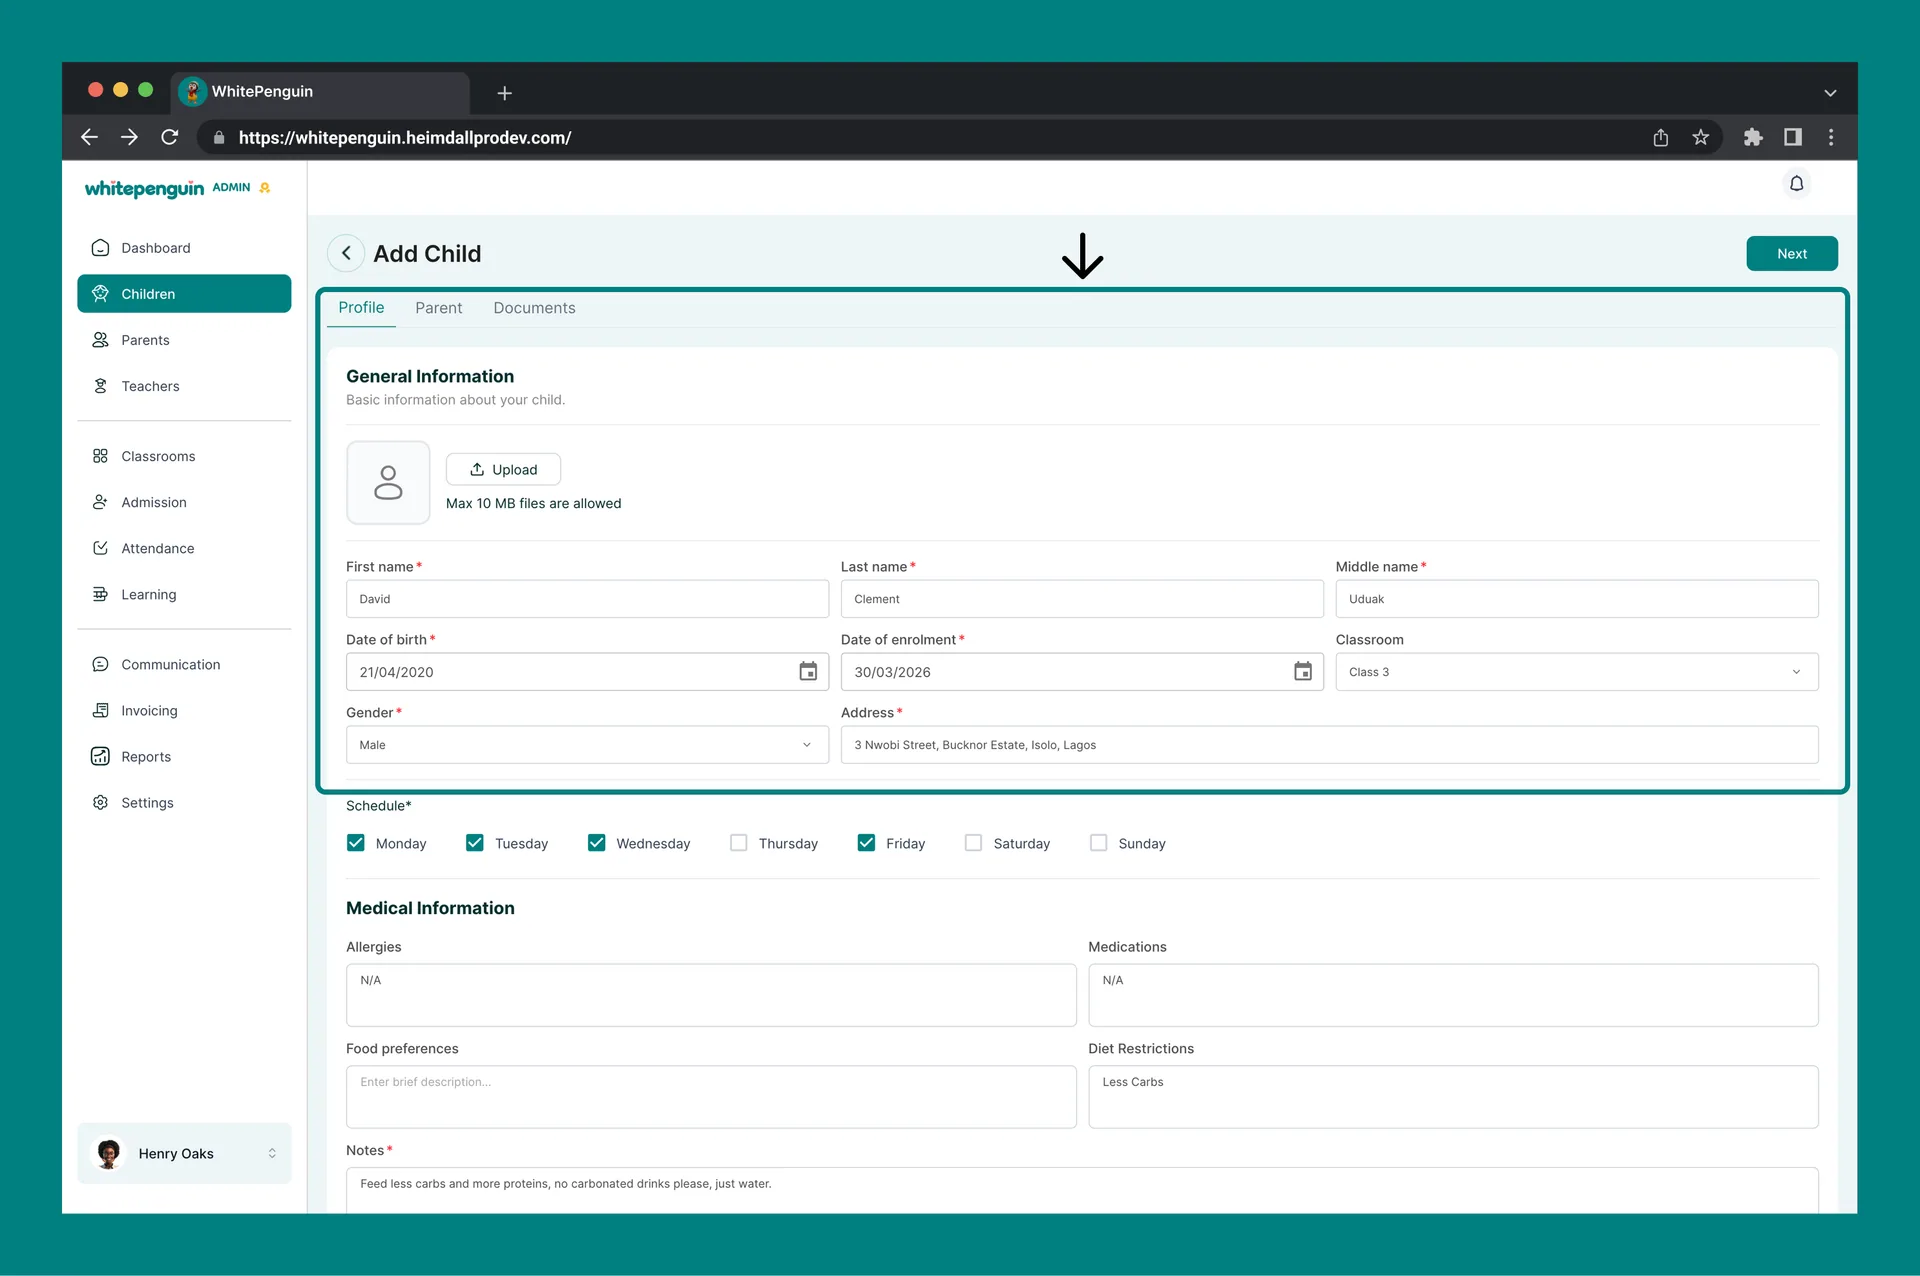
Tab 1 — Profile
The Profile tab contains the child's personal, medical, and emergency contact information.
General Information
| Field | Required | Description |
|---|---|---|
| Profile Photo | Optional | Upload a photo for the child. Max file size: 10 MB. |
| First Name | ✅ Required | The child's first name. |
| Last Name | ✅ Required | The child's last name. |
| Middle Name | ✅ Required | The child's middle name. |
| Date of Birth | ✅ Required | The child's date of birth (dd/mm/yyyy format). |
| Date of Enrolment | ✅ Required | The date the child is being enrolled (dd/mm/yyyy format). |
| Classroom | Optional | Assign the child to a classroom from the dropdown. Only classrooms already created in the system will appear here. |
| Gender | ✅ Required | Select the child's gender from the dropdown. |
| Address | ✅ Required | The child's home address. |
| Schedule | ✅ Required | Select at least one day of the week the child attends school (Monday through Sunday checkboxes). |
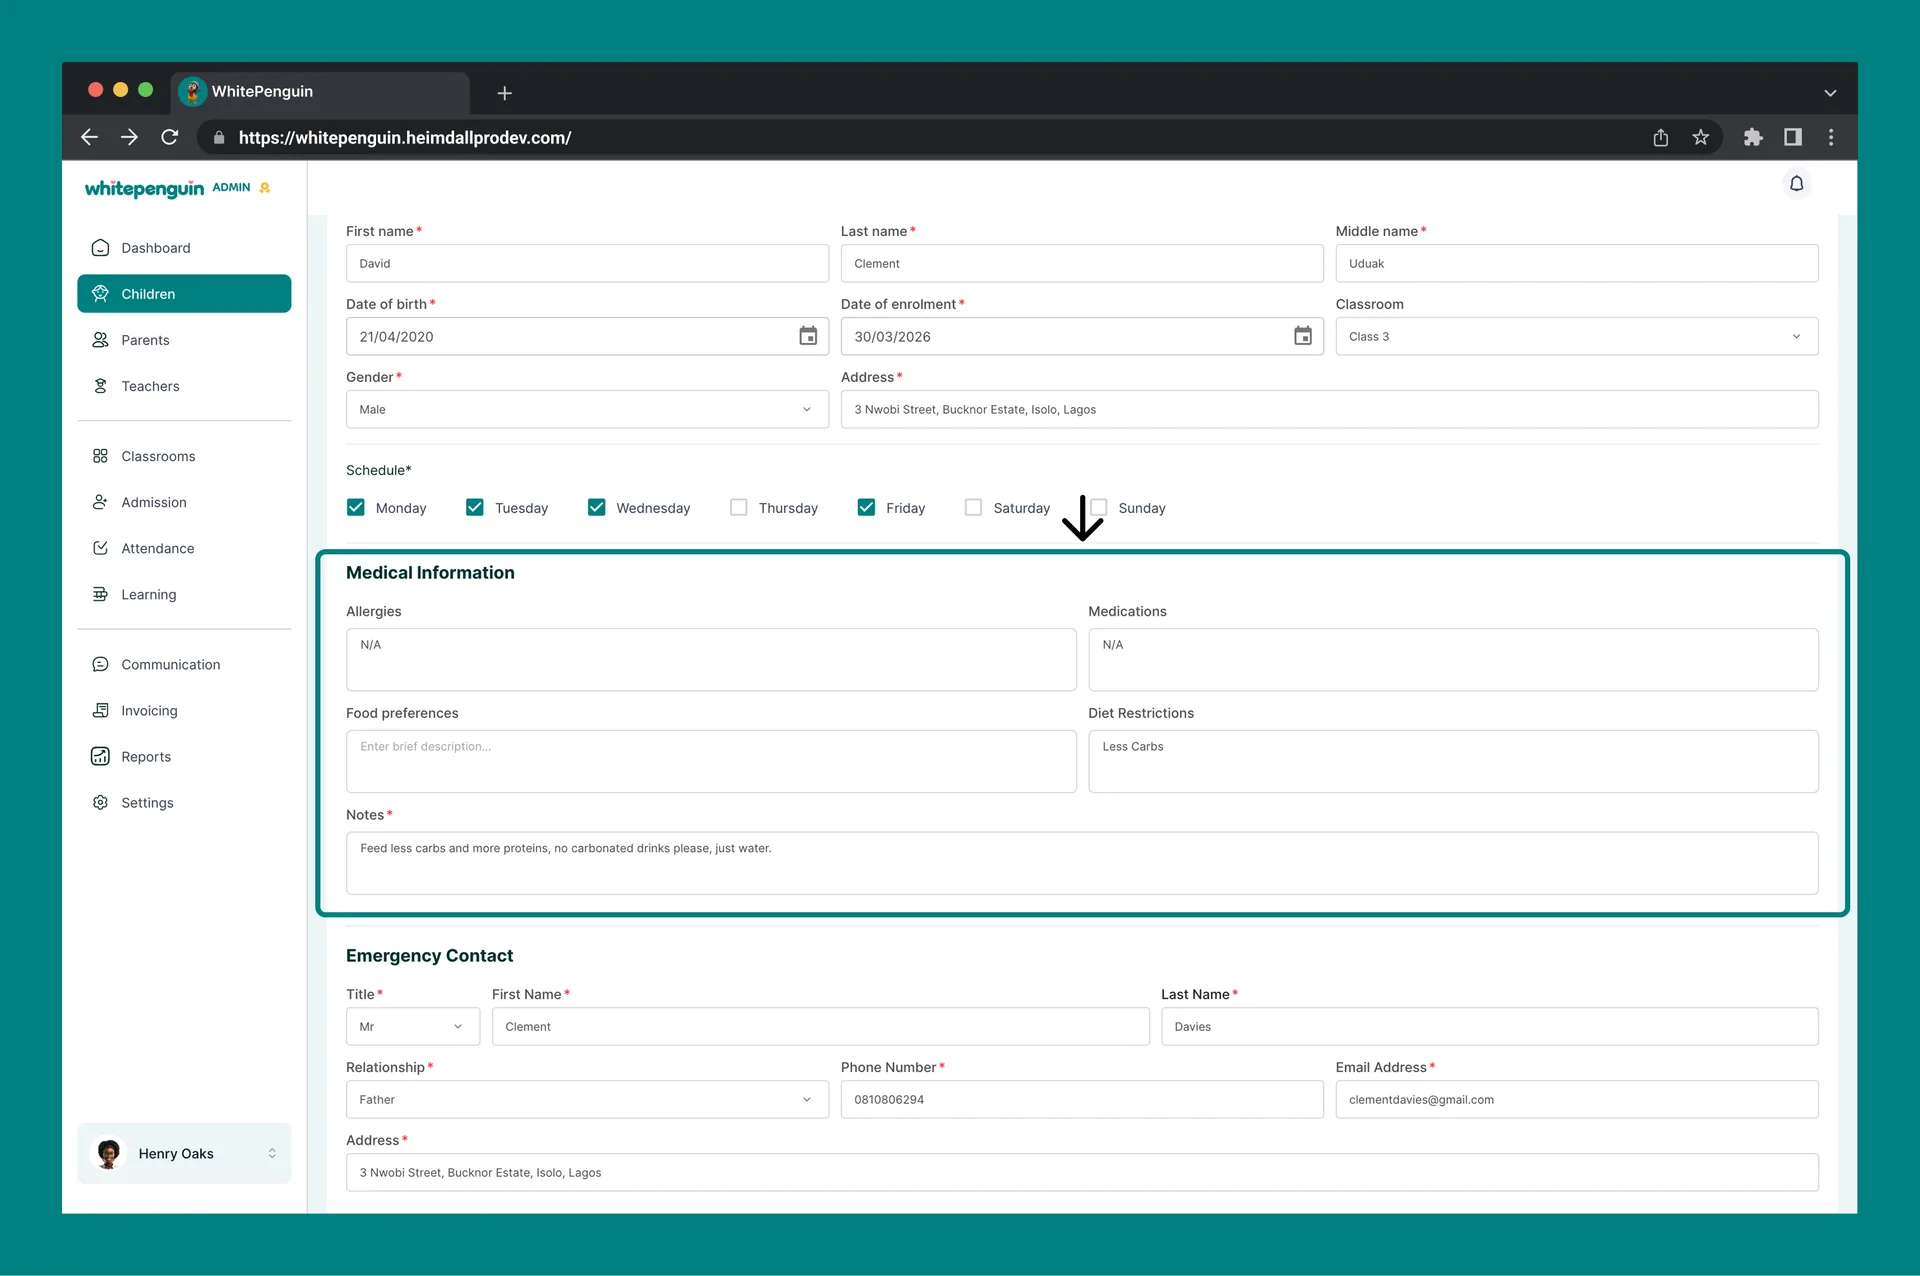
Medical Information
This section records important health details for the child. All fields are optional but strongly recommended.
| Field | Description |
|---|---|
| Allergies | Any known allergies (food, environmental, medication, etc.) |
| Medications | Any medications the child currently takes |
| Food Preferences | Dietary preferences or restrictions (e.g., vegetarian, halal) |
| Diet Restrictions | Any specific dietary restrictions the child follows |
| Notes | Any additional notes relevant to the child's health or wellbeing |
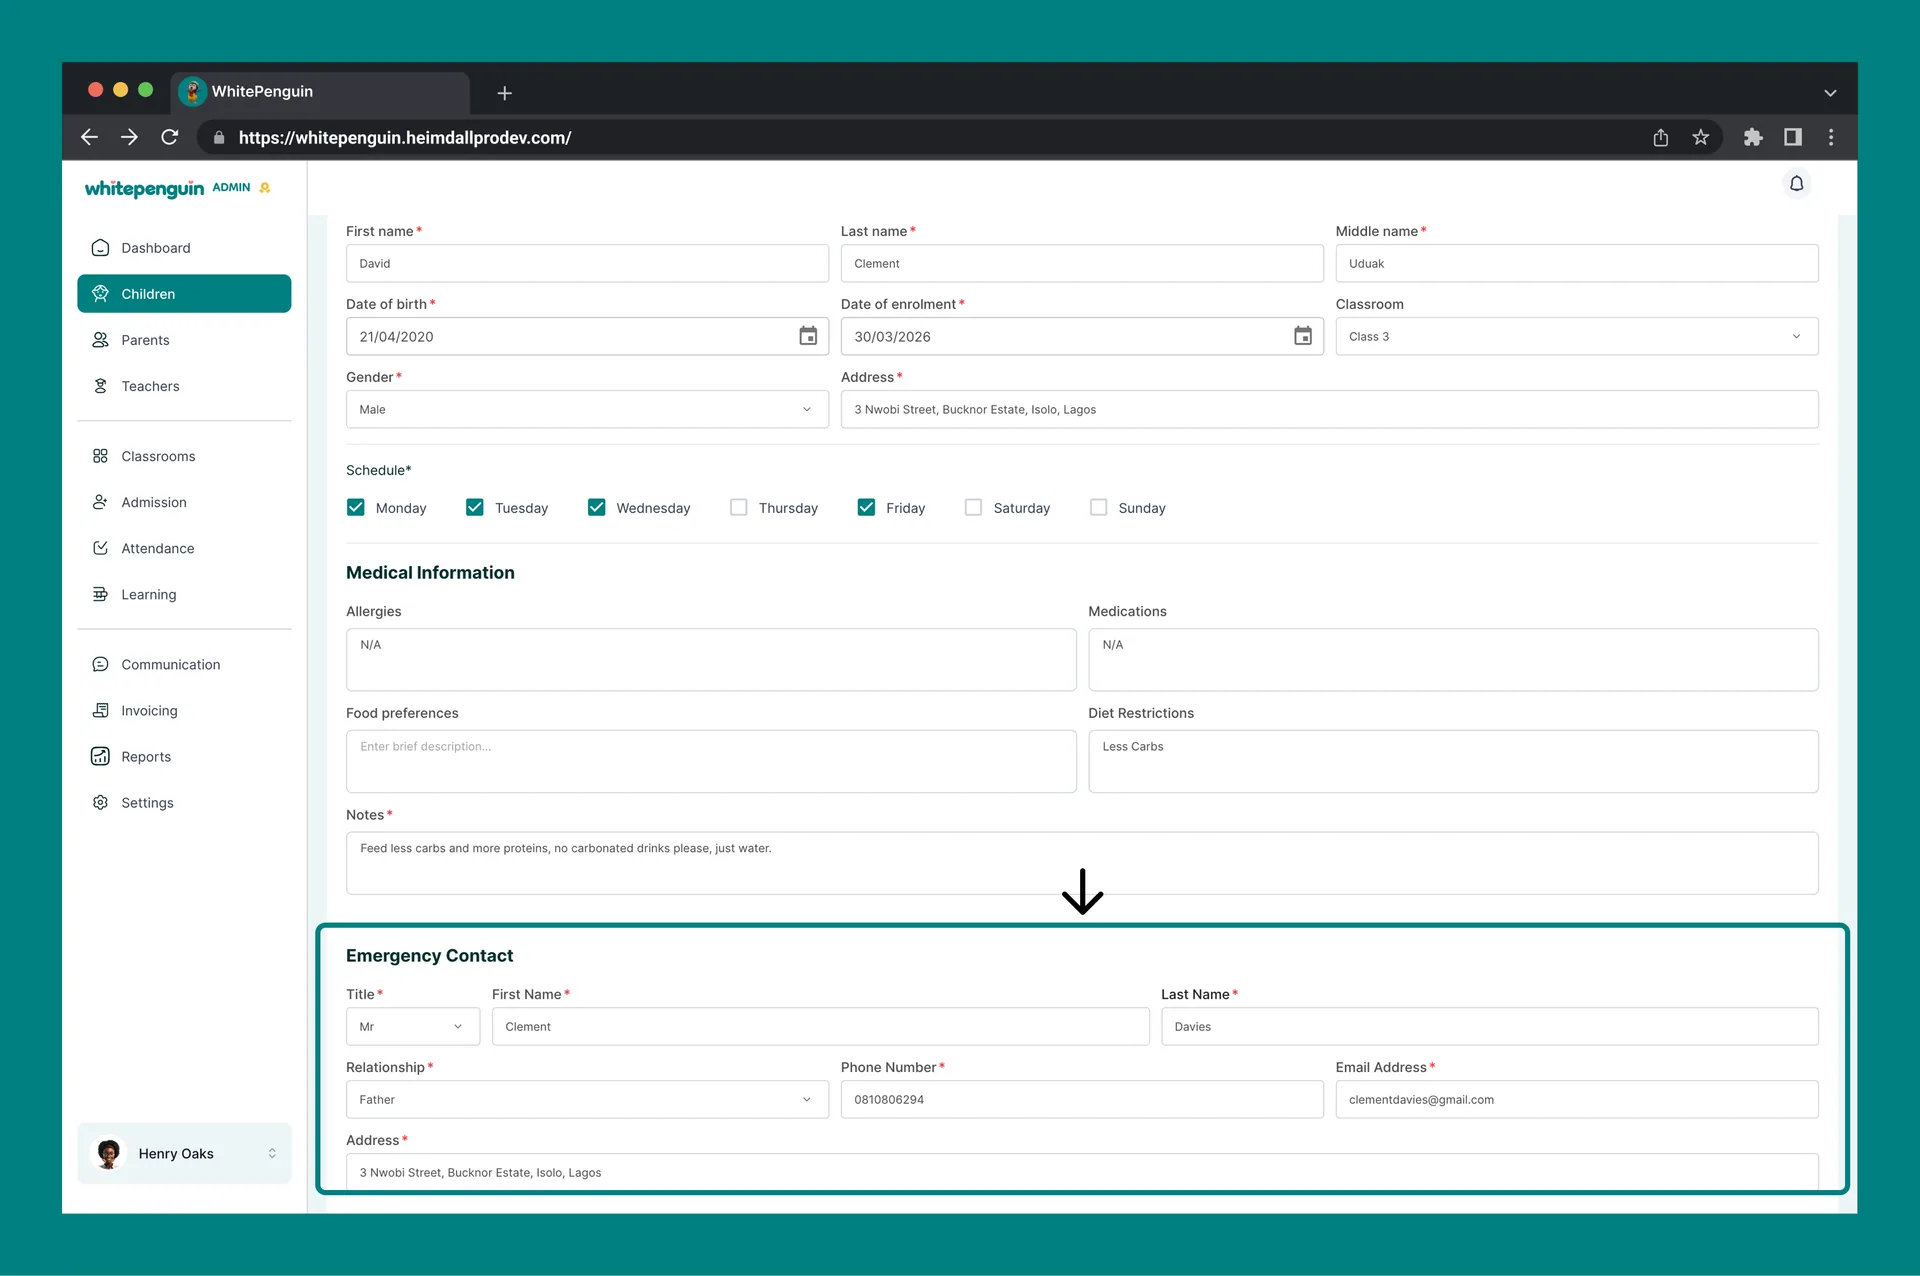
Emergency Contact
The Emergency Contact fields capture a person to reach if there is an emergency. All fields are required.
| Field | Description |
|---|---|
| Title | Title of the emergency contact (e.g., Mr., Ms.) |
| First Name | Emergency contact's first name |
| Last Name | Emergency contact's last name |
| Relationship | Their relationship to the child (e.g., Parent, Grandparent, Uncle) |
| Phone Number | Emergency contact's phone number |
| Email Address | Emergency contact's email address |
| Address | Emergency contact's full address |
Once the Profile tab is complete, click Next to proceed to the Parent tab.
Tab 2 — Parent
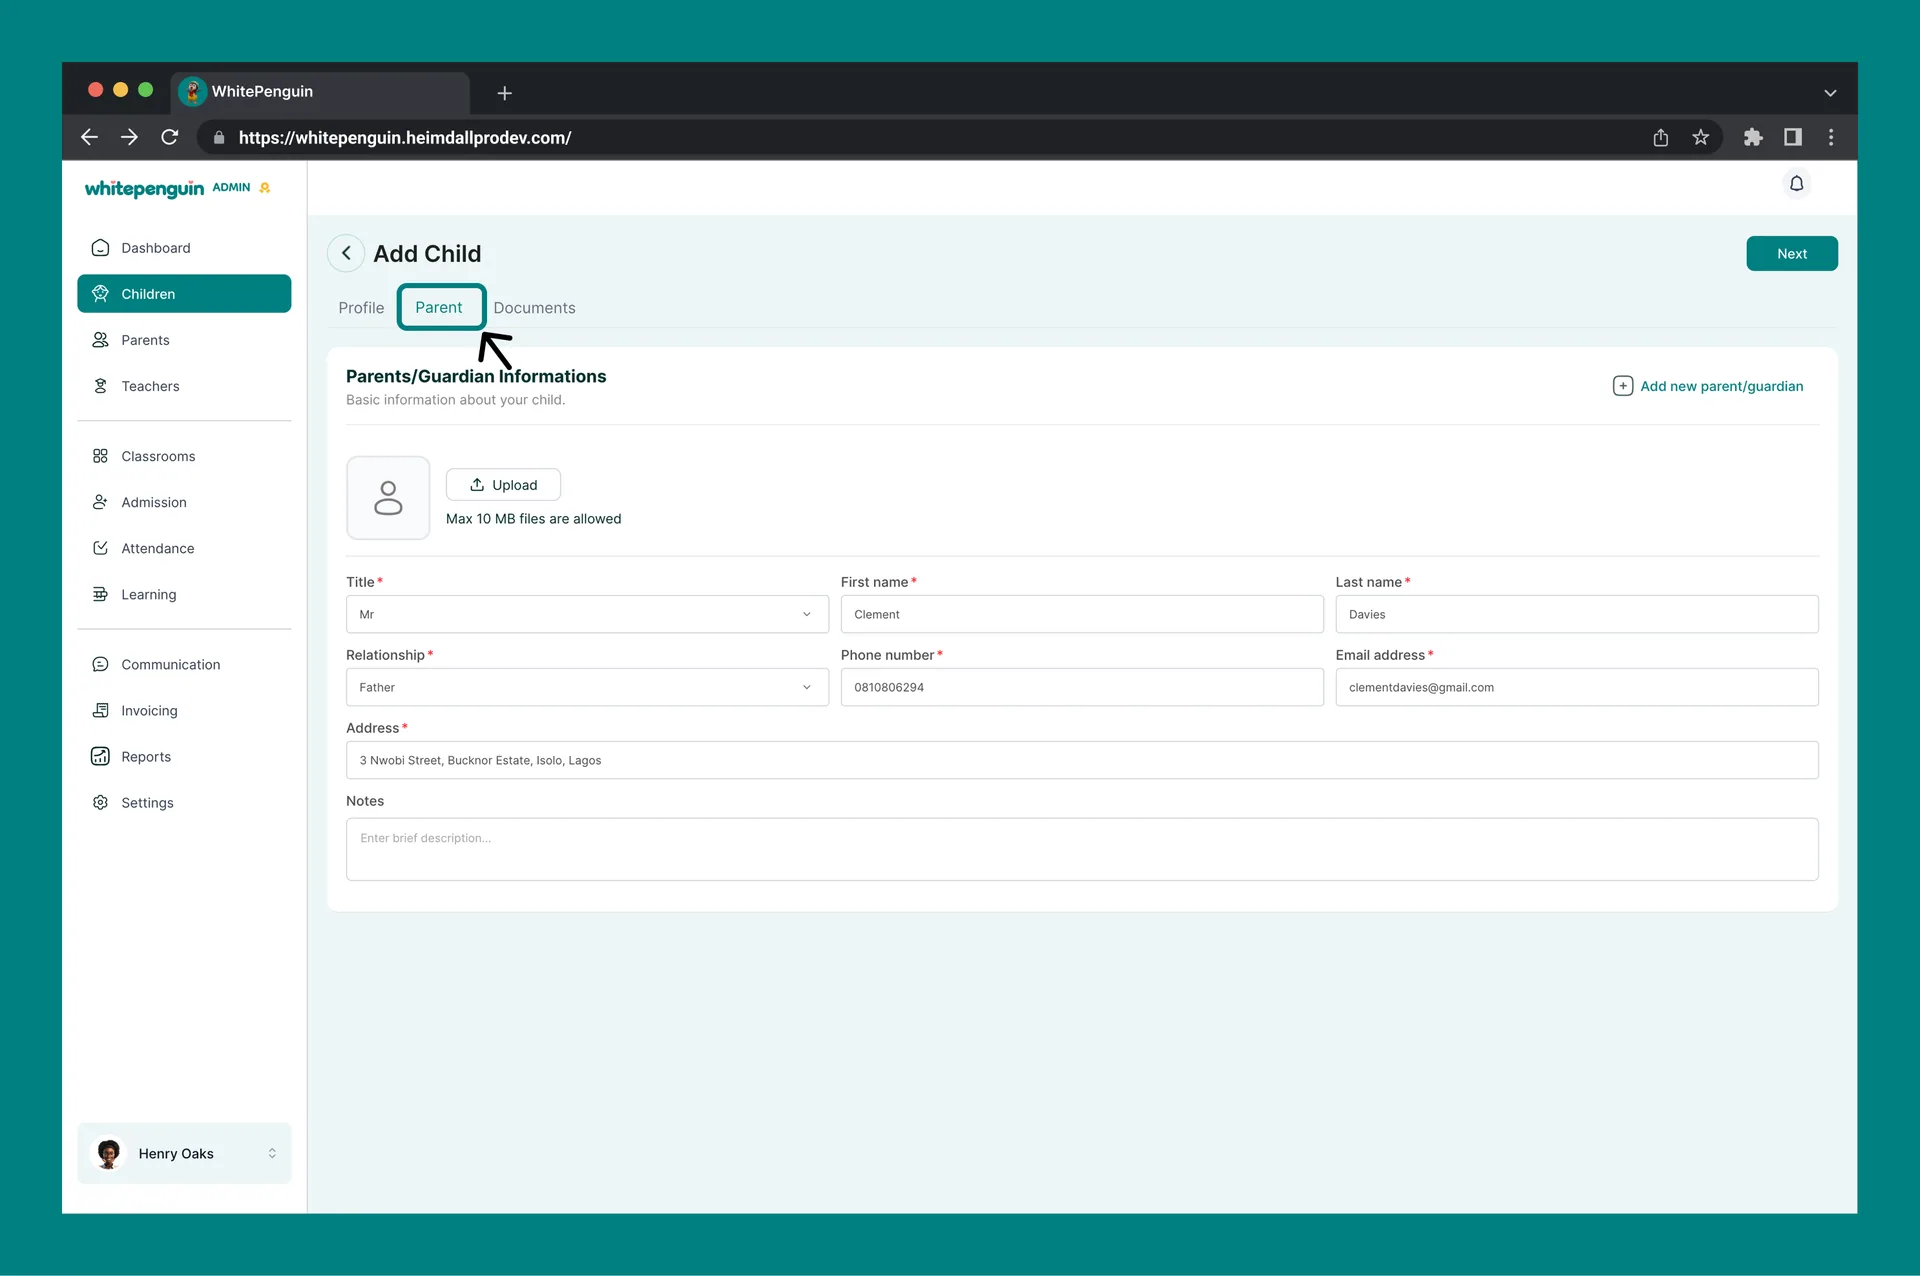
The Parent tab collects information about the child's parent or guardian. This is also where the parent invitation is triggered.
| Field | Required | Description |
|---|---|---|
| Profile Photo | Optional | Upload a photo for the parent. Max file size: 10 MB. |
| Title | ✅ Required | Select a title (e.g., Mr., Ms., Dr.) from the dropdown. |
| First Name | ✅ Required | Parent's first name. |
| Last Name | ✅ Required | Parent's last name. |
| Relationship | ✅ Required | The parent's relationship to the child (e.g., Mother, Father, Guardian). |
| Phone Number | ✅ Required | Parent's contact phone number. |
| Email Address | ✅ Required | Parent's email address. This is used to send the parent their invitation to the parent portal. |
| Address | ✅ Required | Parent's full address. |
| Notes | Optional | Any relevant notes about the parent or guardian. |
Need to add more than one parent or guardian for this child? Click + Add new parent/guardian at the top right of the Parent tab to add additional contacts.
Once the Parent tab is complete, click Next to proceed to the Documents tab.
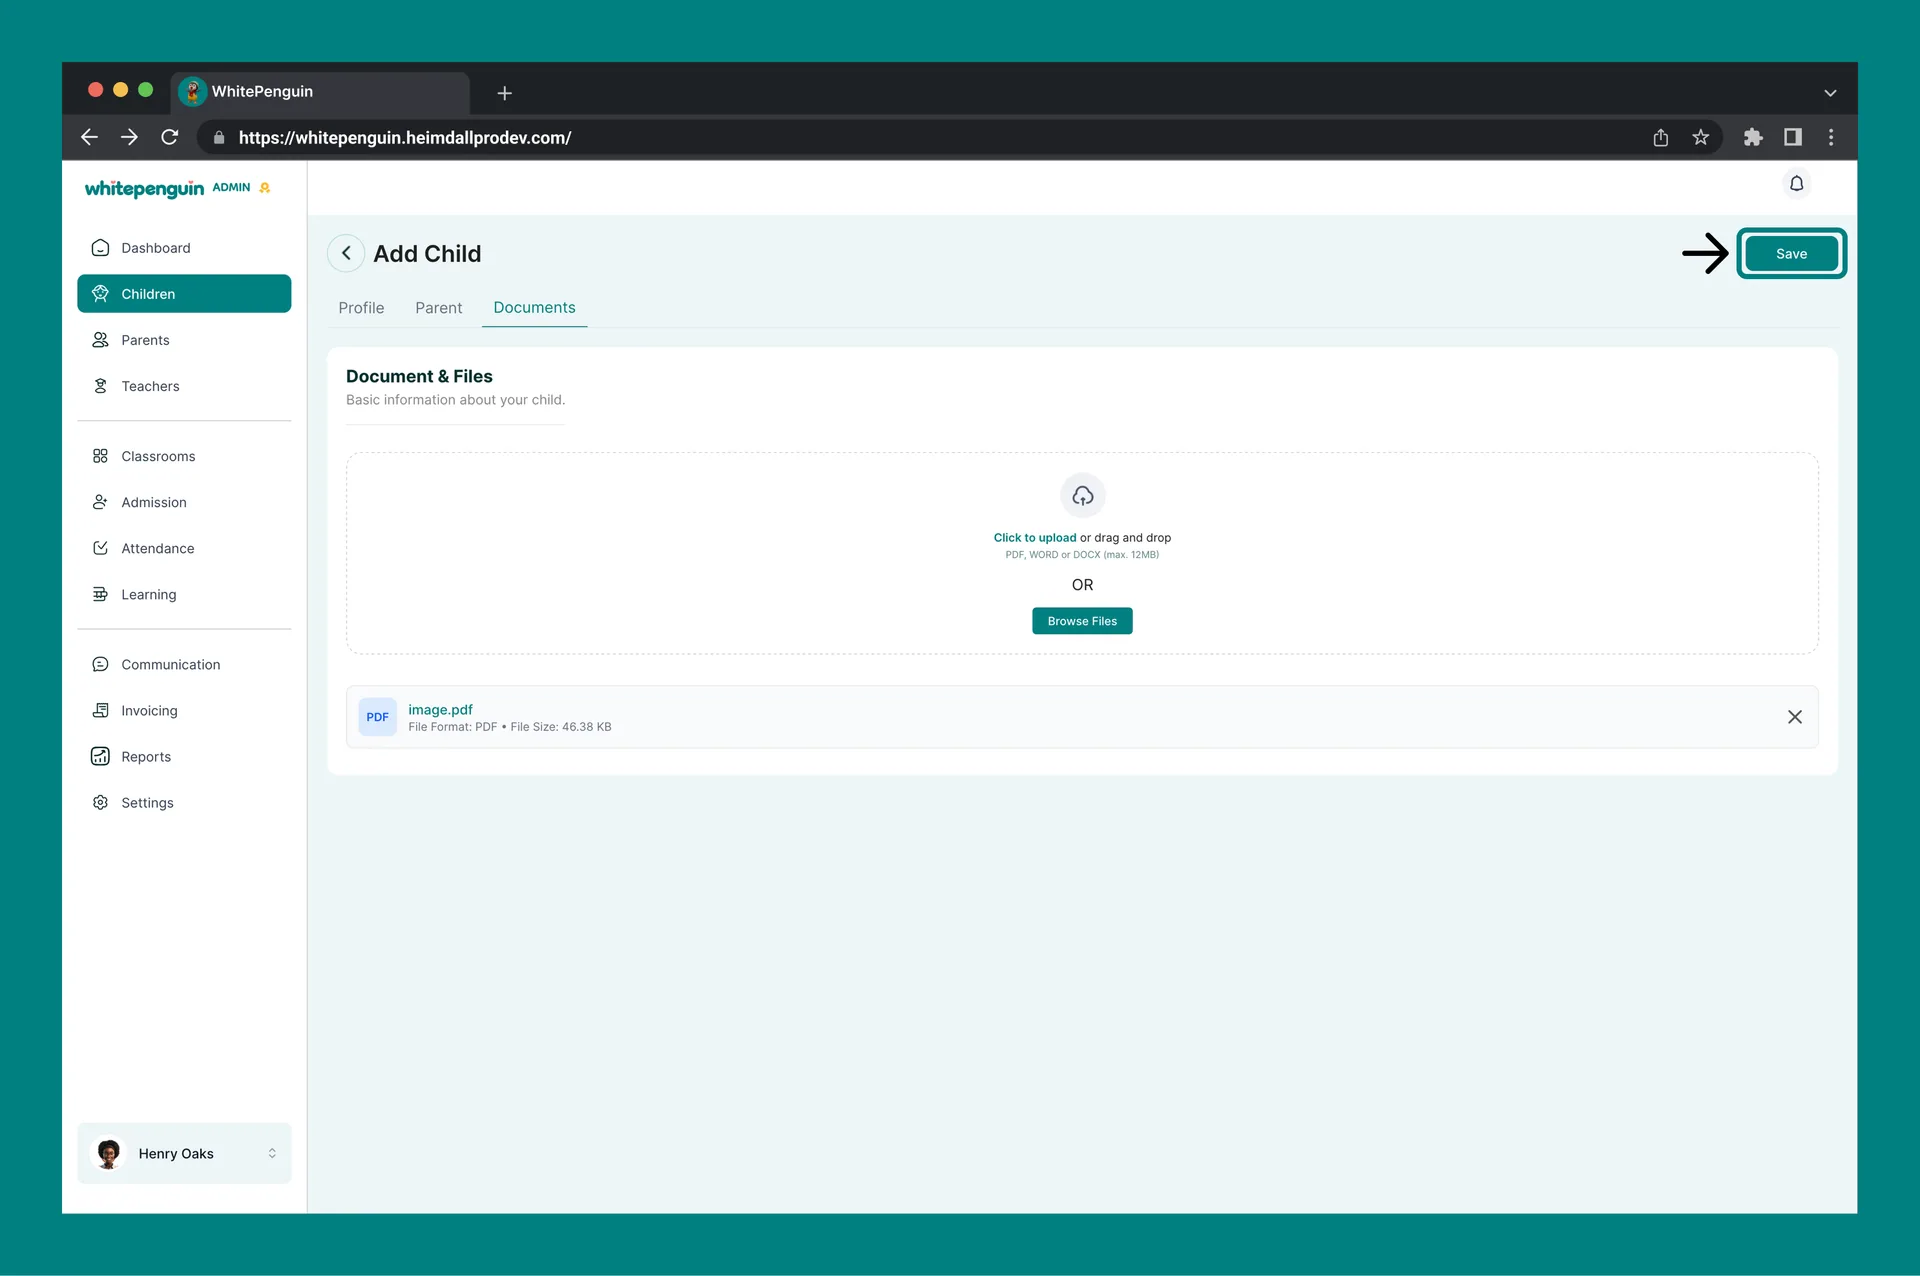
Tab 3 — Documents
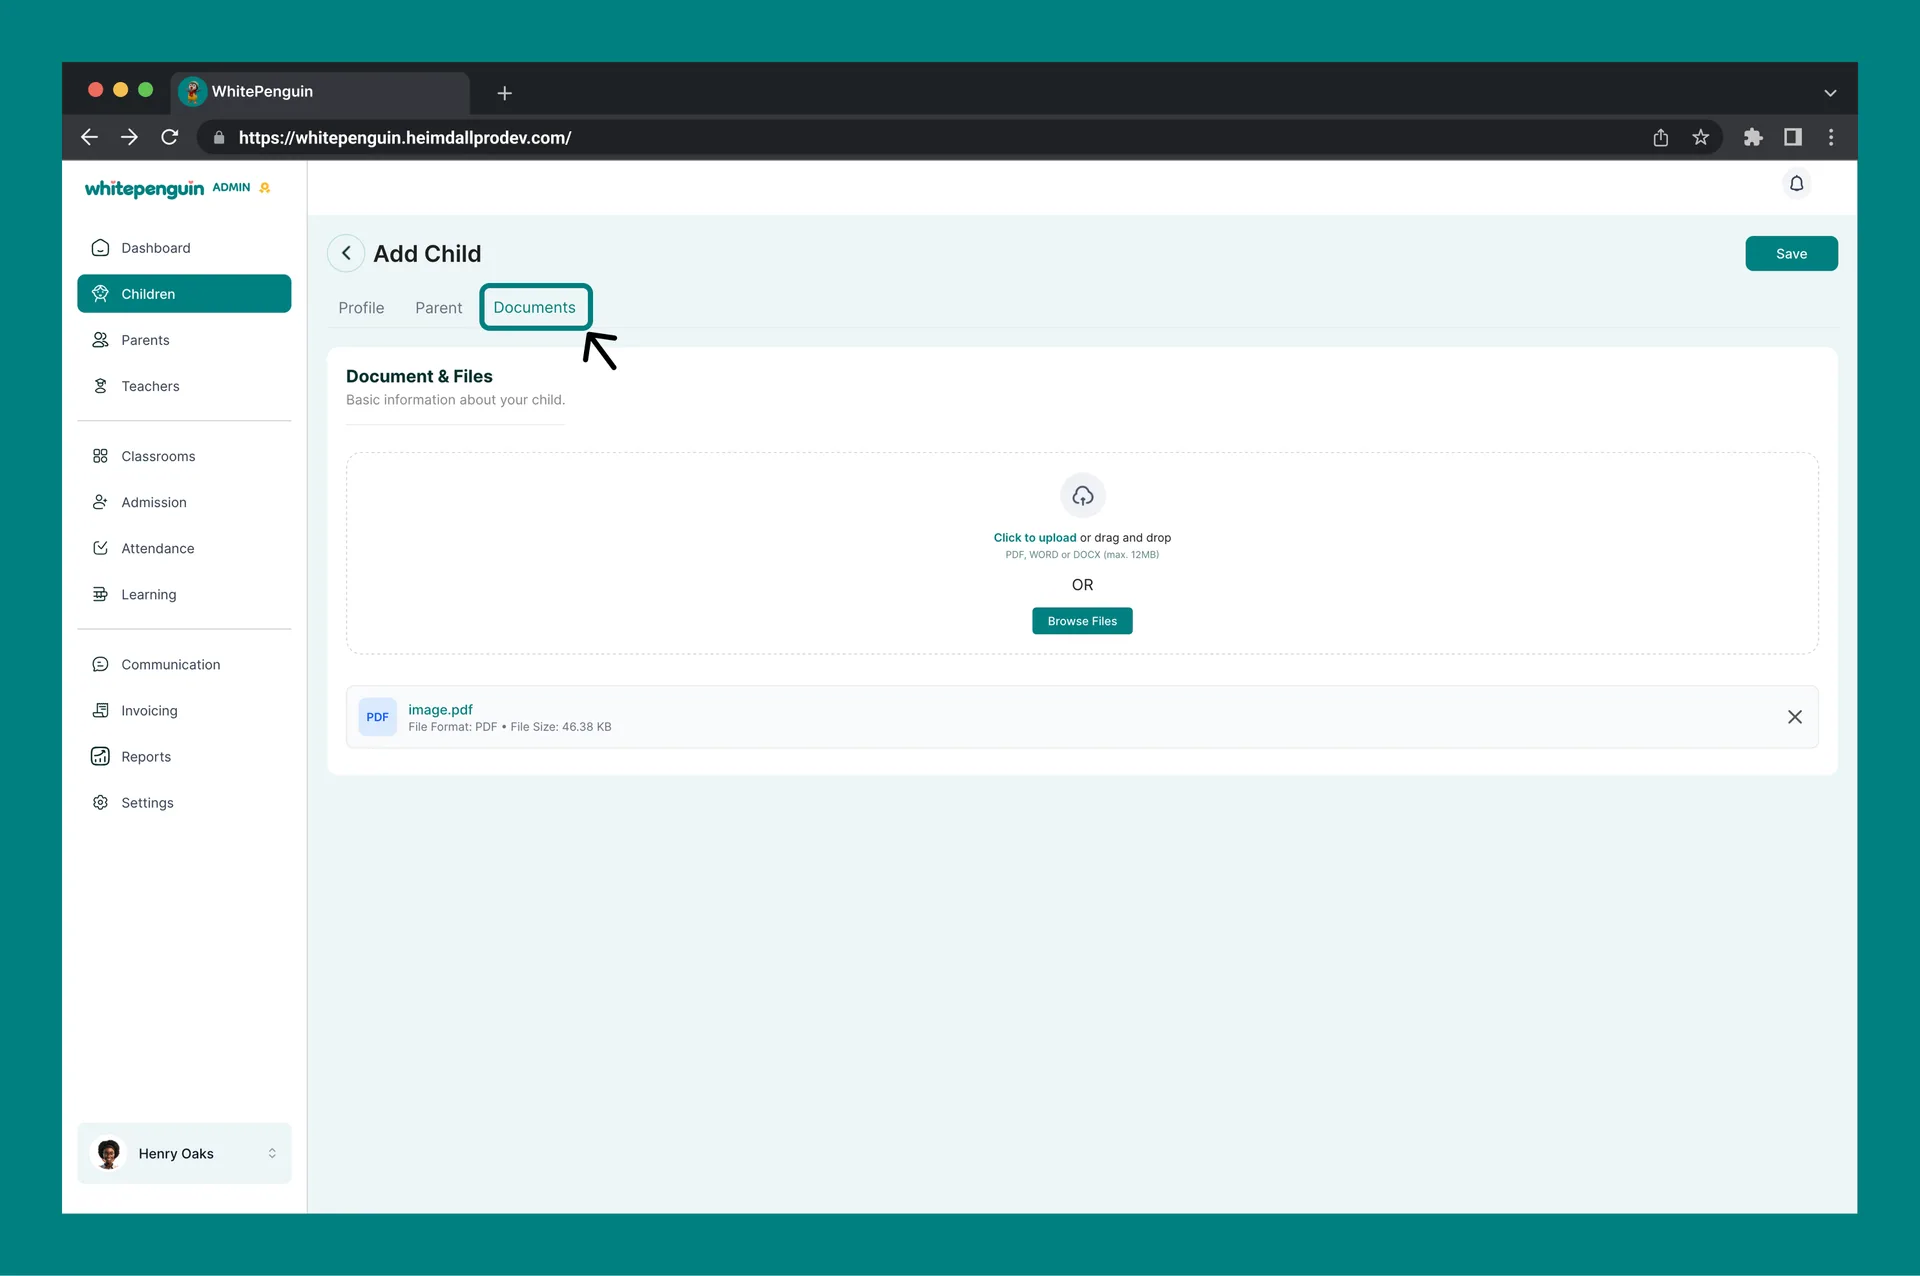
The Documents tab is where you upload the child's required files.
- Accepted formats: PDF, Word (.docx)
- Maximum file size: 12 MB per file
- You can upload files by clicking to upload, drag and drop, or using the Browse Files button.
Uploading at least one document is required to save the child's profile. The form cannot be submitted without a document upload. Make sure the file is in PDF or DOCX format and does not exceed 12 MB.
Once a document is uploaded, click Save to complete and create the child's profile.
Parent Invitation & the Parents Section
After the child's profile is saved:
-
The parent listed in the Parent tab will automatically receive an email invitation to set up their account and access the parent portal.
-
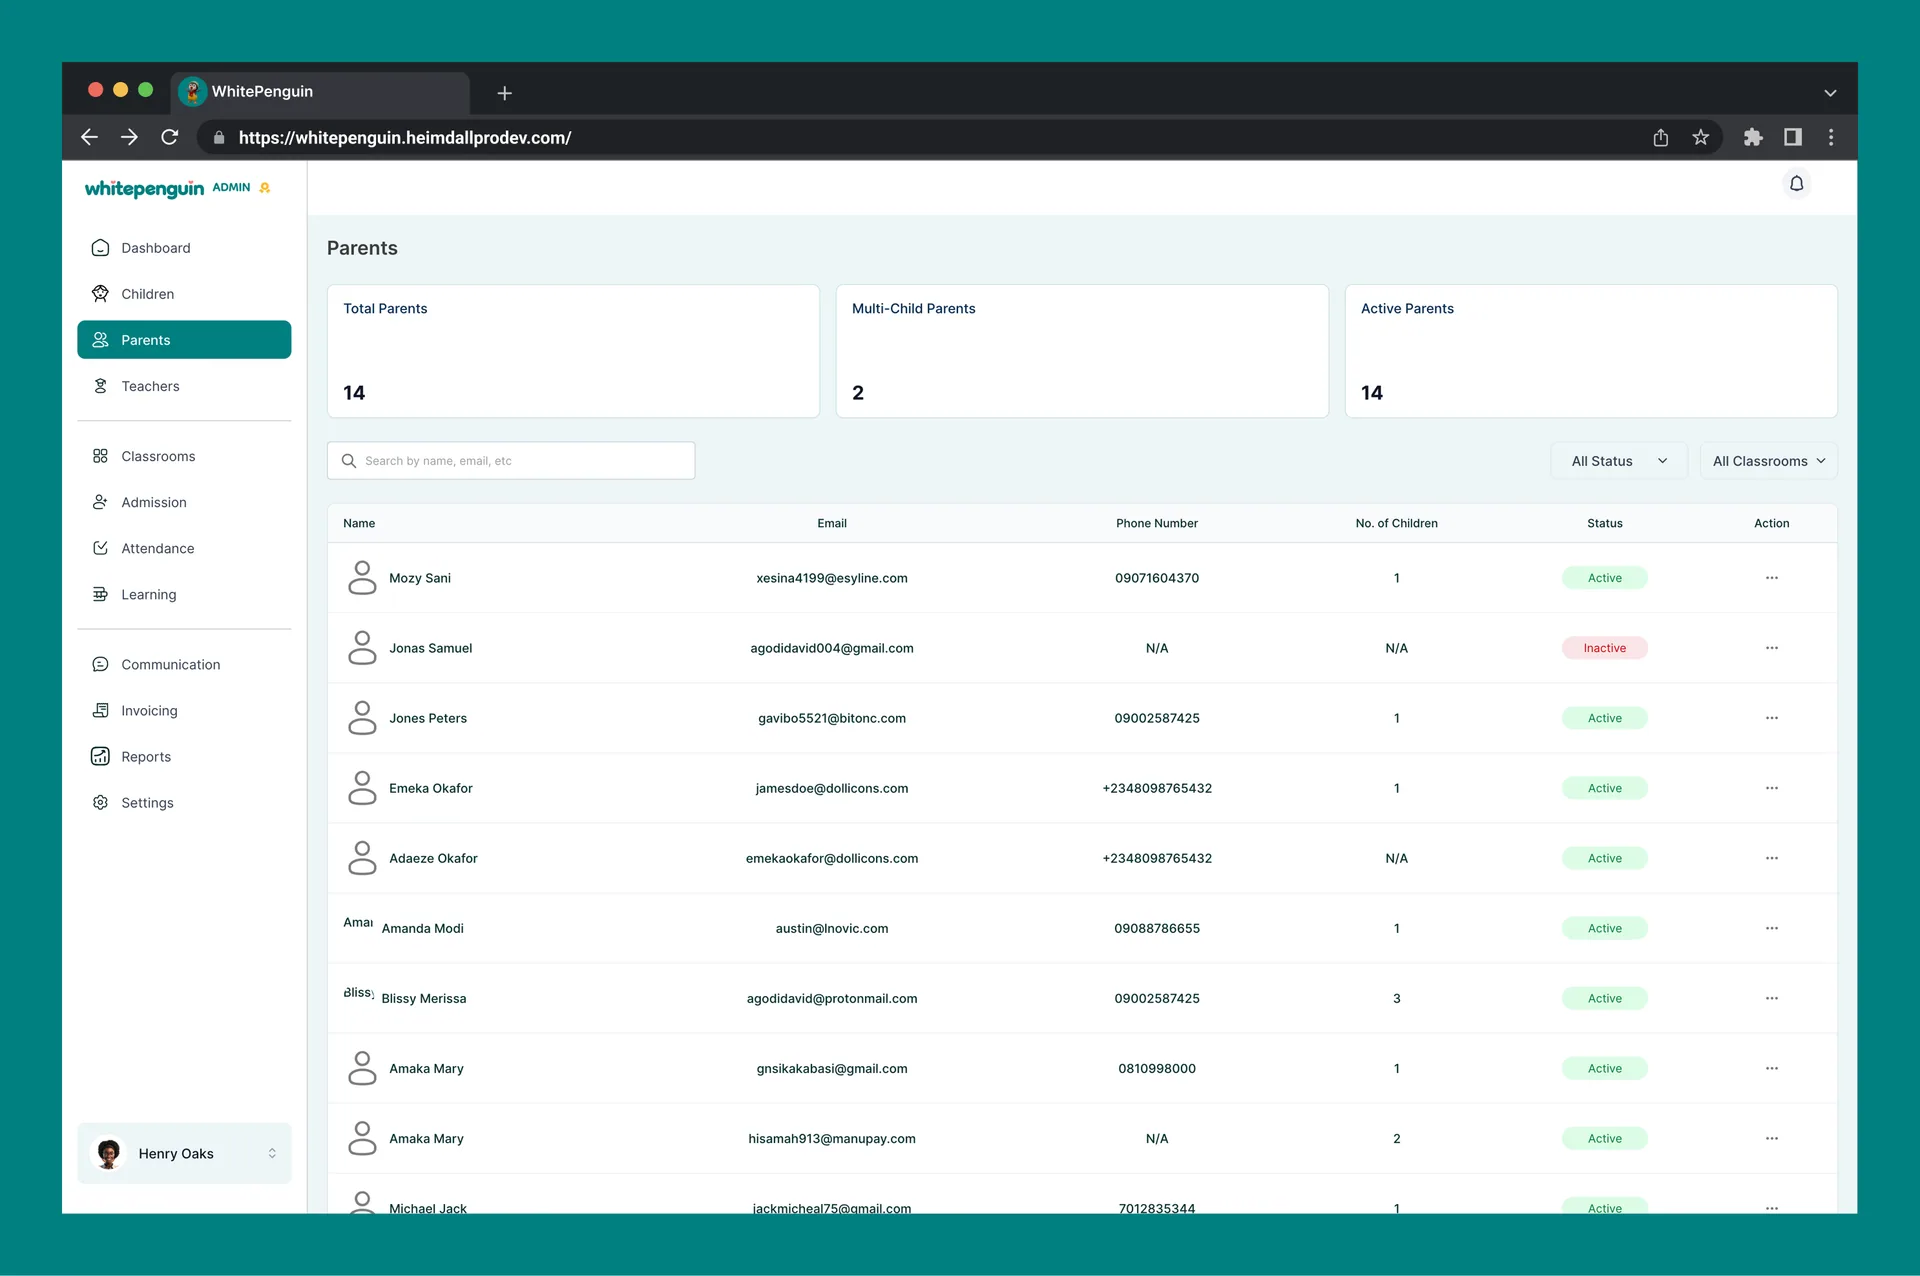
You can view all invited parents from the Parents section in the left sidebar.
-
The Parents page shows three summary cards: Total Parents, Multi-Child Parents, and Active Parents.
-
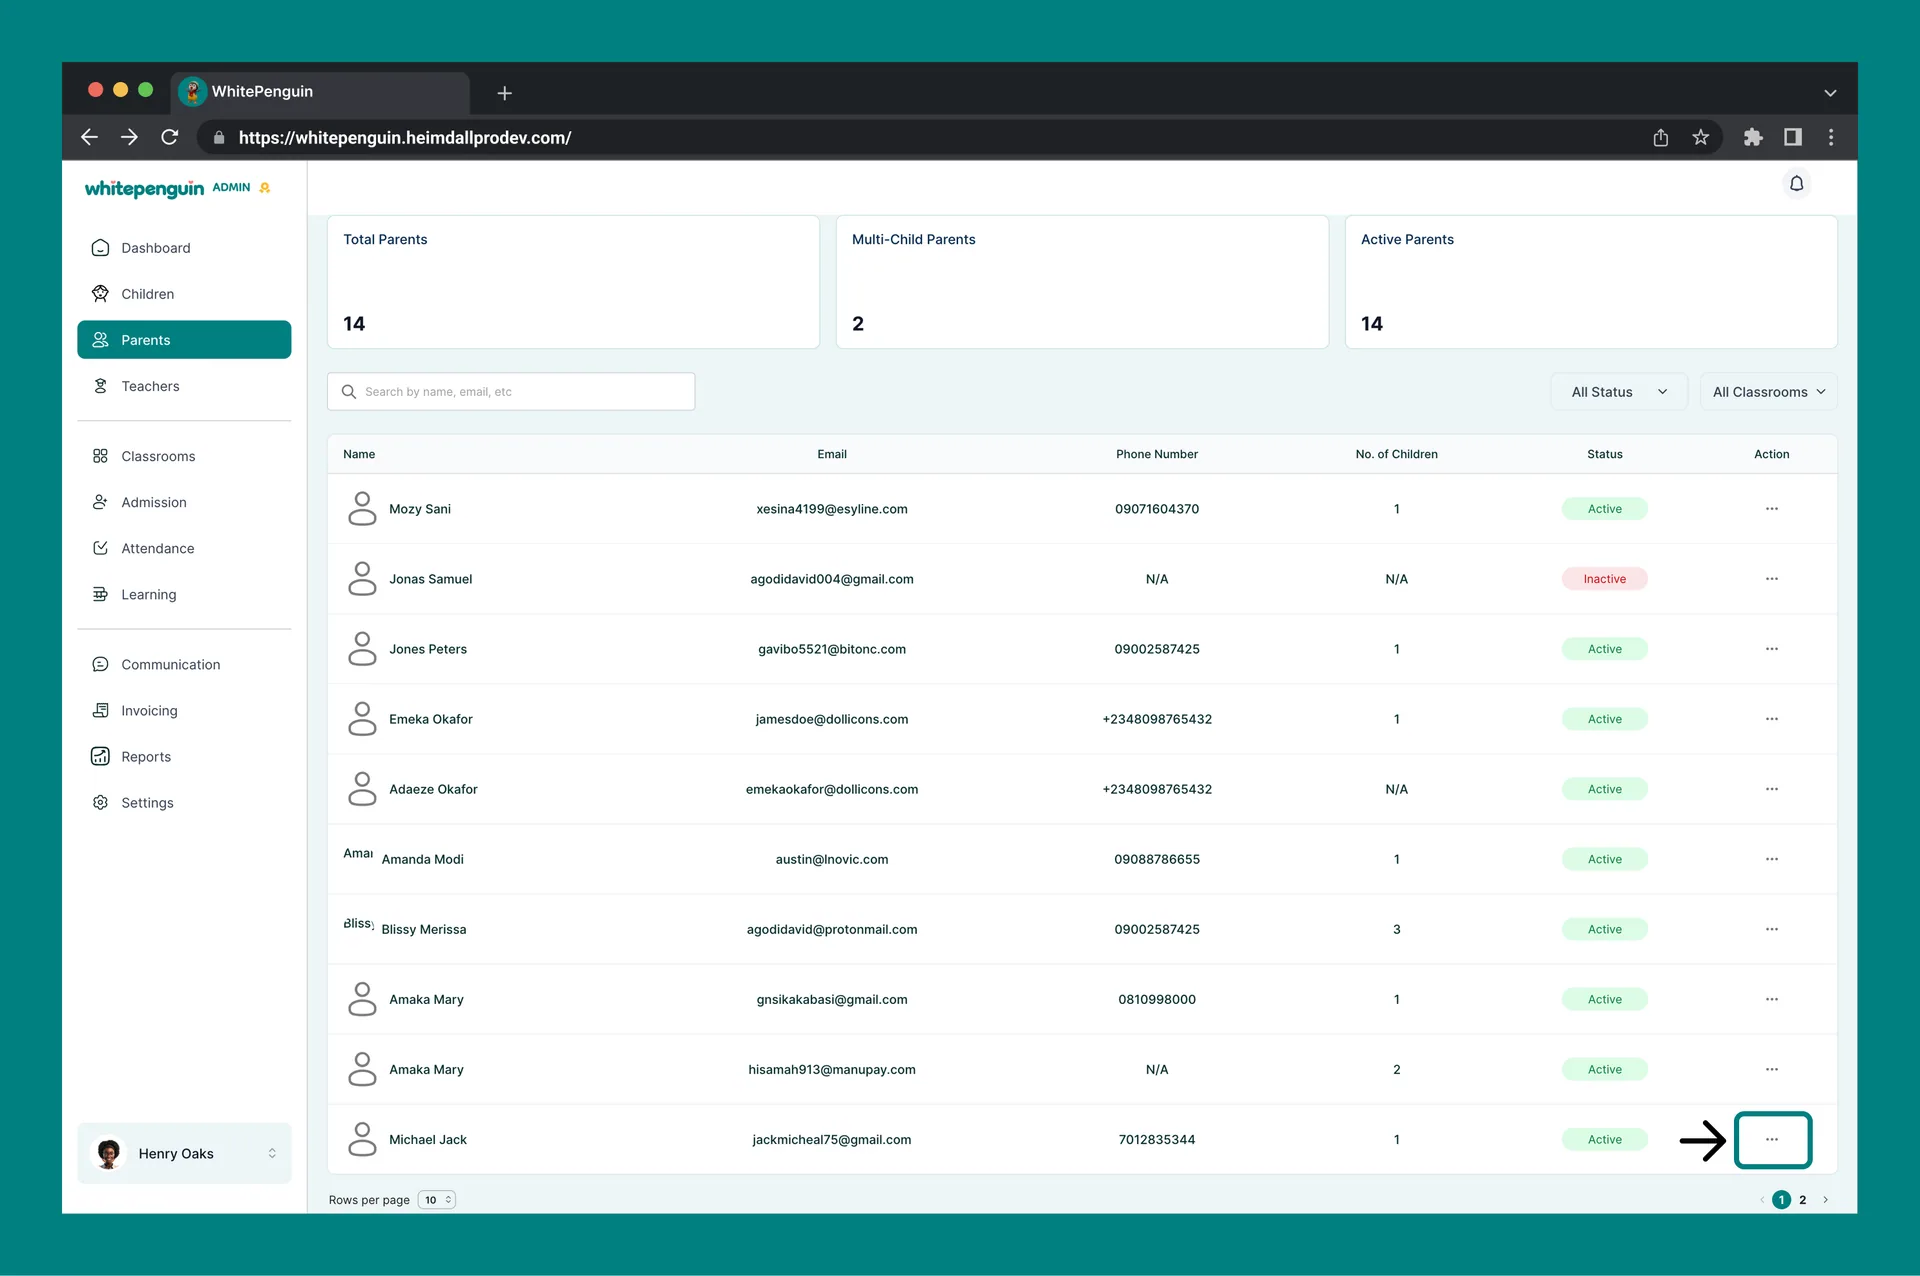
From the Actions (⋯) menu on any parent row, you can:
- View — open the parent's profile
- Resend Invite — resend the invitation email if the parent hasn't accepted yet
- Delete — remove the parent from the system
If a parent hasn't accepted their invitation, their status will appear as Inactive in the Parents section. Use Resend Invite to send them a fresh email.
Tips
- Complete all 3 tabs before saving. The form uses a tab-based layout — you must go through Profile → Parent → Documents in order. Clicking Save before completing all tabs will trigger validation errors.
- Classroom is optional at enrollment. You can add the child without assigning a classroom and assign one later by editing the profile.
- Medical info matters. Even though medical fields are optional, filling in allergies and medications helps teachers and staff respond quickly in emergencies.
- One document minimum. Always have a relevant document ready before starting the Add Child form — this is required to complete enrollment.
- Multiple guardians supported. Use the + Add new parent/guardian button in the Parent tab to link more than one adult to the child's profile.
- Check the Parents section after adding a child to confirm the parent invitation was sent and to track their acceptance status.
FAQs
Yes. All three tabs — Profile, Parent, and Documents — must be fully completed before the profile can be saved. If any required field is missing or no document has been uploaded, the system will display an error banner at the top of the form.
At least one document must be uploaded in the Documents tab to complete the child's enrollment. Accepted formats are PDF and DOCX, with a maximum file size of 12 MB. The document could be an enrollment form, medical record, birth certificate, or any relevant file.
Yes. Once you save the child's profile, the system automatically sends an email invitation to the parent's email address entered in the Parent tab. The parent can use this invite to create their account and access the parent portal.
Go to the Parents section from the left sidebar. Find the parent in the list, click the Actions (⋯) menu, and select Resend Invite. Also ask the parent to check their spam or junk mail folder.
Yes. In the Parent tab, click + Add new parent/guardian to add additional parents or guardians to the child's profile. Each will receive a separate invitation email.
Yes. The Classroom field in the Profile tab is optional. You can complete and save the child's profile without a classroom assignment and update it later by editing the profile.
Go to the Parents section from the left sidebar. All parents linked to children profiles are listed here with their status (Active or Inactive), email, phone number, and number of children linked to them.
The Schedule field in the Profile tab lets you select which days of the week the child attends school. At least one day must be selected. This is used for attendance tracking, meal planning, and daily reports.
Last updated on
How to Add & Invite Teachers
Learn how to add a new teacher to your school, assign them to a classroom, set their role, and automatically send them an email invitation to access their own dashboard.
How to Add or Link Parents
Learn how parents are added and linked to children in WhitePenguin, how to view and manage parent profiles, and how to track their invitation status from the Parents section.