

How to Create a New Classroom
Learn how to set up a new classroom in WhitePenguin — configure age ranges, capacity, assign staff, and get your room ready for children in just a few steps.
Overview
Classrooms are the core organizational unit in WhitePenguin. Every child, teacher, attendance record, and activity is tied to a classroom. Before you can add children or assign teachers to a room, the classroom must first be created in the system.
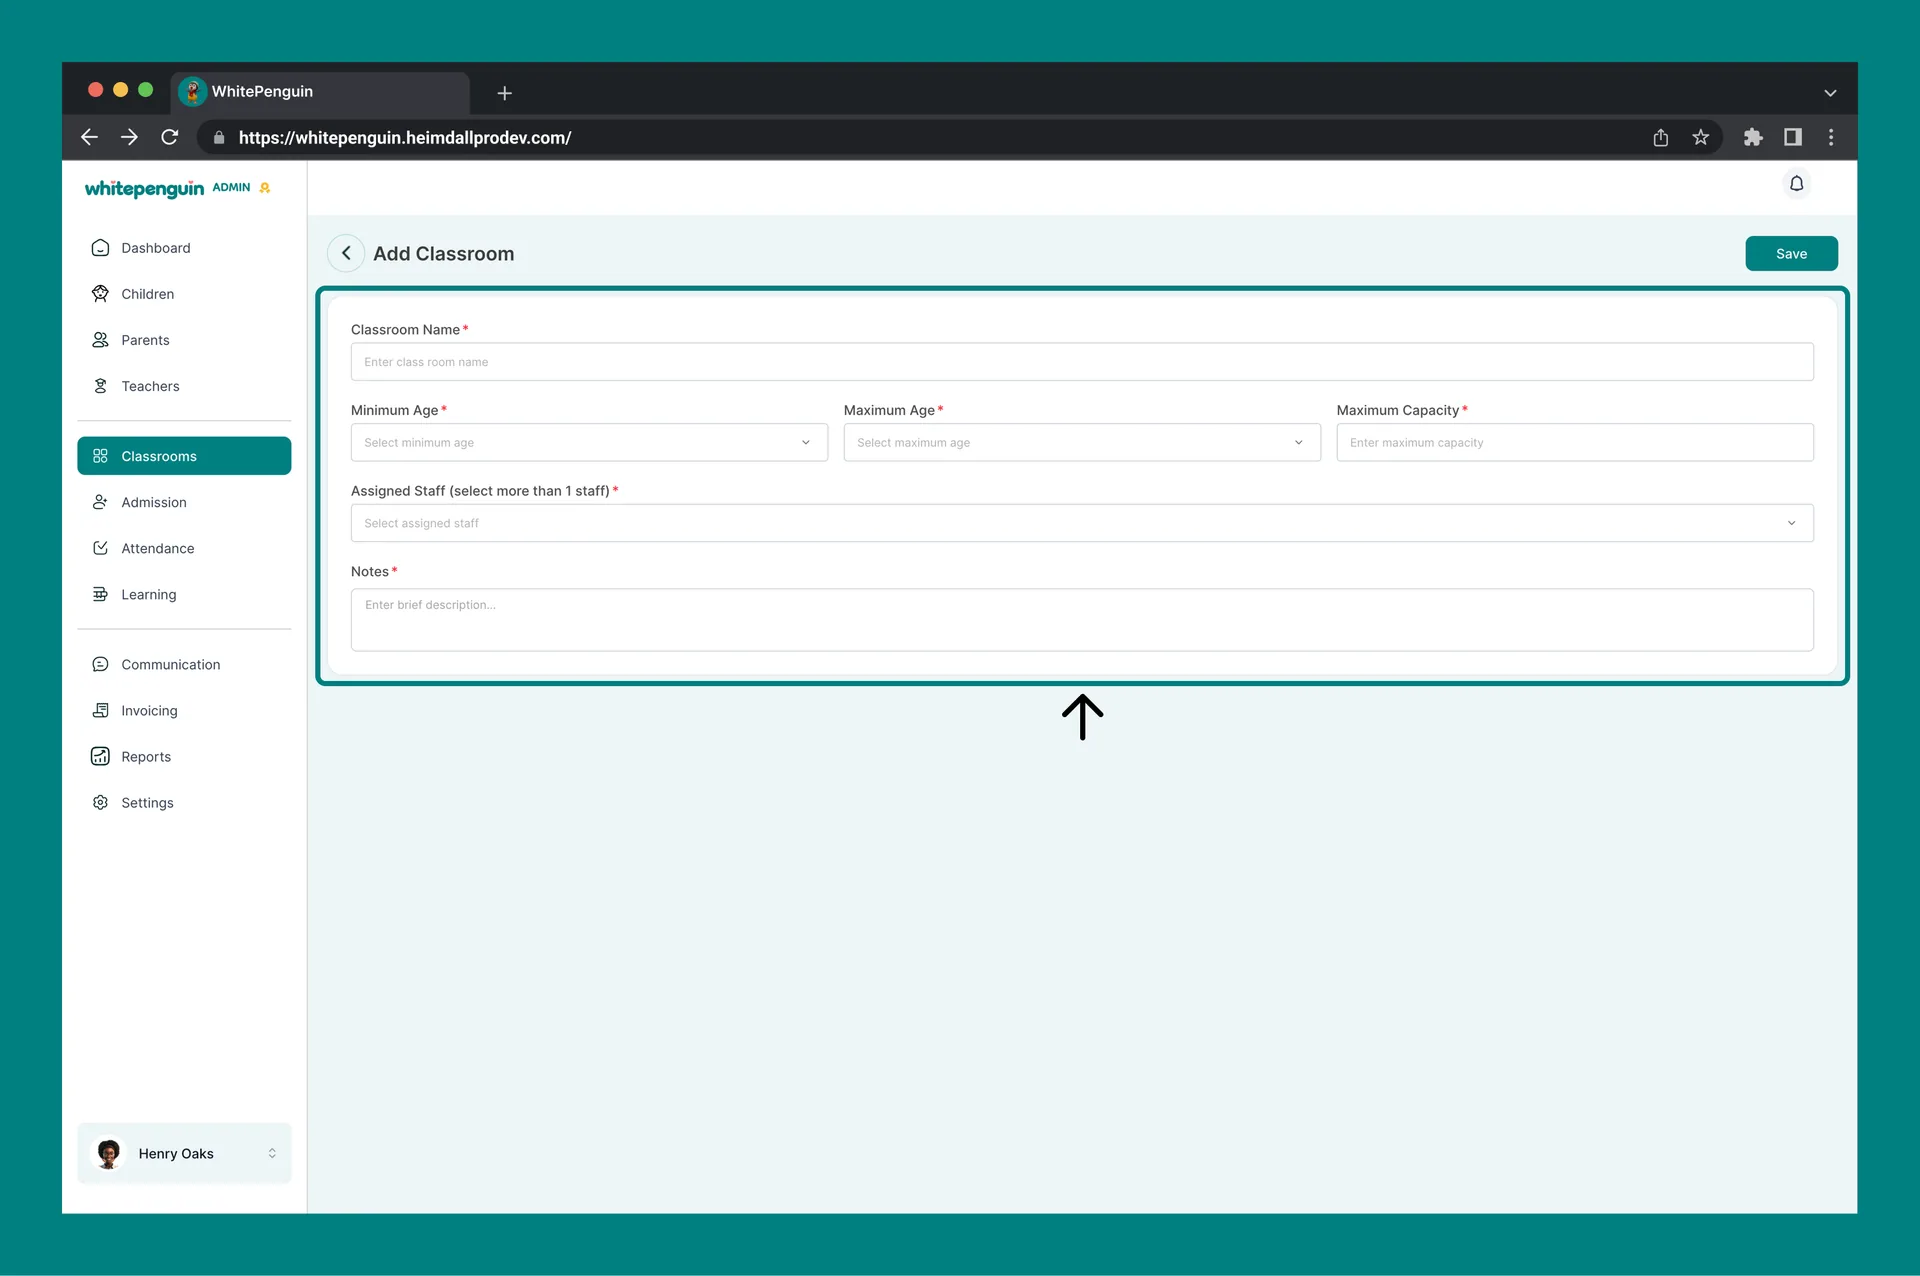
The Add Classroom form lets you define the classroom's name, the age range it supports, its maximum capacity, the staff assigned to it, and any relevant notes.
How to Access the Add Classroom Form
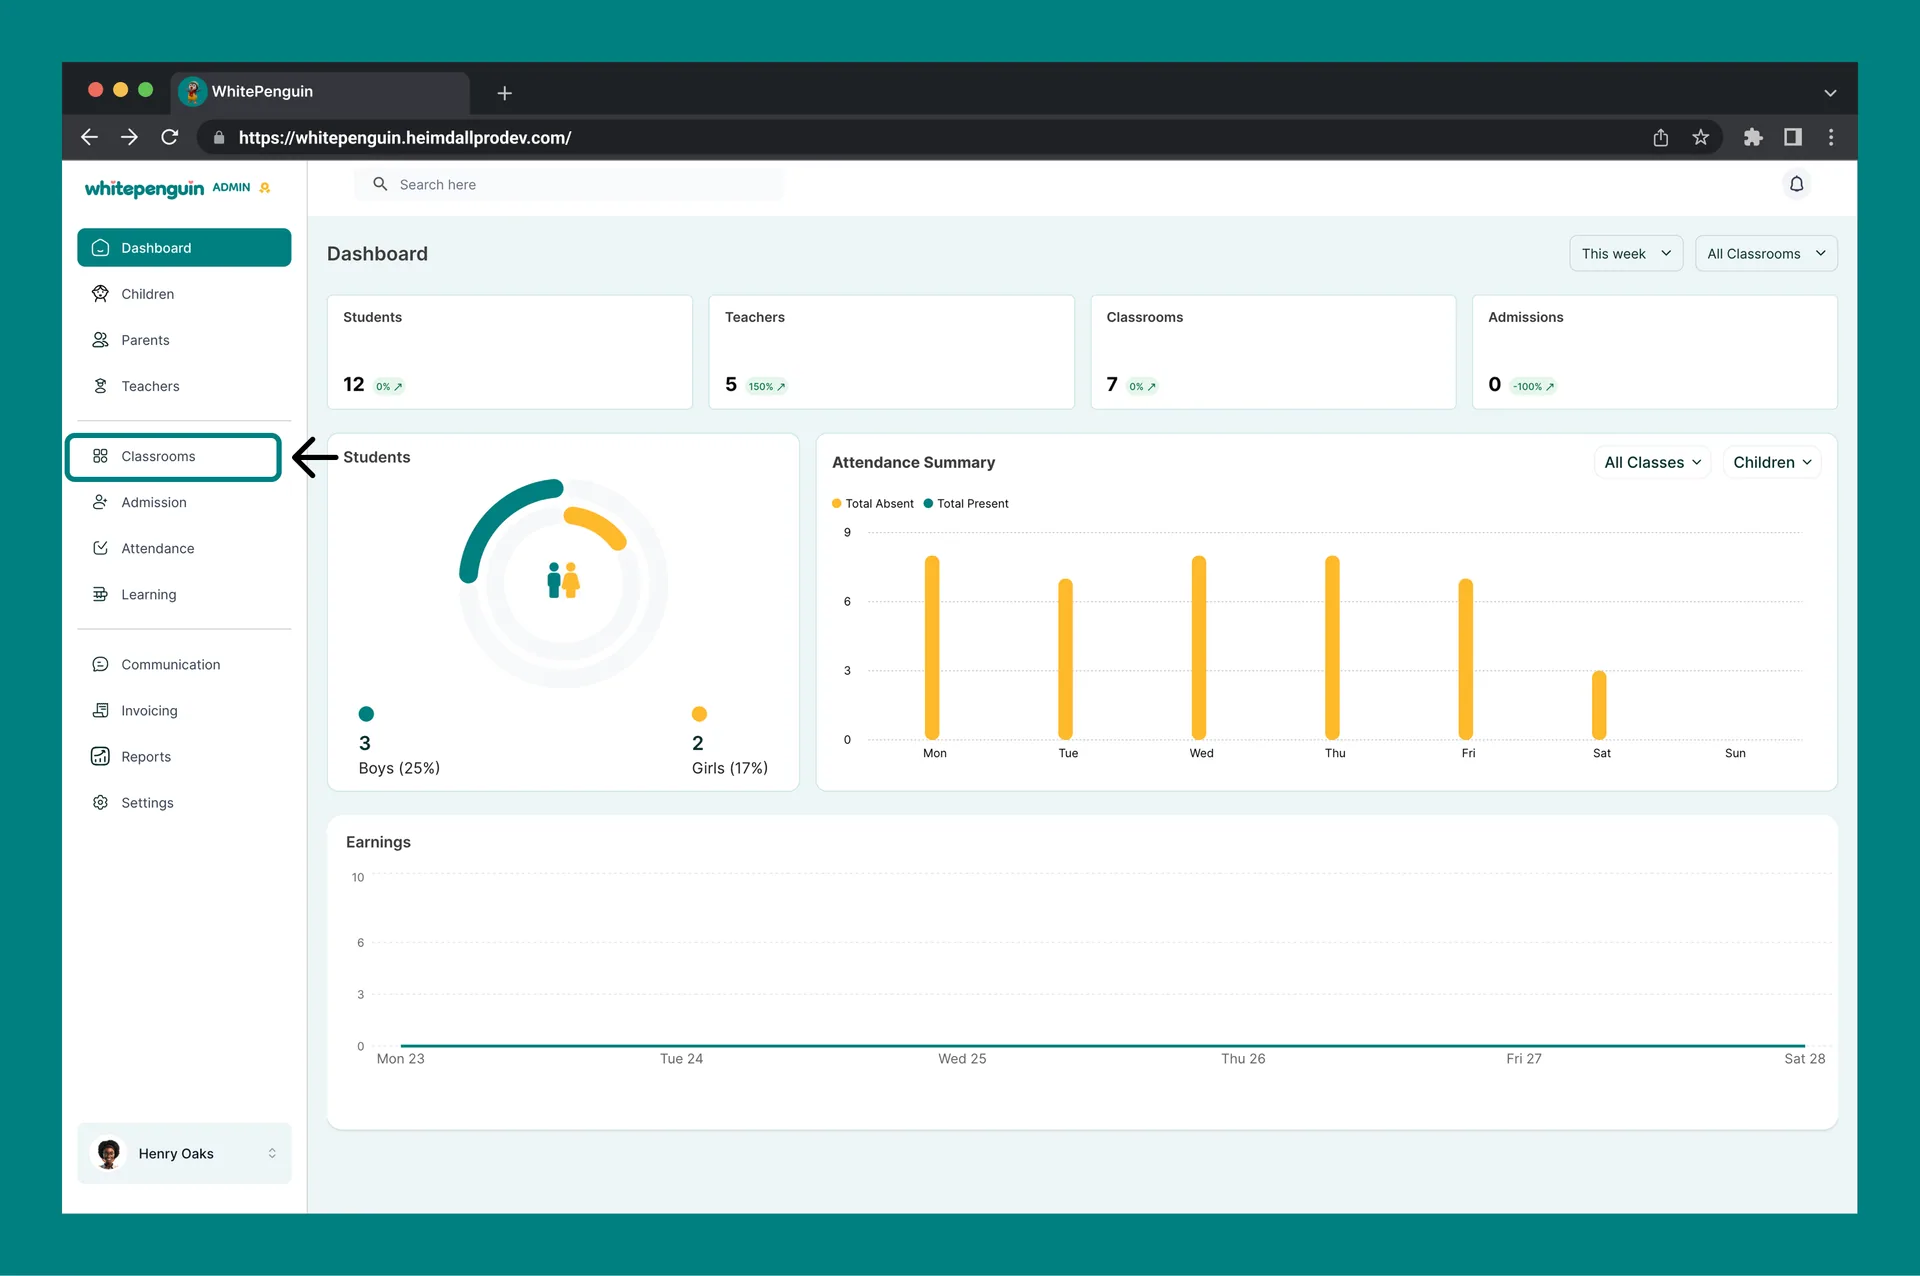
- Click Classrooms in the left sidebar.
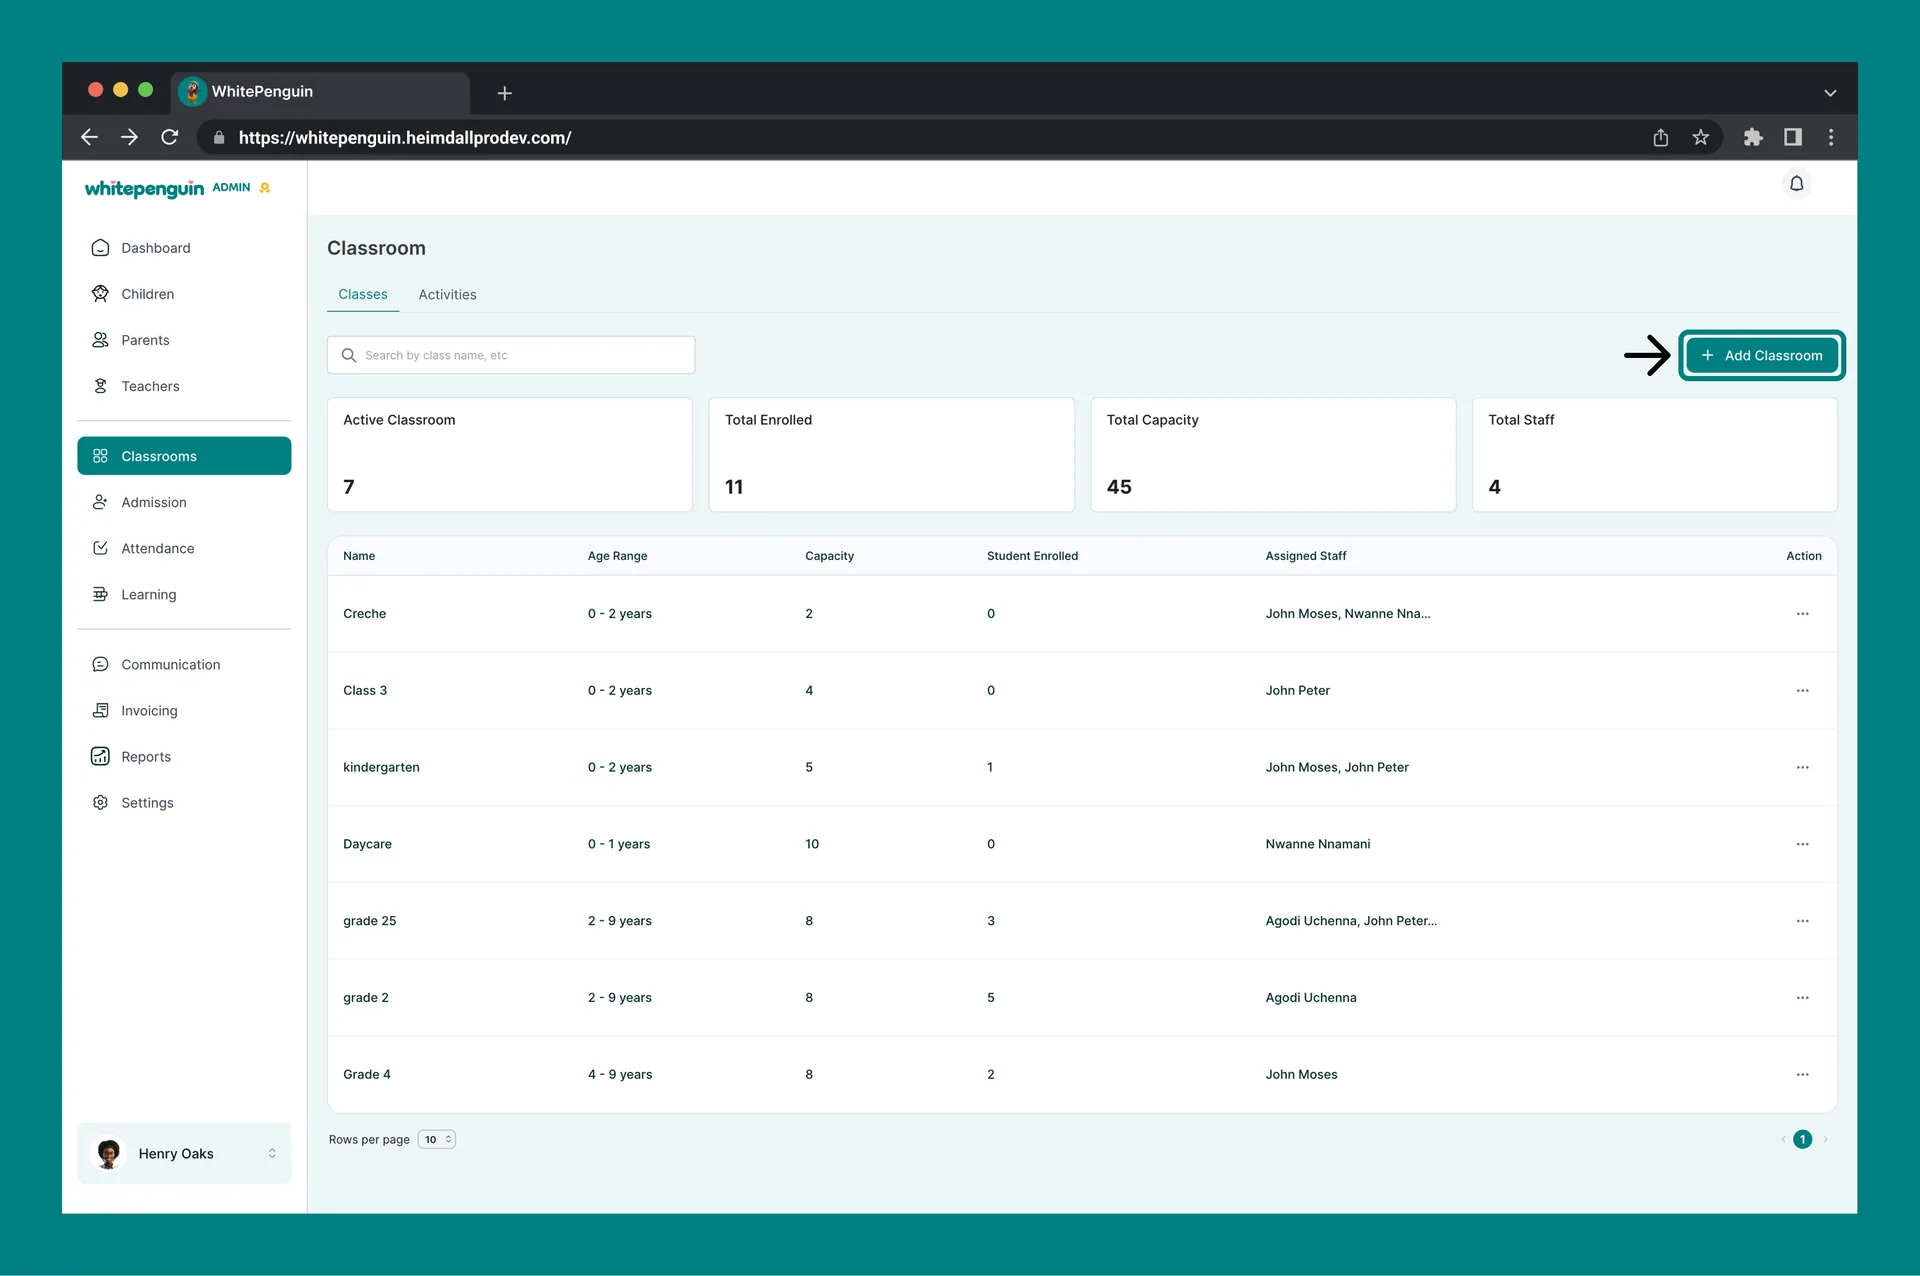
- On the Classrooms page, click the + Add Classroom button (top right of the page).
- The Add Classroom form will open as a full page.
- Fill in the required fields (marked with a red asterisk *).
- Click Save when done.
You can also access Classrooms quickly using the Quick Actions shortcut from the Search menu, then click + Add Classroom from there.
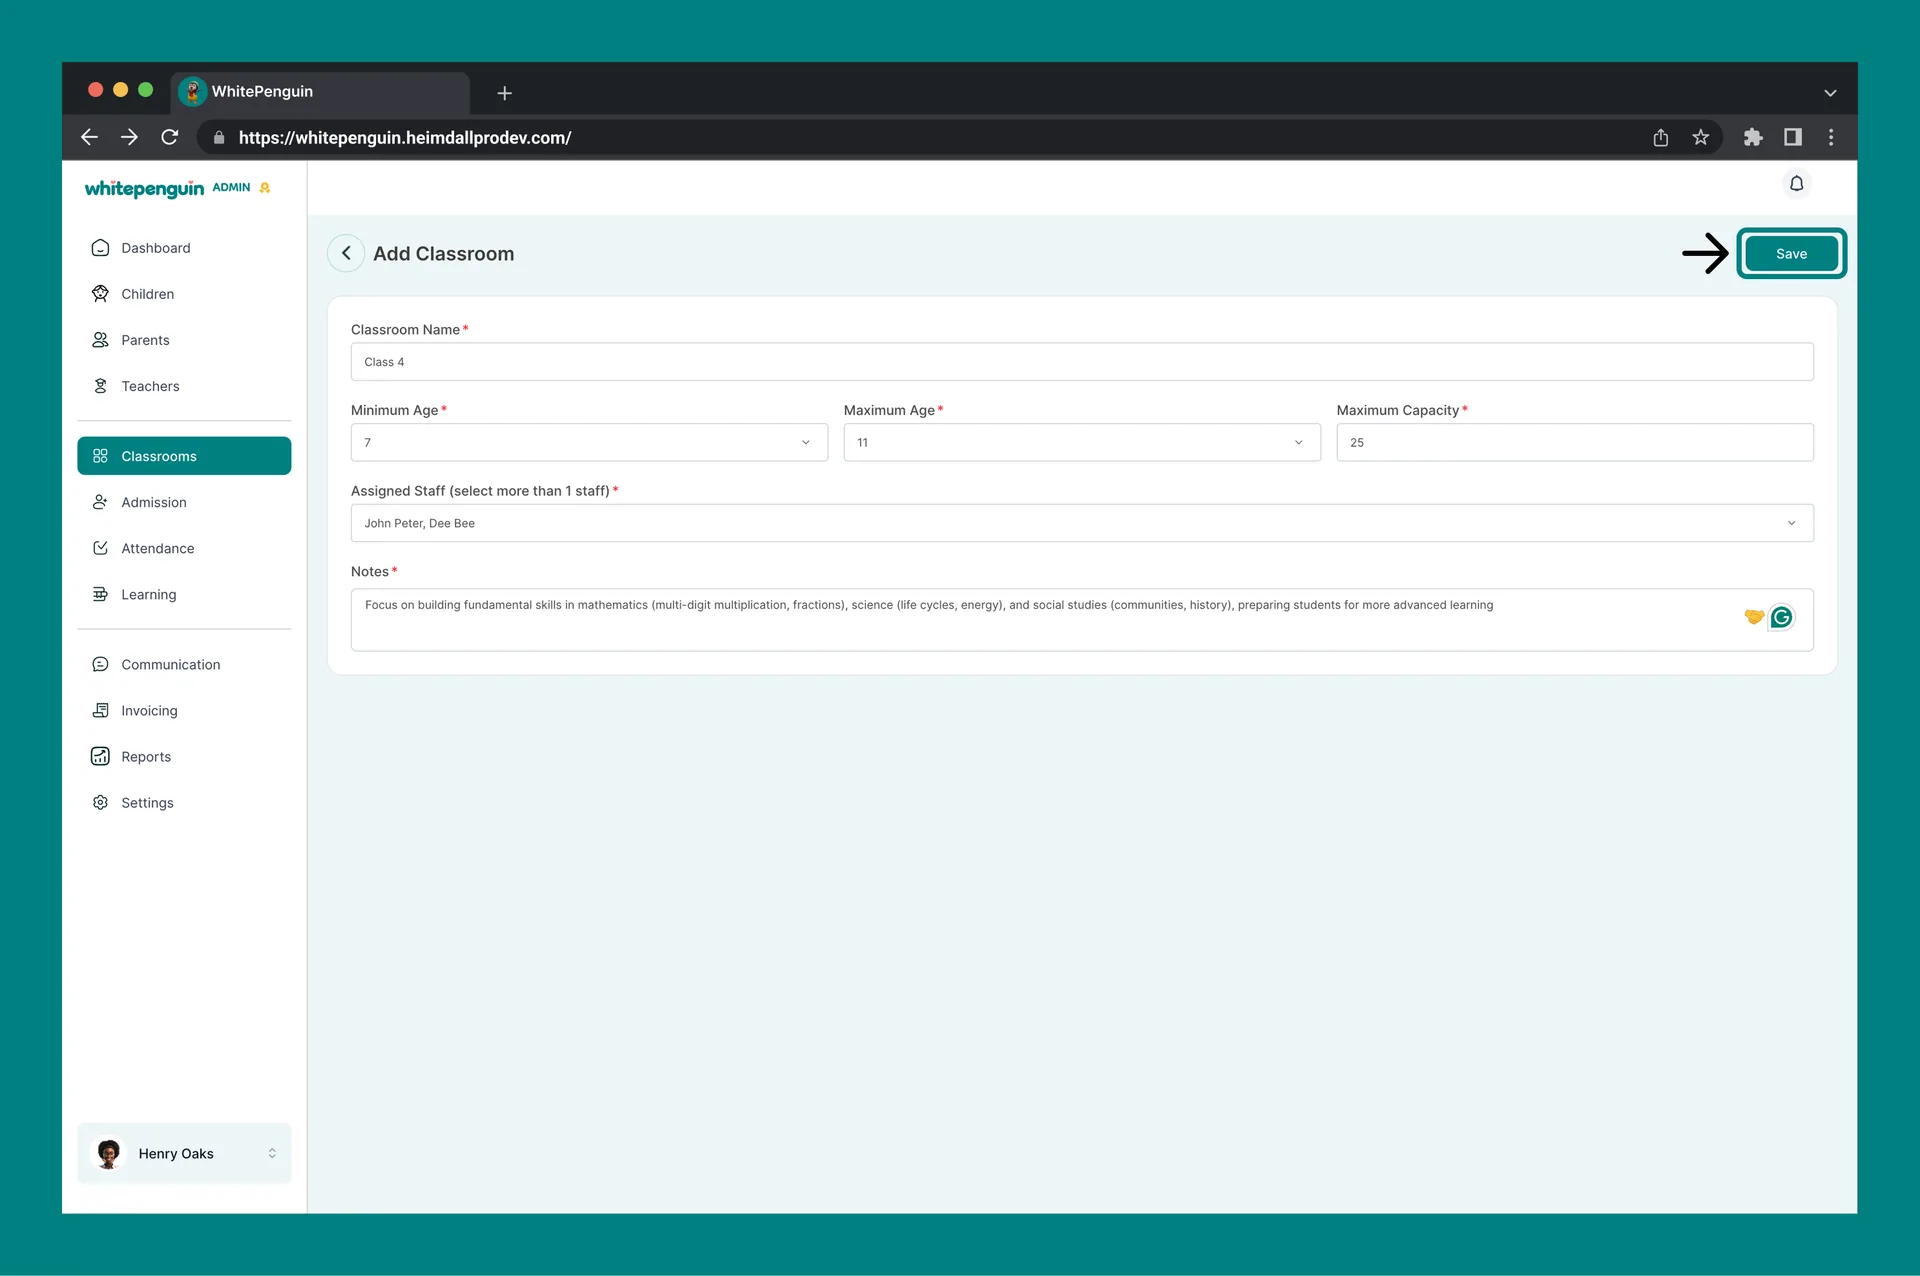
Form Fields — Step by Step
1. Classroom Name (required)
Enter a clear, recognizable name for the classroom. This name will appear across the system — in attendance sheets, reports, and parent-facing views.
Examples: Butterflies Room, Toddlers A, Pre-K Blue
2. Minimum Age (required)
Select the minimum age of children eligible for this classroom from the dropdown. Age values range from 0 to 20 years.
Use this to ensure children are placed in age-appropriate classrooms during enrollment.
3. Maximum Age (required)
Select the maximum age of children eligible for this classroom from the dropdown. Age values range from 0 to 20 years.
The Maximum Age must always be greater than the Minimum Age. For example, a classroom for toddlers might have a minimum age of 1 and a maximum age of 3.
4. Maximum Capacity (required)
Enter the maximum number of children the classroom can accommodate. This helps you track room occupancy and prevents over-enrollment.
Tip: Set this based on your facility's physical capacity and licensing requirements.
5. Assigned Staff (optional at creation)
Use the Assigned Staff dropdown to select one or more teachers to assign to this classroom.
You must have at least one teacher added to the system before you can assign staff here. If no teachers have been added yet, this field will be empty.
You can save the classroom without assigning staff and come back later to assign a teacher by editing the classroom. See the Tips section below for how to do this.
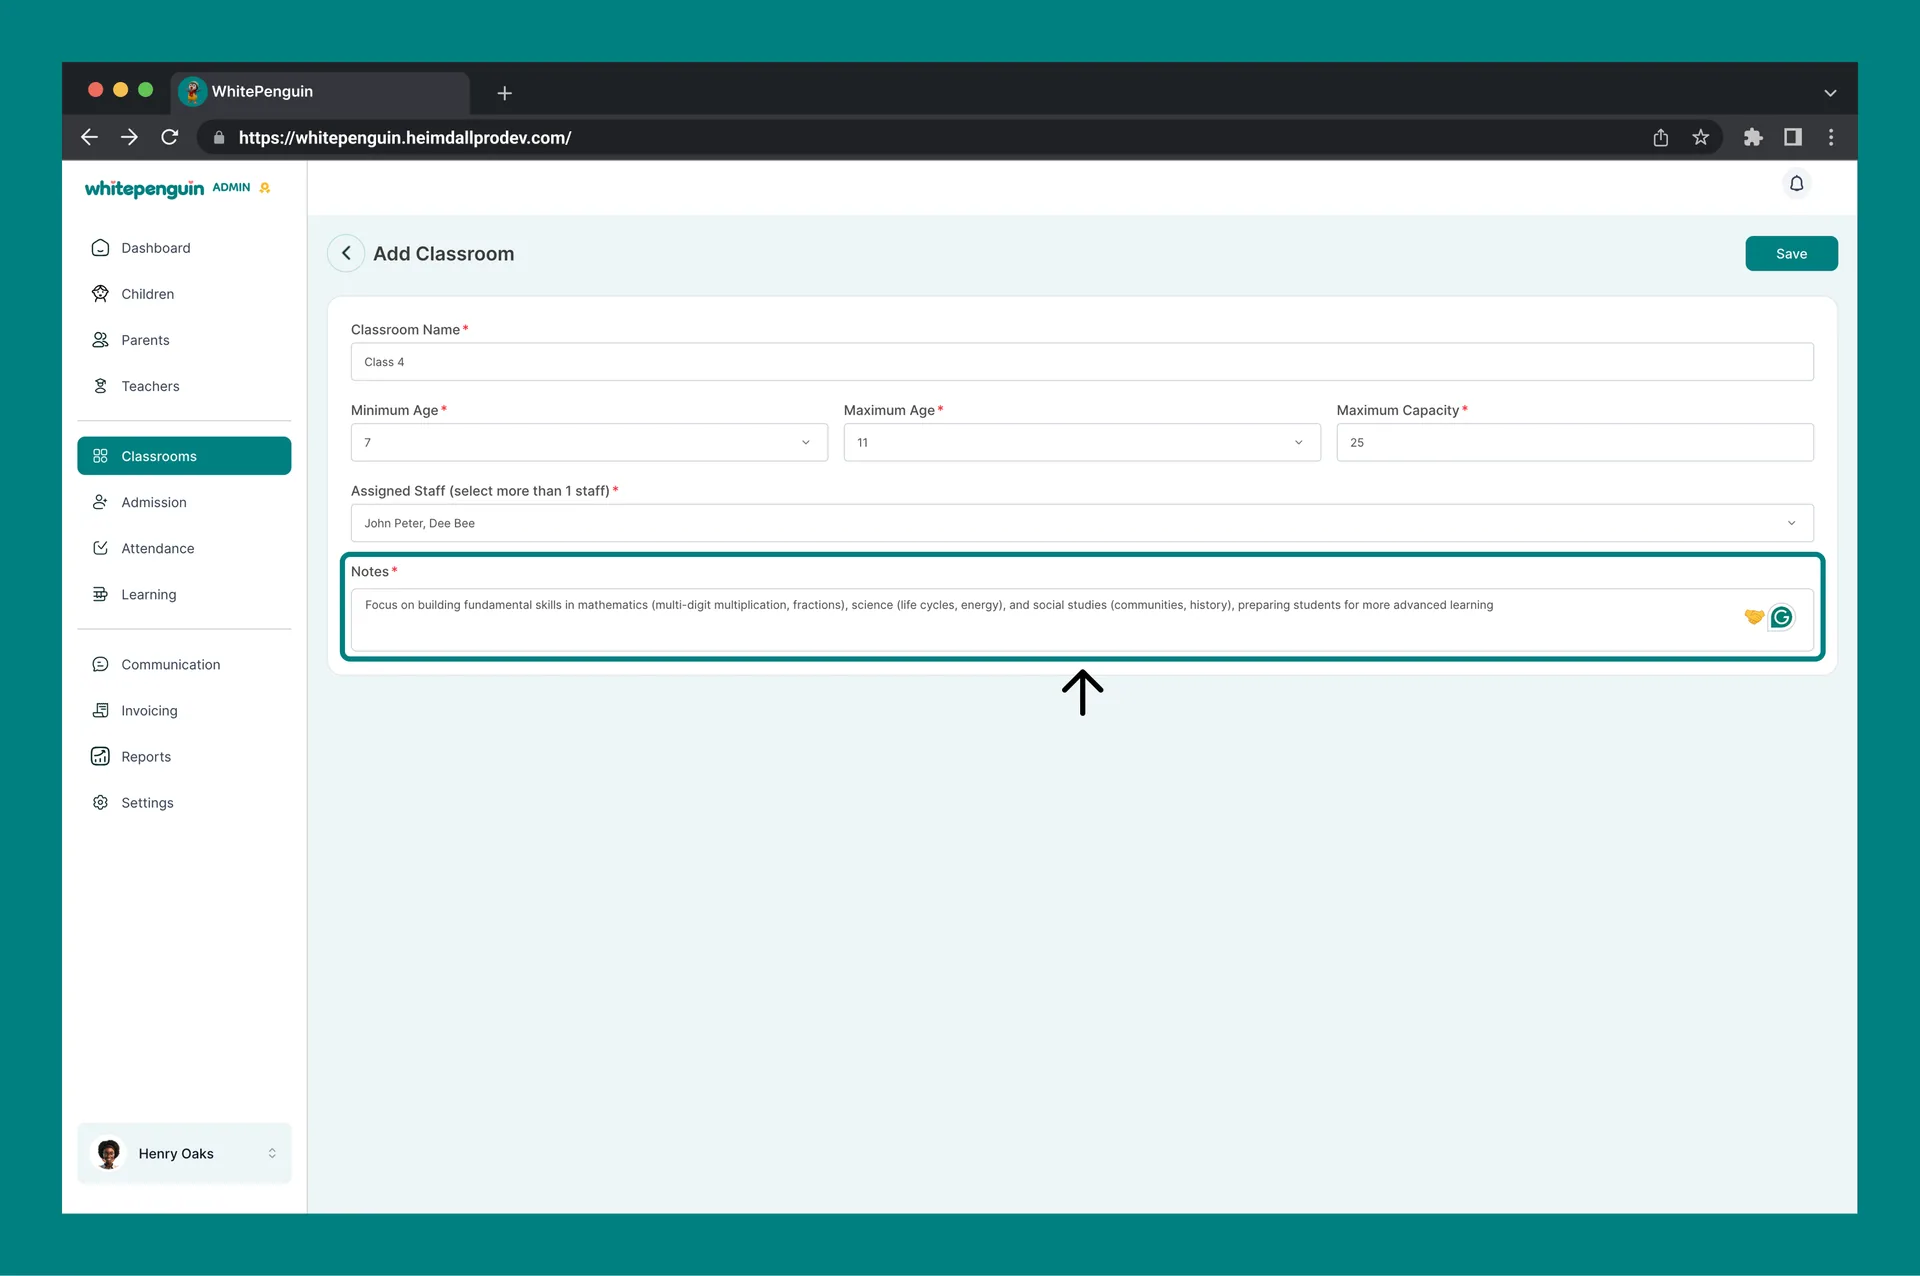
6. Notes (required)
Enter a brief description or any relevant notes about the classroom — such as the curriculum focus, room location, or special considerations.
Tips & Related Info
- Age range (0–20 years): The Min/Max Age dropdowns support a full range from 0 to 20 years, making the system suitable for nurseries, preschools, primary schools, and beyond.
- No teacher yet? No problem. You can create a classroom without assigning a teacher. Once you have added teachers to the system via the Teachers section, go back to the classroom, click Edit, assign the teacher, and click Save.
- Multiple staff per classroom: The Assigned Staff field supports selecting more than one teacher per classroom. This is useful for rooms with co-teachers or classroom aides.
- Classroom names are visible to parents in some views — use clear, friendly names that are easy for families to recognize.
- Review capacity regularly — as you enroll more children, check the classroom's capacity to avoid overloading a room.
FAQs
Yes. The Assigned Staff field is optional at the time of creation. You can save the classroom first and then assign a teacher later by going to Classrooms, clicking on the classroom, selecting Edit, choosing the teacher from the Assigned Staff dropdown, and clicking Save.
Both the Minimum Age and Maximum Age dropdowns support values from 0 to 20 years. This makes the system flexible for nurseries, kindergartens, and older school-age programs.
This means no teachers have been added to your school yet. Go to the Teachers section from the sidebar and add at least one teacher profile first. Once a teacher is added, they will appear in the Assigned Staff dropdown when creating or editing a classroom.
Yes. The Assigned Staff field supports selecting multiple teachers for the same classroom. This is useful for rooms with co-teachers, assistants, or rotating staff.
Yes. Go to Classrooms, find the classroom you want to update, and click the Edit option. You can change the name, age range, capacity, assigned staff, and notes at any time.
The system will flag the classroom as full during enrollment. You will need to either increase the Maximum Capacity in the classroom settings or create a new classroom to accommodate additional children.
Classrooms with active children or attendance records cannot be deleted to preserve data integrity. You can deactivate or archive a classroom instead. Contact your system administrator if you need to permanently remove a classroom.
Last updated on
Setup Your School — Admin
Set up your school in WhitePenguin: create classrooms, add and invite teachers, add children profiles and add or link parents.
How to Add & Invite Teachers
Learn how to add a new teacher to your school, assign them to a classroom, set their role, and automatically send them an email invitation to access their own dashboard.