

Using Notification Panel
Stay up-to-date on the most important things happening at your school — new messages, student enrollments, and more — all from the Notification Panel at the top right of your admin header.
Overview
The Notification Panel keeps Admin users informed about key events happening in the school in real time. Whenever a new message is received, a student is enrolled, or another important action takes place, a notification is automatically added to your panel so you never miss anything critical.
The panel is accessible from every page in the admin panel and displays a badge counter on the bell icon to show how many unread notifications you have.
How to Access the Notification Panel
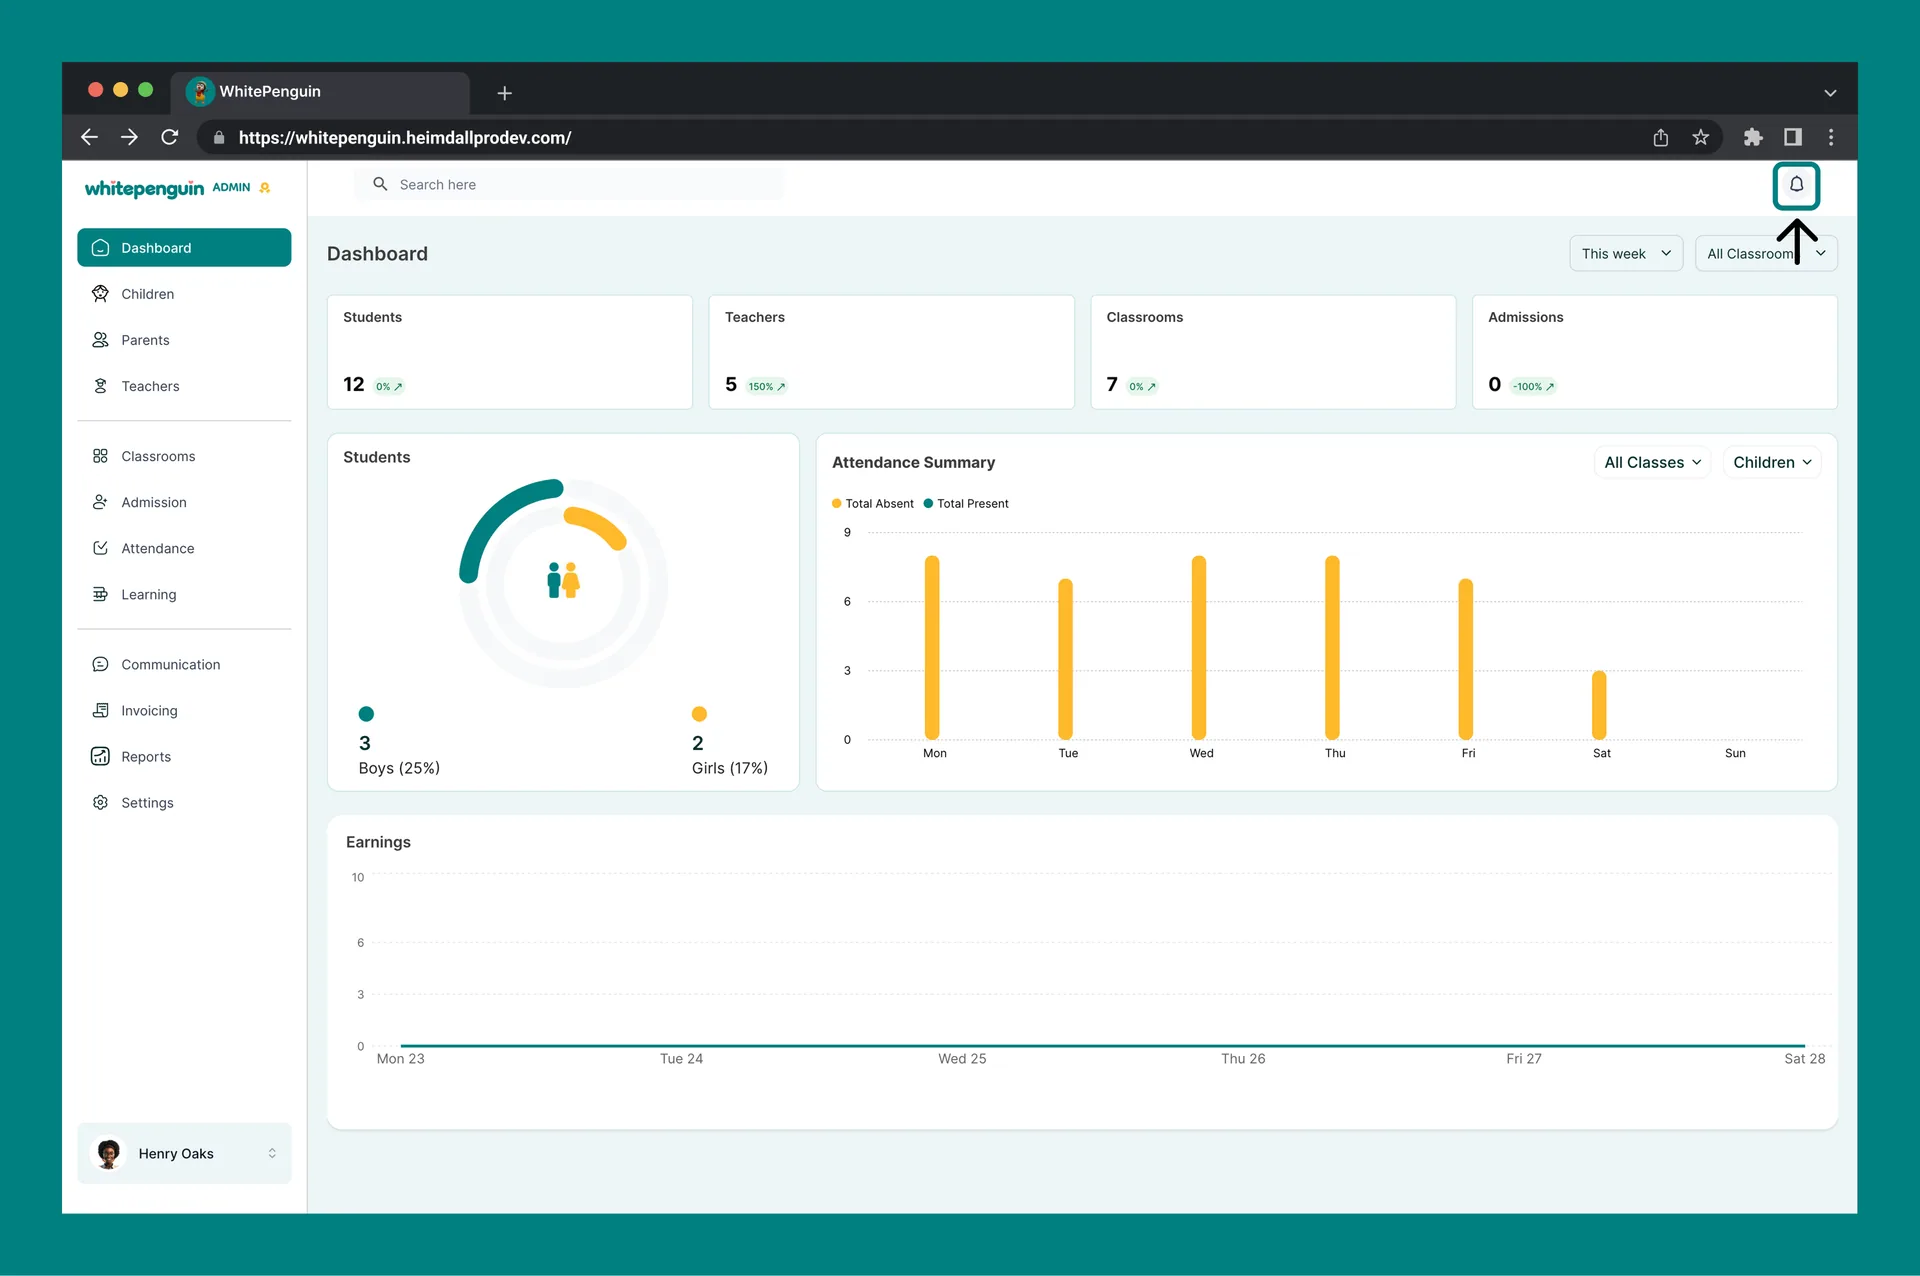
- Look for the bell icon 🔔 at the top right of the admin header.
- A red badge on the bell icon shows the number of unread notifications (e.g., 1, 3).
- Click the bell icon to open the Notifications panel.
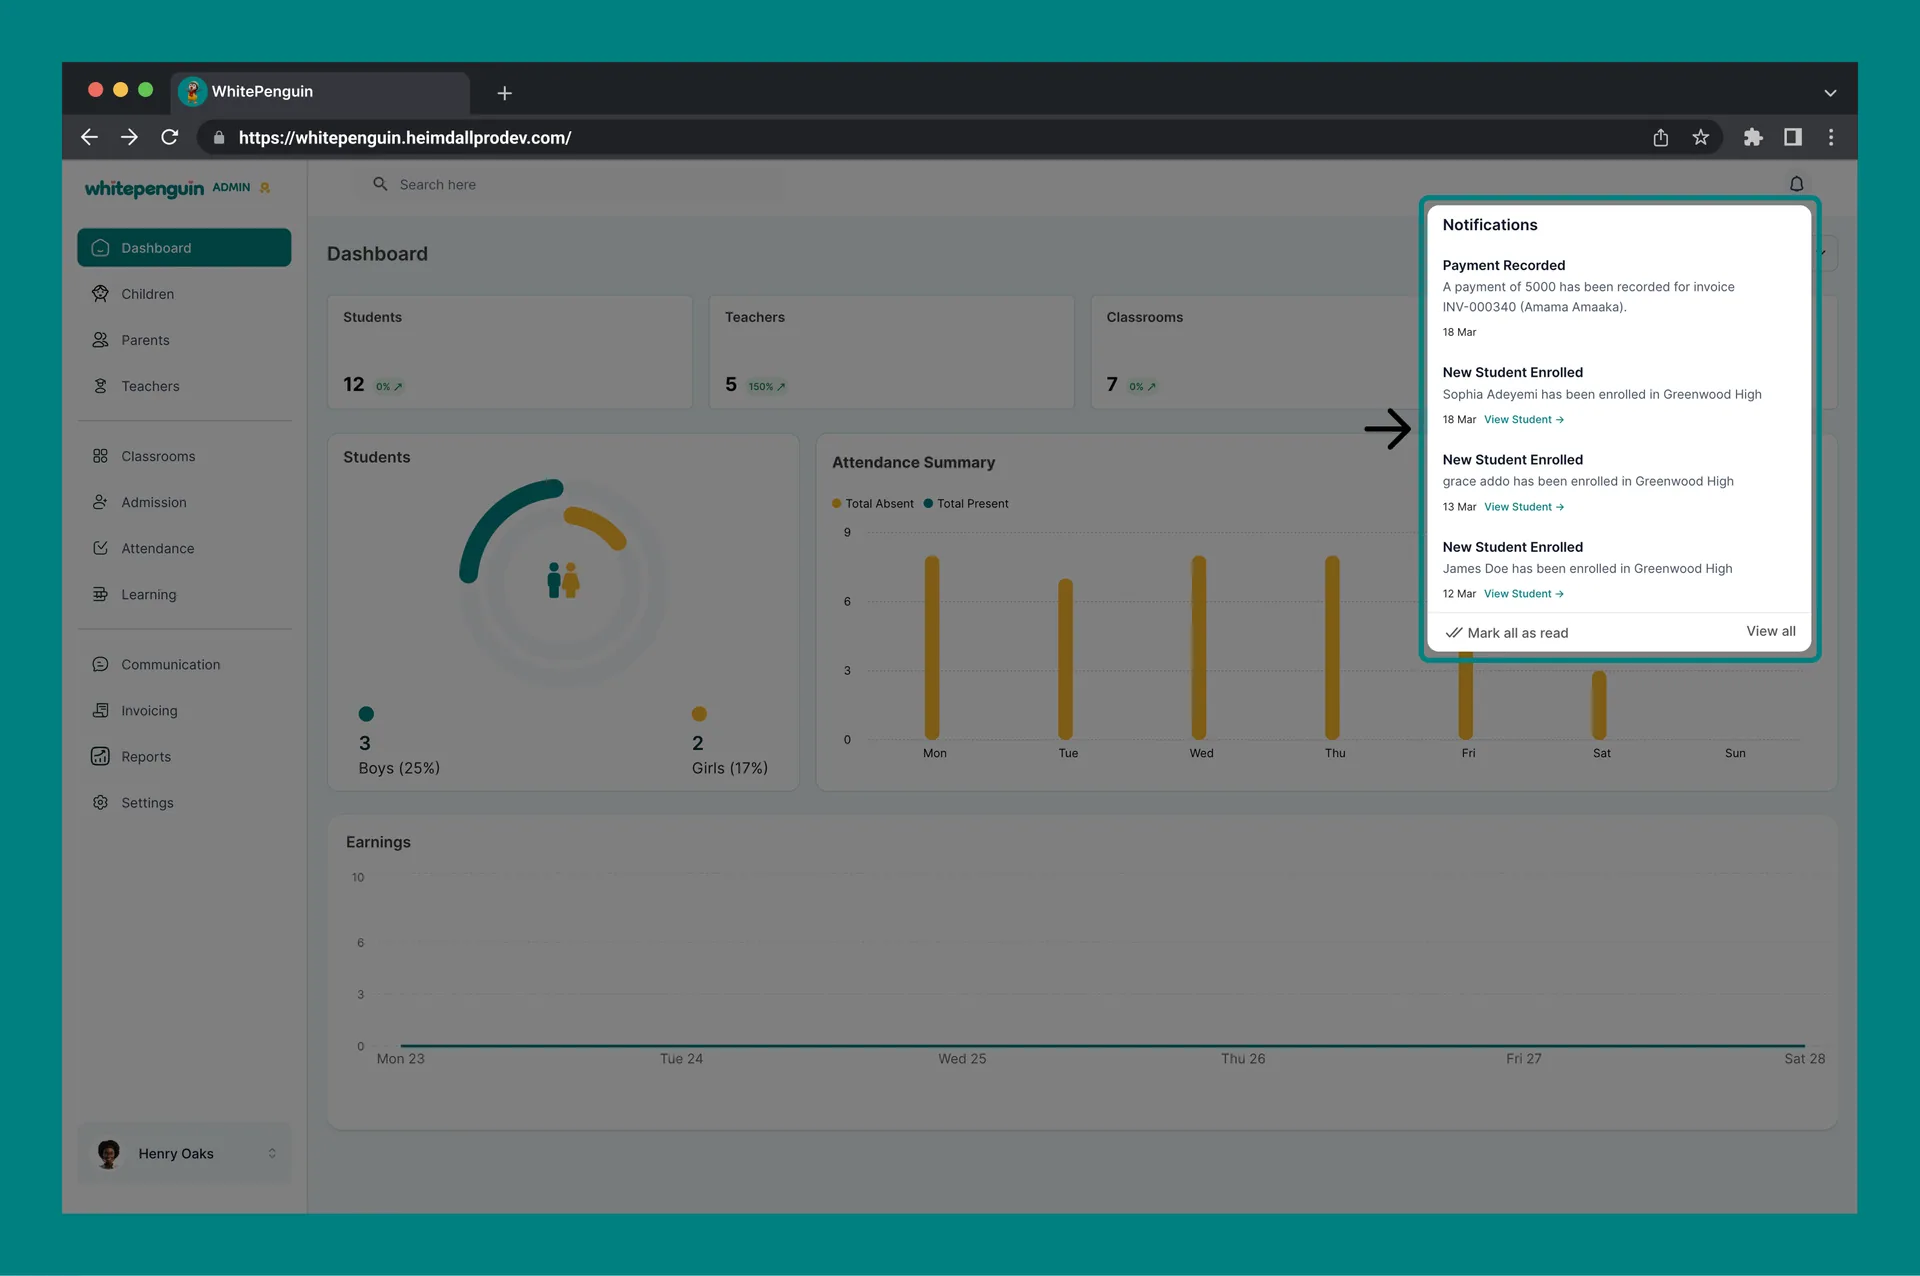
- The panel slides open on the right side of the screen, showing all recent notifications in reverse chronological order (newest first).
- To close the panel, click anywhere outside of it or click the bell icon again.
The red badge counter updates in real time. If a new notification arrives while you are logged in, the badge count will increase automatically without needing to refresh the page.
Types of Supported Notifications
WhitePenguin currently supports the following notification types in the Admin panel:
| Notification Type | What triggers it | What it shows |
|---|---|---|
| New Message | A parent or teacher sends you a message via the Communication section | Sender's name and a preview of the message content, with a timestamp |
| New Student Enrolled | A new child profile is added and enrolled in the school | The student's name and the school they were enrolled in, with a timestamp |
Additional notification types may be added in future updates as new features are released. This guide will be updated accordingly.
Reading & Managing Notifications
Notification Layout
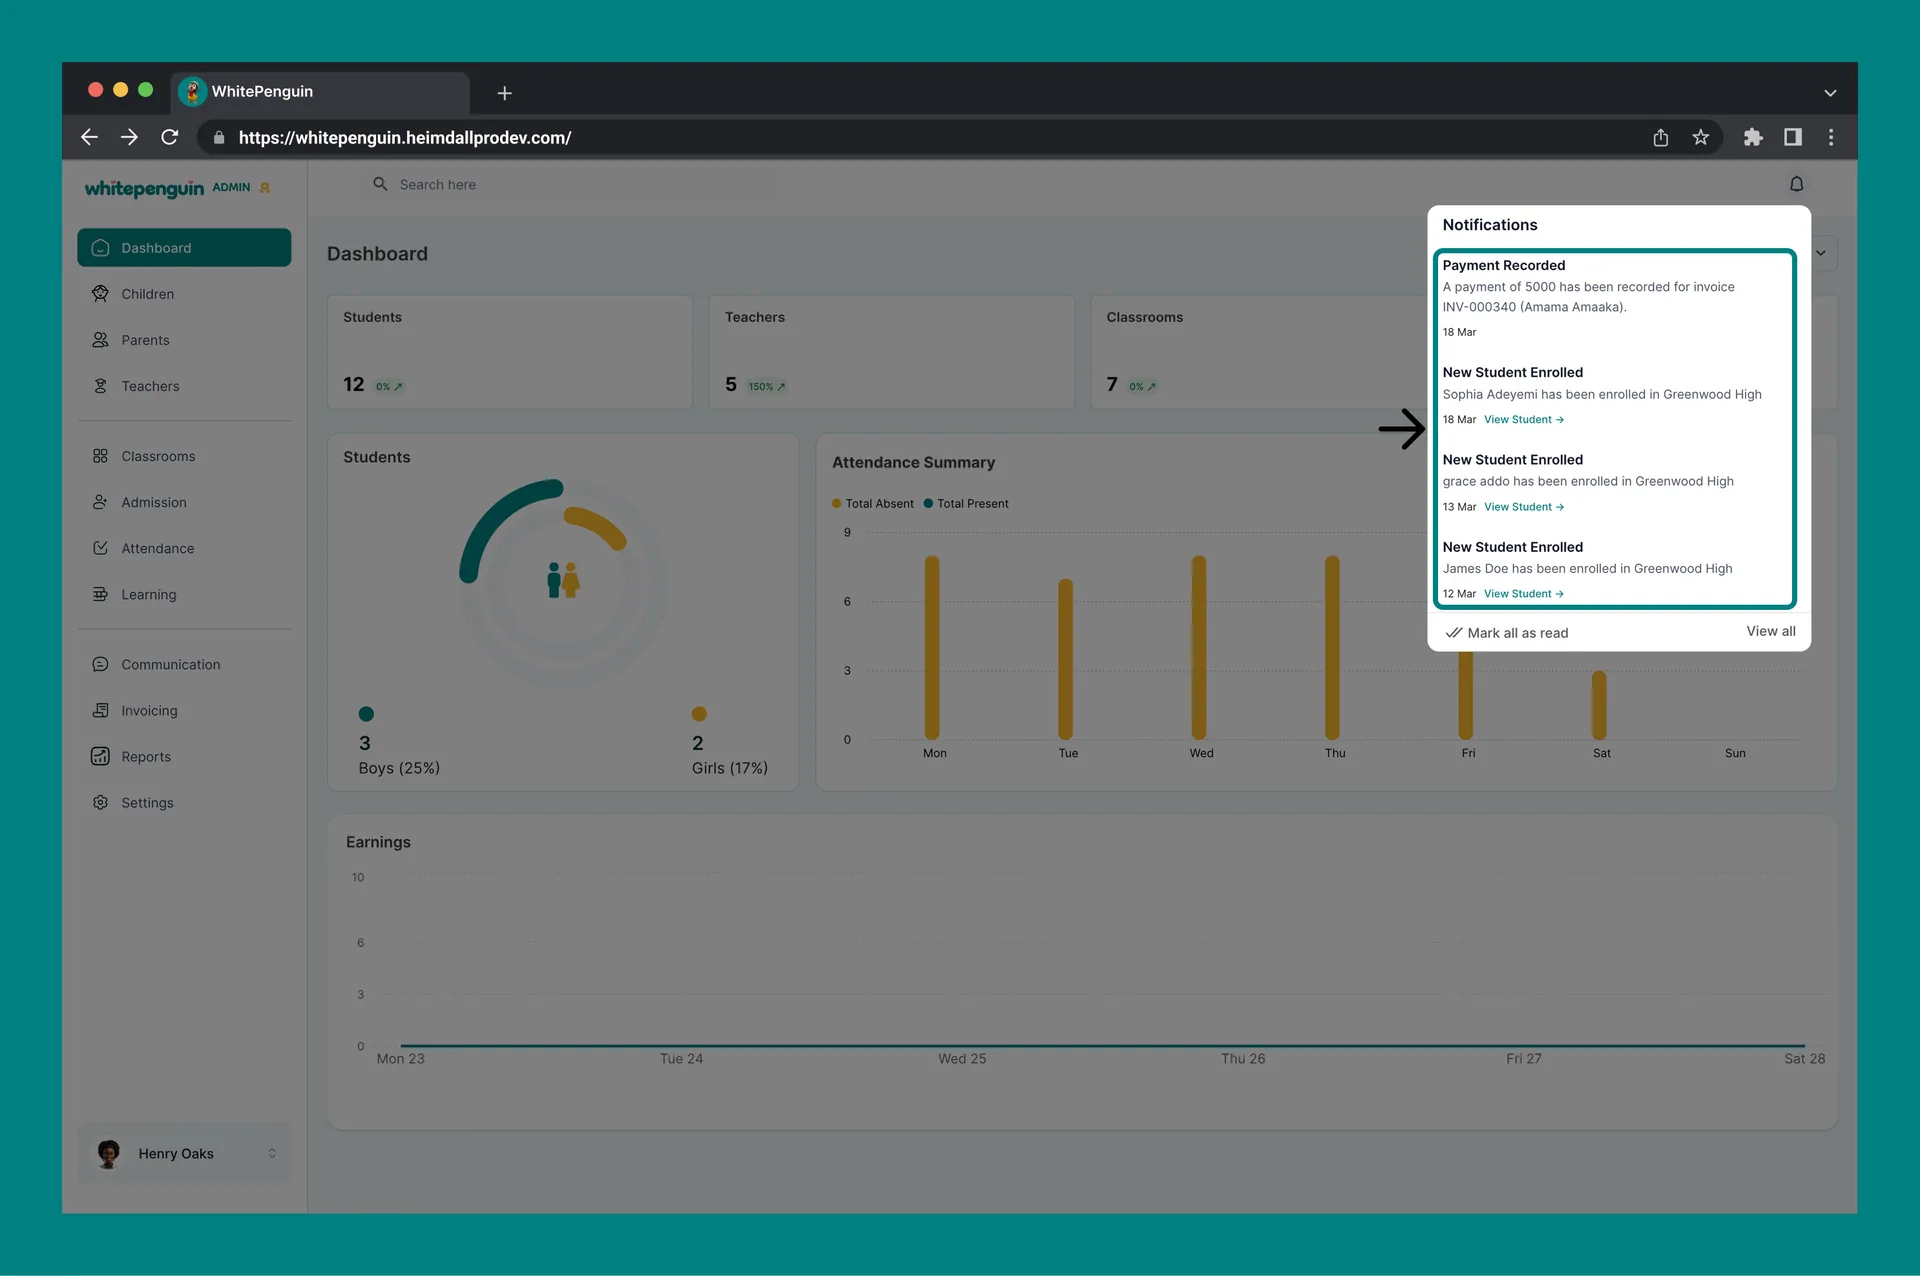
Each notification entry in the panel shows:
- Title — the notification type (e.g., New Message, New Student Enrolled)
- Details — a short description with the relevant name and context
- Timestamp — how long ago the notification was triggered (e.g., 20 hours ago, 2 days ago)
- Action link — some notifications include a clickable link (e.g., View Student →) to navigate directly to the related record
Marking Notifications as Read
At the bottom of the Notification panel you will find two options:
- Mark all as read — marks every notification in the panel as read in one click, clearing the badge counter
- View all — opens a full-page view of all past notifications, including older ones not visible in the panel preview
Tips for Using the Notification Panel
- Check the panel at the start of each day to catch any new enrollments or parent messages that came in overnight.
- Use the View Student → link inside enrollment notifications to jump straight to the new child's profile without searching manually.
- Use Mark all as read after reviewing notifications to keep your badge counter accurate and avoid confusion about new vs. old alerts.
- If the badge counter shows a number but you don't see new notifications in the panel, try refreshing the page — the panel syncs on load.
FAQs
The Notification Panel is accessed by clicking the bell icon 🔔 at the top right of the admin header. It is visible from every page in the admin panel, not just the Dashboard.
The red badge shows the number of unread notifications you currently have. It updates in real time as new notifications arrive. Once you mark notifications as read, the badge count will decrease or disappear.
Click the bell icon to open the panel, then click Mark all as read at the bottom of the panel. This will mark all visible notifications as read and clear the badge counter on the bell icon.
Yes. Click View all at the bottom of the Notification panel to open a full-page view of all past notifications, including ones that have scrolled out of the preview.
Click the notification to open the relevant message, or navigate to the Communication section from the left sidebar to find and reply to the message thread.
Inside the notification, click the View Student → link to go directly to the new child's profile. Alternatively, navigate to the Children section from the sidebar and search by the student's name.
Notification preferences can be managed from Settings → Customize Notifications. From there you can control which types of alerts you receive in the panel.
Last updated on
Using Quick Actions
Discover how to use Quick Actions to jump directly to common tasks — like viewing children, checking attendance, browsing curriculum, or posting announcements — in just one click.
Setup Your School — Admin
Set up your school in WhitePenguin: create classrooms, add and invite teachers, add children profiles and add or link parents.